If you’ve been following my A Day of FLO Living posts, then you’ll know I enjoy eating food that is nourishing for me and my cycle. Now, I’m not going to sit here and tell you that chocolate-topped peanut butter crisp bars are “health food” but I’ll say they come close. During my ovulatory phase I was craving sweets LIKE CRAZY—specifically chocolate. Lucky for me, chocolate is on the list of WomanCode approved foods for ovulatory phase. Yippee!
So, I went into the kitchen, with a bit of guidance from Angela Liddons’ Oh She Glows Everyday Cookbook, and got experimenting. I used Angela’s recipe for Nut-Free Dream Bars as a base but I tinkered with the sweetener, salt, and, of course, the nut butter. For me, what makes these bars awesome is the pairing of protein and fat, both of which lessen the sugar punch and make these bars satiating. Of course, macronutrients aside, the chocolate-peanut butter combination is also a huge appeal!
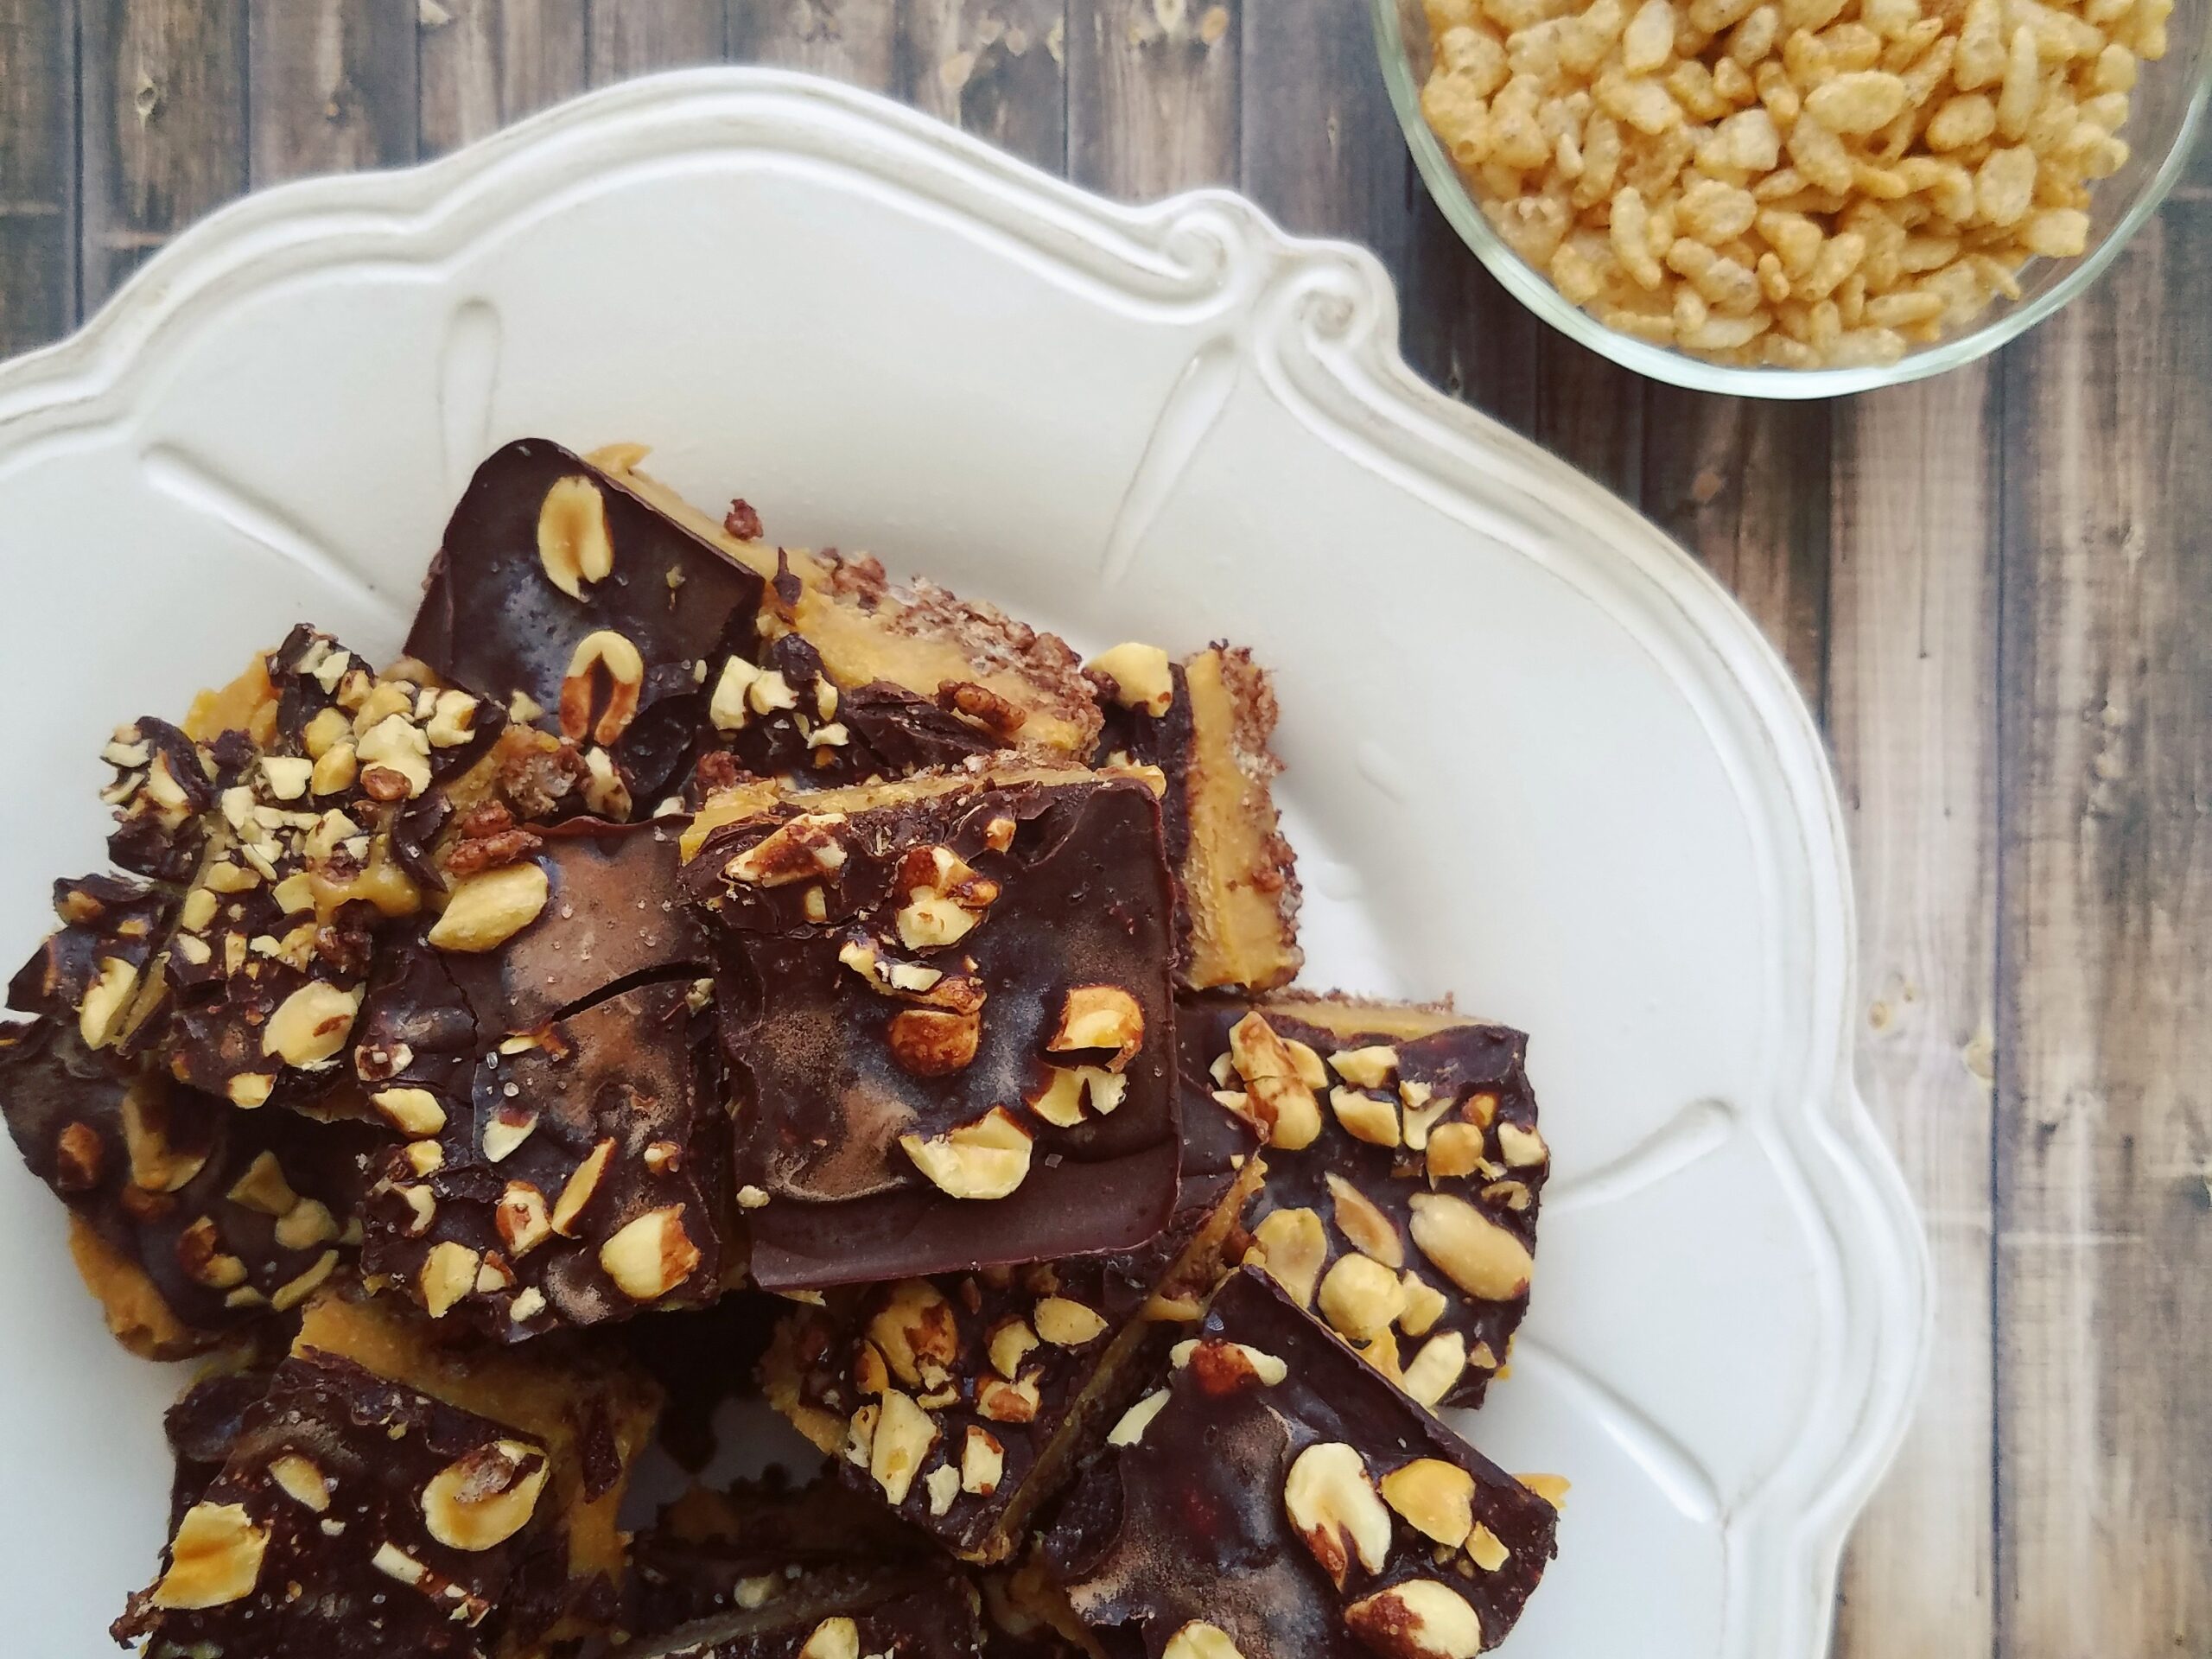
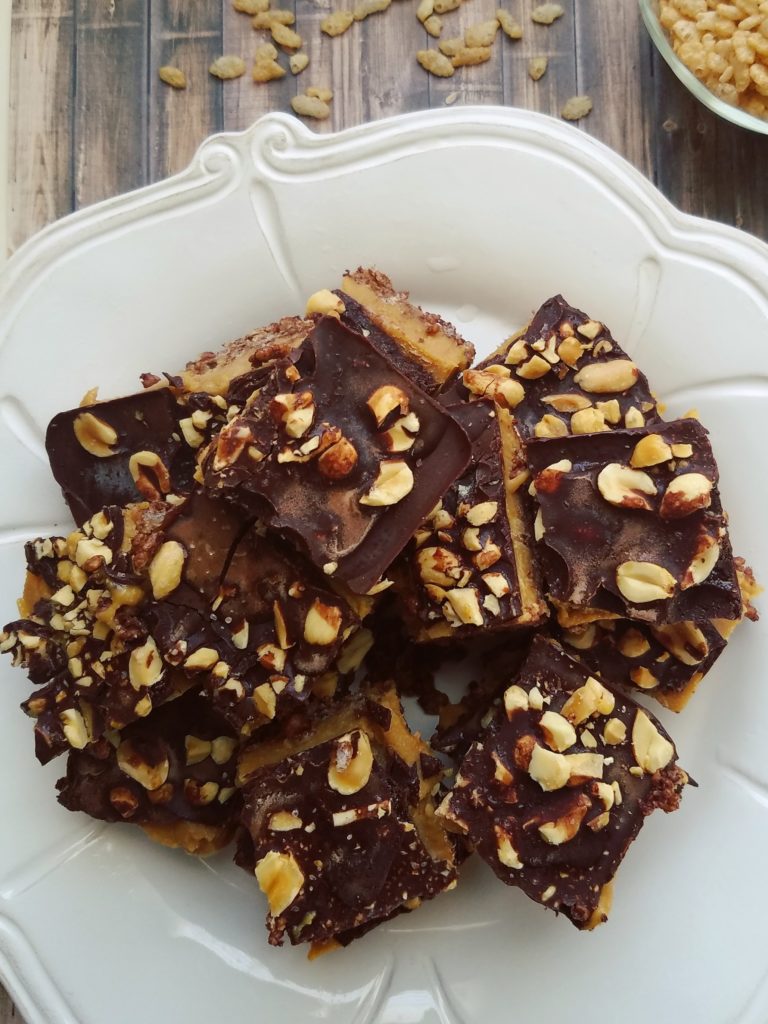
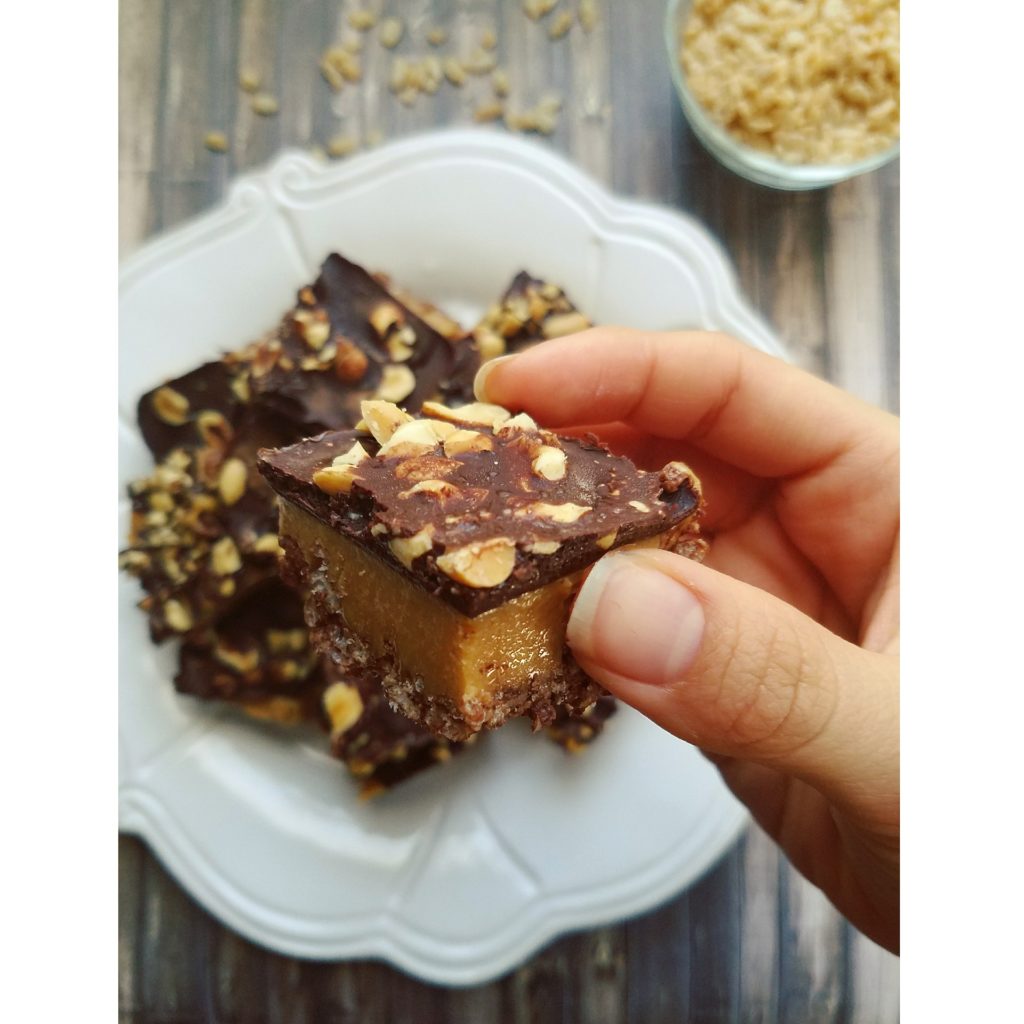
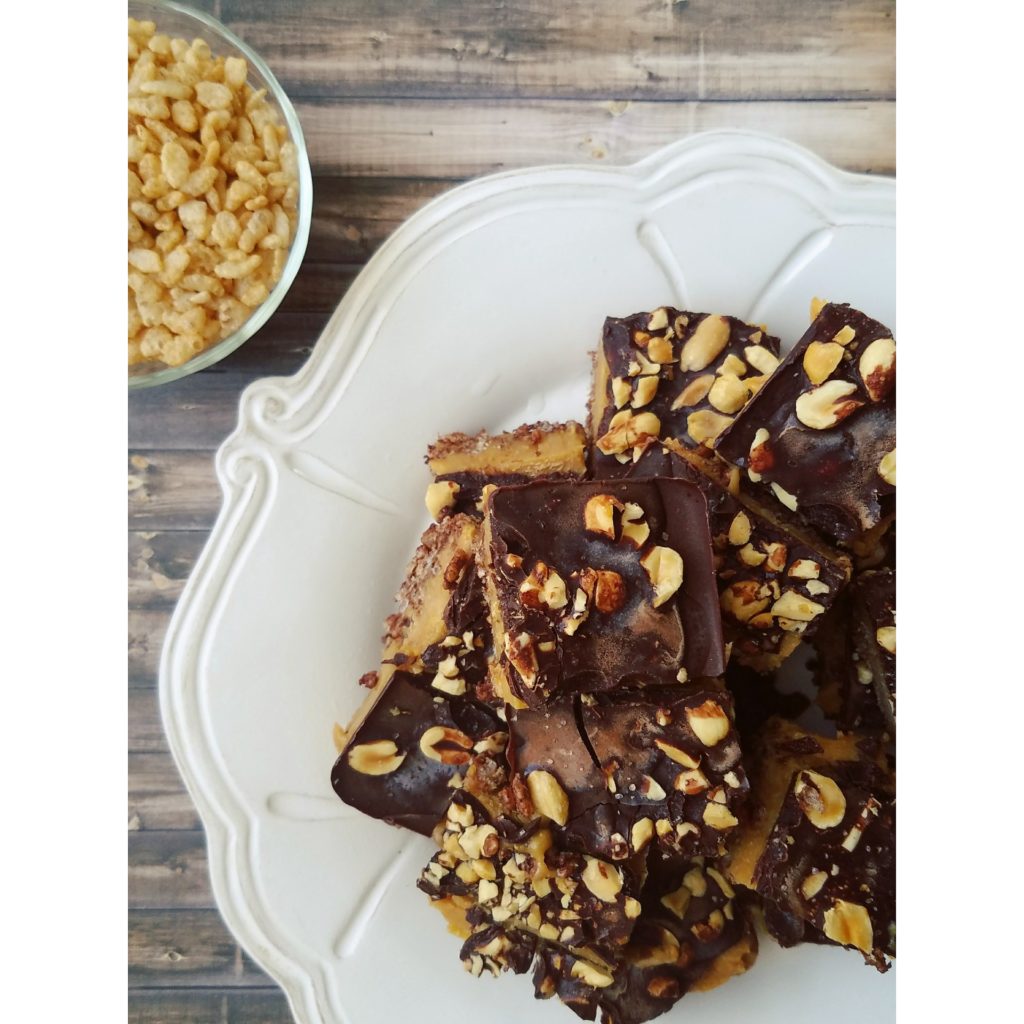
They require a small amount of prep but NO BAKING. This is a freezer treat at its finest. Plus, once made, they will last forever in the freezer! Just let them defrost for a few minutes before biting into them. If you can exercise restraint, let them defrost for five to ten minutes and the peanut butter filling gets extra creamy and oozy. In fact, the filling contrasts so nicely in that state with the crisp crust and solid chocolate topping. Together, the three layers make for one delightfully decadent and delicious dessert or snack.
Let me know if you give these bars a try! Just writing this post makes me crave one so I’ll be at my freezer if you need me! 👋
Creamy Peanut Butter Chocolate Crisp Bars
Recipe Type: Dessert
Cuisine: American
Author: Melanie
Prep time:
Cook time:
Total time:
Serves: 18-20 bars
These rich and creamy no-bake bars, adapted from Angela Liddon’s recipe, make for a satisfying dessert or snack when those chocolate peanut butter cravings kick in! The combination of crispiness from the crust and creaminess from the bars just can’t be beat!
Ingredients
Crust Ingredients:
1 ½ tbsp melted virgin coconut oil
1 ½ cups Erewhon Organic Cinnamon Brown Rice Cereal
2 tbsp cacao powder or cocoa powder
2 tbsp maple syrup
a pinch of salt
Filling Ingredients:
1 cup natural peanut butter
¼ cup maple syrup
¼ cup melted virgin coconut oil
¼ to ½ tsp salt, depending on the saltiness of the peanut butter
1 tsp vanilla extract
Chocolate Topping Ingredients:
1/3 cup melted virgin coconut oil
1/3 cup cacao or cocoa powder
1 tbsp maple syrup
1/3 cup unsalted dry-roasted peanuts, chopped, for topping
Sea salt, for topping, optional
Instructions
Line a large loaf tin (see notes) with parchment paper and lightly grease with coconut oil.
In a bowl, combine the first 5 ingredients for the crust. With a rubber spatula, mash up the cereal until it looks crumby and thoroughly coated. Then, press the crust down into the bottom of the loaf tin. Place it in the freezer while you prepare the filling.
In the same bowl, rinsed and wiped clean, combine the next five ingredients. As a precaution, make sure the ingredients for the filling are all room temperature. If the maple syrup or peanut butter are cold then that will make the coconut oil seize up. The mixture should be smooth. Adjust salt to taste.
Remove the crust from the freezer and pour the filling on top. Gently swivel the pan so that the filling covers the crust completely and so that the top is flat and even. Now, the filling will set in the freezer for an hour before the final topping.
After waiting the appropriate amount of time for the filling to solidify, begin making the chocolate topping. Whisk together melted coconut oil, cacao powder, and maple syrup until no clumps remain. Chop the peanuts and keep them at the ready.
Remove the loaf tin from the freezer and pour the chocolate over the filling. Be warned: it freezes almost instantaneously! While the chocolate is still wet, throw on the peanuts and a sprinkle of sea salt. The chocolate layer will soon solidify from the cold from the loaf tin.
You may then remove the bars, using the parchment paper to lift them out. Move them to a cutting board and slowly cut into 18-20 squares. If the bars seem melty in any way, do put them back into the freezer for 10 minutes or so. They may fall apart if you try cutting them while soft.
The peanut butter chocolate dream bars are best stored in the freezer. Pull one out when you want to enjoy a bar and let it sit at room temperature for up to 3-5 minutes. They will soften to an easier-to-bite state. Wait a little longer and the peanut butter filling gets extra oozy and delicious!
Notes
My baking tin is 9.5 x 5 inches though Angela’s recipe uses a 10 x 6 inch pan. I believe that a standard 9 x 5 loaf tin could work, too but your bars will just be a bit thicker.[br]Cooking time also reflects freezing time in this recipe.
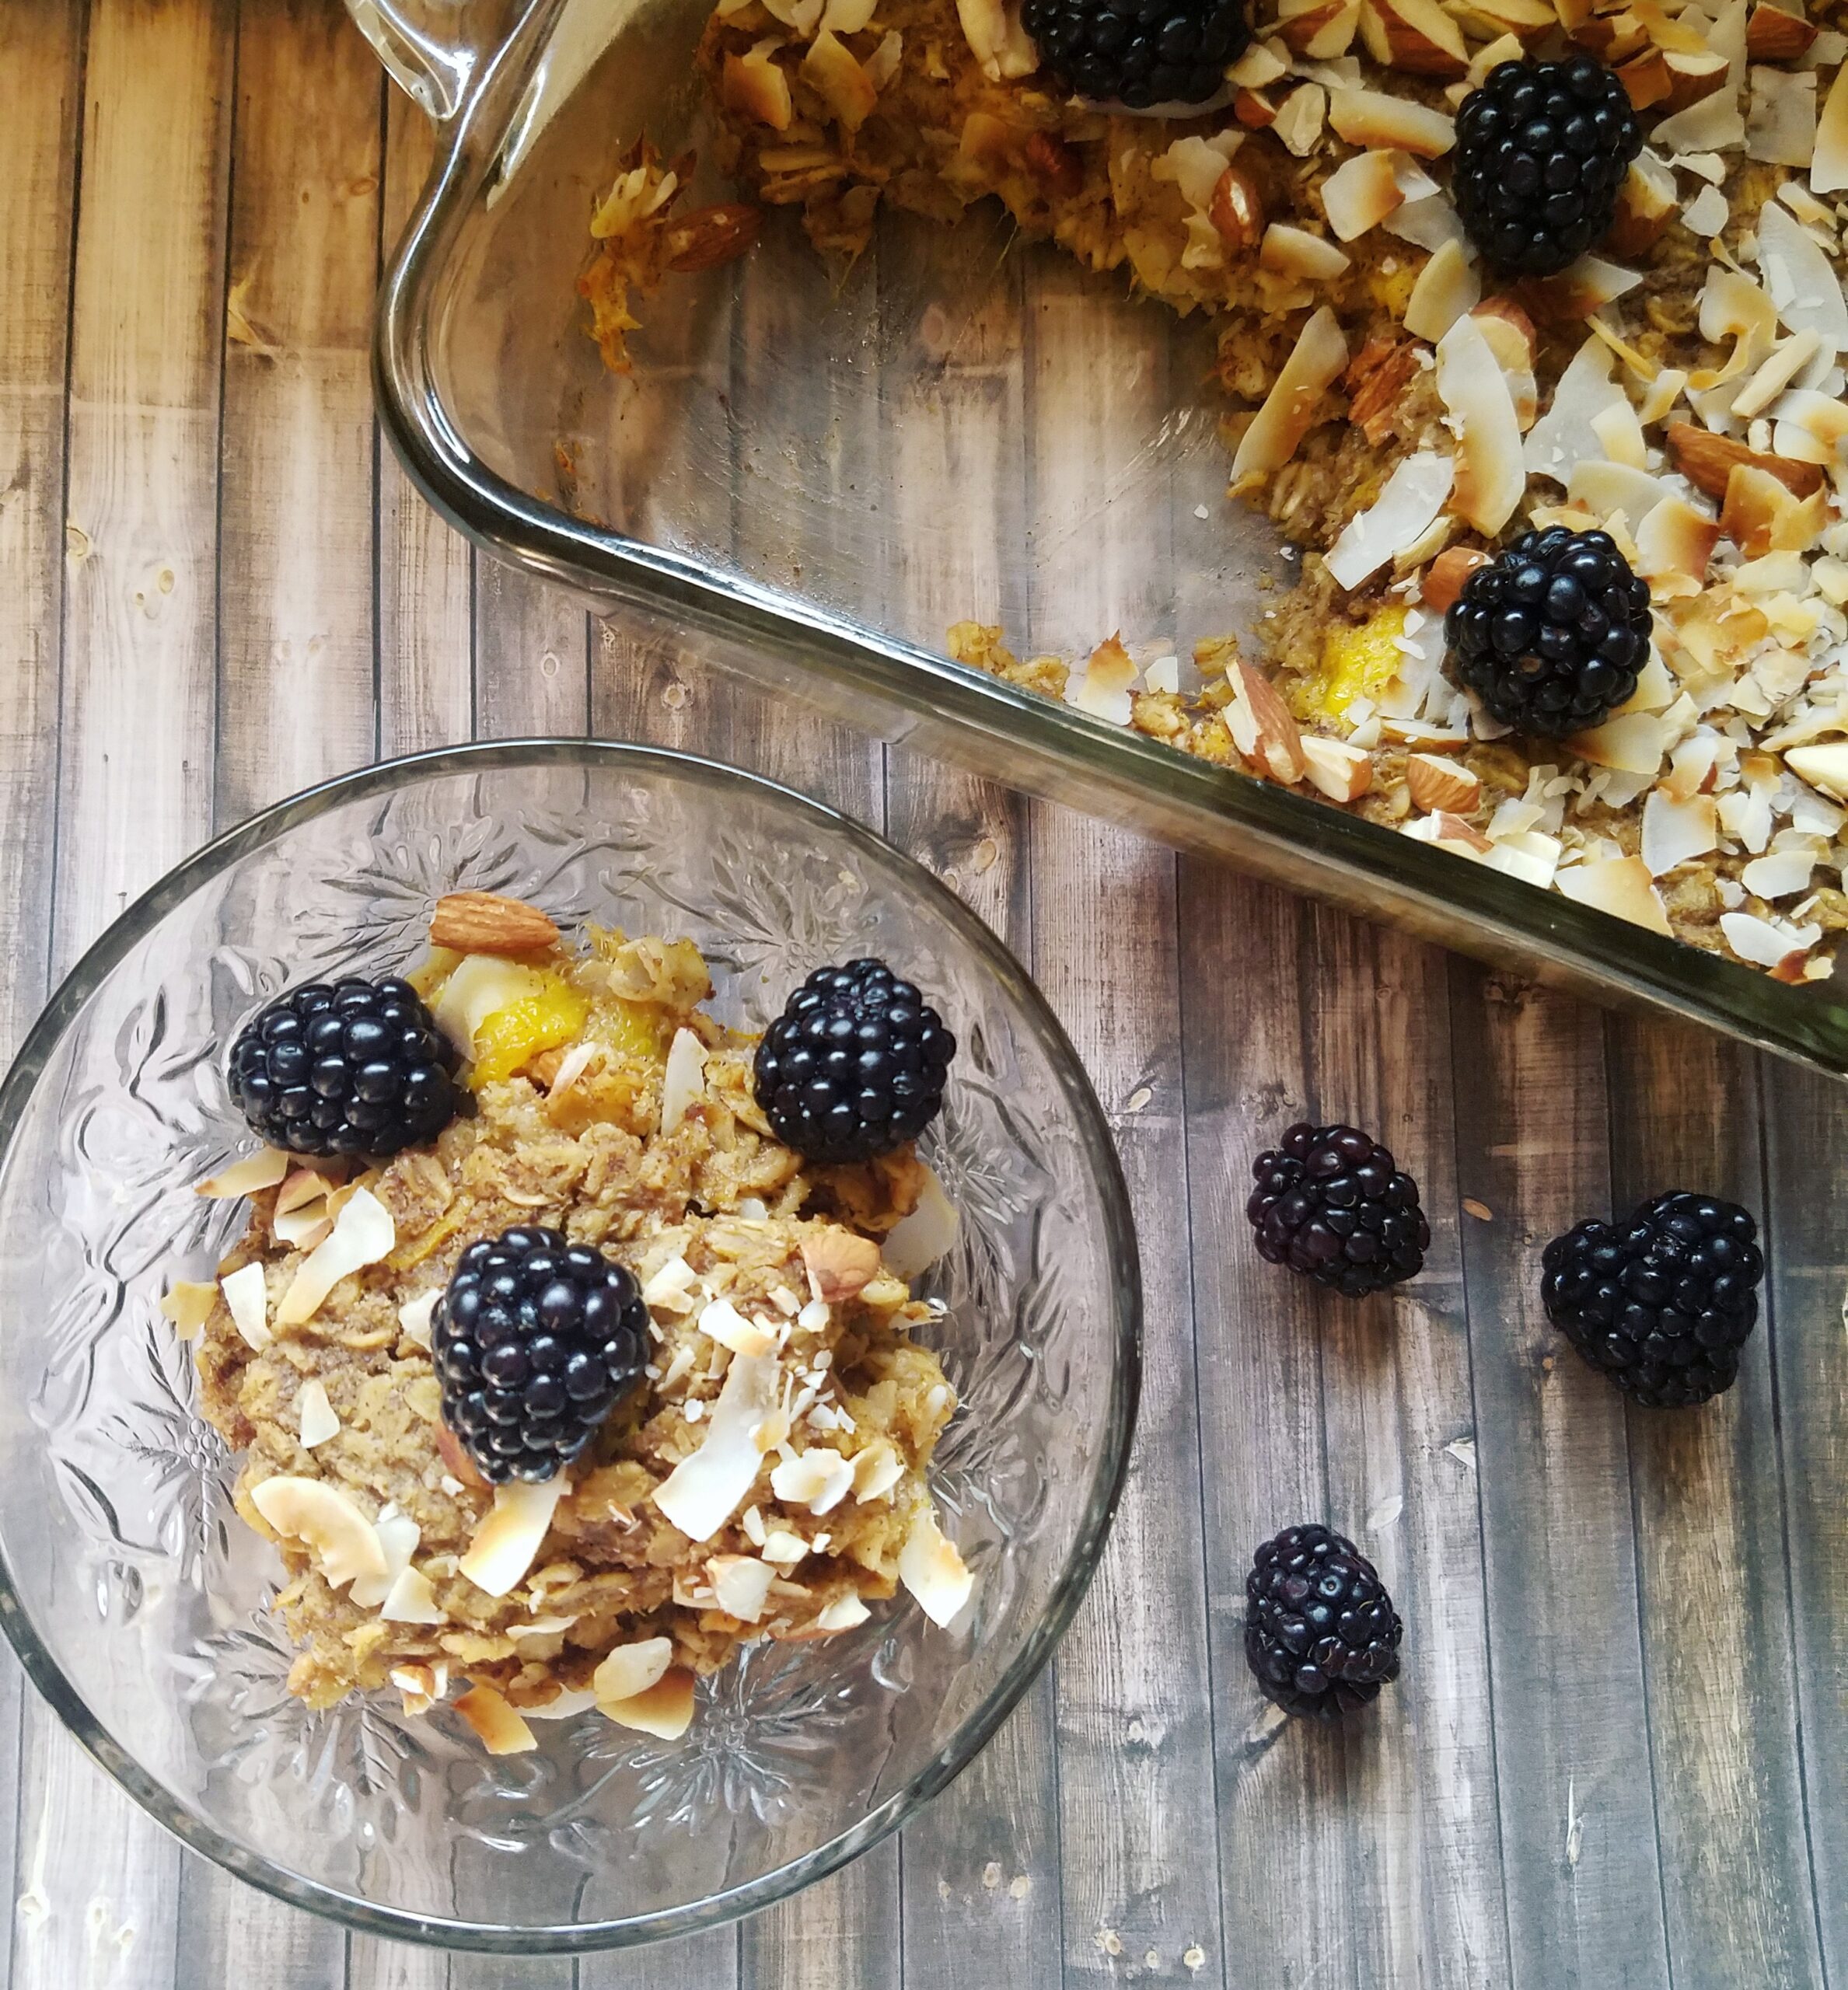
You all know I enjoy cooking, but I can also appreciate the savior that is meal-prepping. It makes a difference to batch-cook entrees or staples items to have easy to assemble meals throughout the week. I thought lunch, dinner, and snacks were the only thing worth prepping until today. This past weekend I whipped up a Mango Blackberry Coconut Oatmeal Bake for my family breakfast and got to ride the wave of leftovers for two days. And let me tell ya…
Oatmeal bakes are highly underrated.
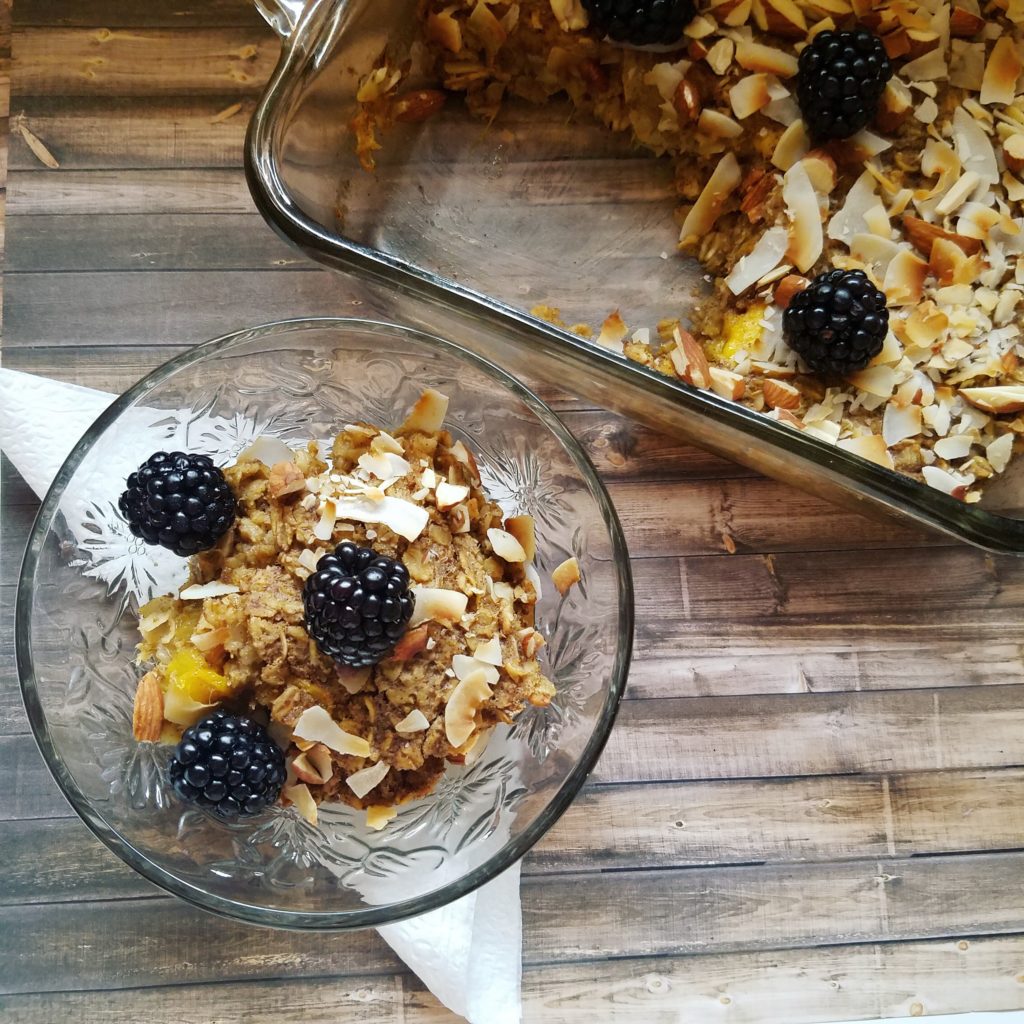
Not only is the one-dish meal convenient for feeding a crowd but it keeps really well, too! It tastes amazing on Day 1 but then something magical happens when the leftovers go into your fridge. The texture gets better and the flavors meld together even more (similar to the way banana bread gets better the day after you bake it)! Leftovers keep well for up to 5 days in the fridge. You can eat it cold, if you prefer, but I like to reheat a portion in the microwave for a minute, then add it to a cast-iron skillet greased with coconut oil so the bottom gets crispy. 😉 Oooh yeaaah.
Plus, if I haven’t already convinced you, baked oatmeal is versatile and a great way to use up lots of fruit. My inspiration for baked oatmeal actually comes as an adaptation of a Love and Lemons recipe for Blueberry Coconut Baked Oatmeal. Her recipe is splendid but this tropical version with mango and plump juicy blackberries is so perfect for summer! 😀
This bake can be assembled ahead of time or simply the day you want to serve it.
Also, don’t be put off by the long list of ingredients. You likely have most of them on hand already and, if not, sub in what you do have! I like making the oatmeal mixture the night before so that way all I need to do is slip it into the oven in the morning. EASY. The oatmeal could also be assembled and baked straight away if that’s more your thing. My instructions are for the latter option but do what works for you.
If you like oatmeal, also be sure to check out my single-serving
Who’s making this for weekend brunch? 🙋 Drop me a comment or tag me on Instagram if you do!
Mango Blackberry Coconut Baked Oatmeal
Recipe Type: Breakfast, Brunch
Cuisine: American
Author: Melanie
Prep time:
Cook time:
Total time:
Serves: 6 servings
Ingredients
2 tablespoons ground flaxseed + 6 tablespoons warm water
¾ cup water or almond milk
2 tablespoons melted coconut oil
¼ cup brown sugar or coconut sugar
1 teaspoon baking powder
1 teaspoon cinnamon
¾ teaspoon sea salt
¾ tsp vanilla extract
½ tsp coconut extract (optional)
2 cups whole rolled oats
½ cup chopped or slivered almonds (save half for topping)
⅔ cup coconut flakes (save half for topping)
1 cup packed diced mango (from about 2 large mangoes)
½ – 1 cup blackberries (mixed in or as topping)
Instructions
Preheat the oven to 350°F and grease an 8×8-inch (or 9×11) baking dish with coconut oil or use cooking spray.
In a small bowl, combine the flaxseed and warm water and set aside to thicken for about 5 minutes.
Then, combine the water OR almond milk, coconut oil, and brown sugar and whisk to combine.
Next, add in the baking powder, cinnamon, salt, and extracts. Stir in the rolled oats and HALF of the almonds and coconut flakes.
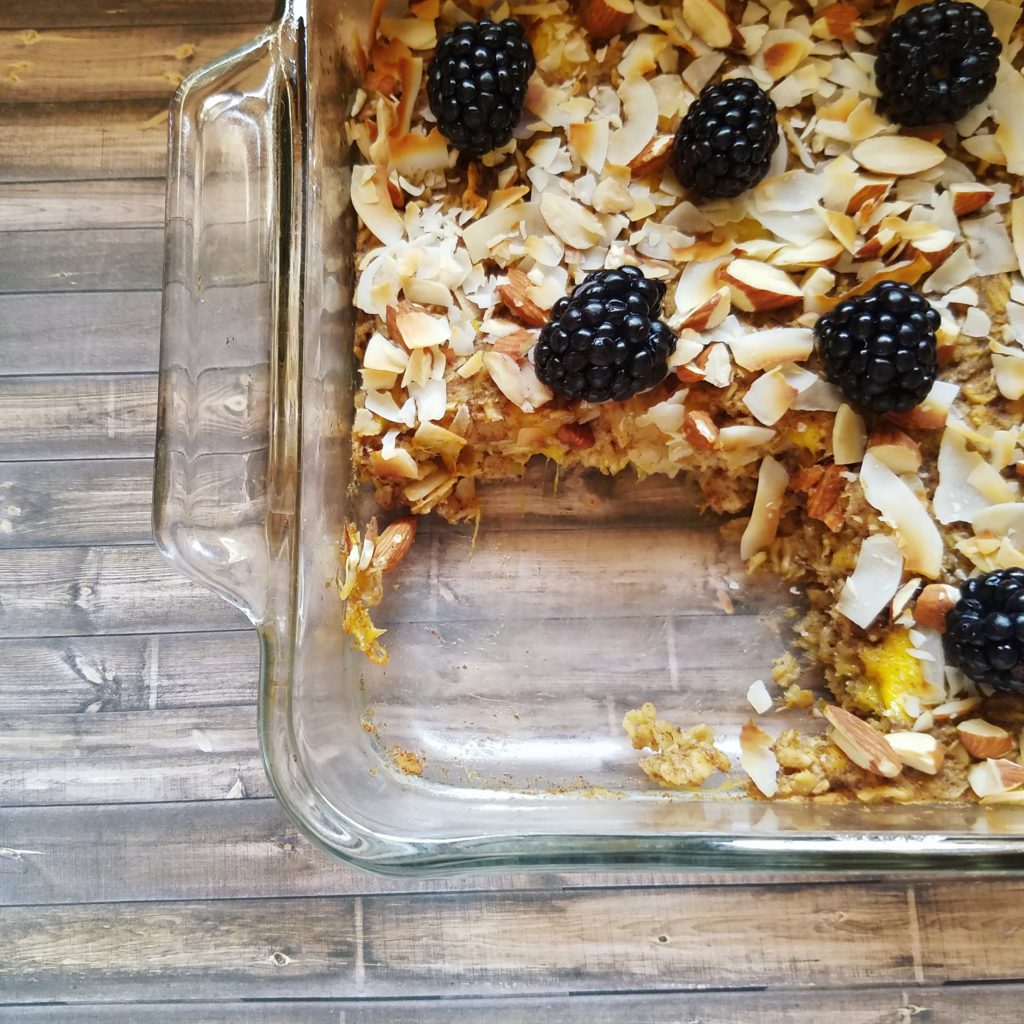
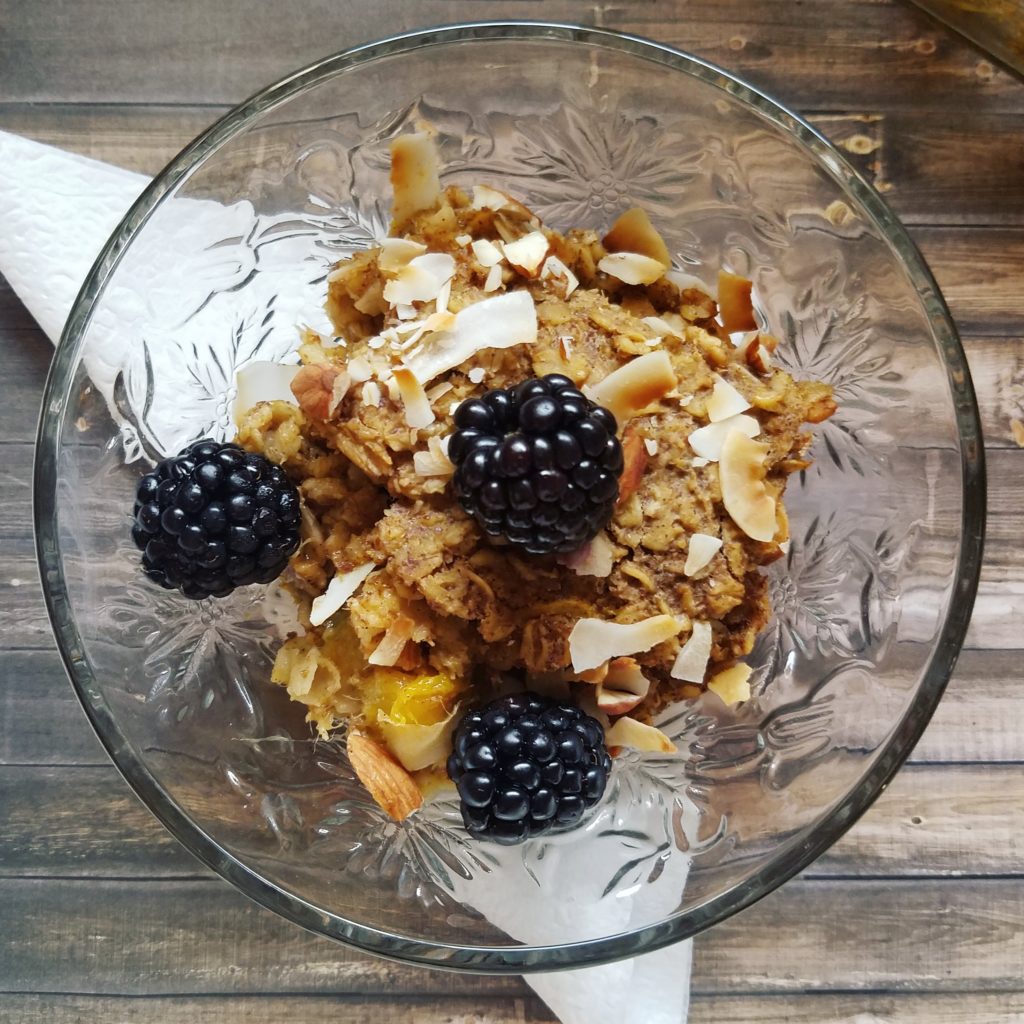
Mix in the mango (and blackberries, if desired. I like to serve them fresh, as shown in the photo) before pouring the mixture into a baking dish. Cover the top with reserved coconut flakes and chopped almonds, lightly pressing the toppings into the oatmeal.
Bake for 40-50 minutes or until the top is crisp and golden. If the coconut flakes have browned then definitely remove the bake from the oven.
Lastly, let the oatmeal cool for 10 minutes before slicing and serving. Top with as many fresh blackberries as your heart desires!
Notes
You can substitute whatever fruit you like. I find that 1-1 ½ cups of fruit is ideal. The bake is only lightly sweetened but you can add in an extra ¼ cup of either sugar if your fruit isn’t very sweet or if you just prefer sweeter food.
First and foremost, thank you to Attune Foods for making this post possible!
If you’ve been hanging around here for any short amount of time, you know that I’m a big fan of sweet treats and breakfast foods. What may come as a surprise is how much savory food appeals to me, too! As a matter of fact, I love spiced dishes like curries, southwestern fajitas, or my Tex-Mex quinoa taco “meat”. As for main dishes, I’ve been meaning to expand my blog’s recipe archives with some yummy veggie patties or meatballs for a lunch/dinner entree.
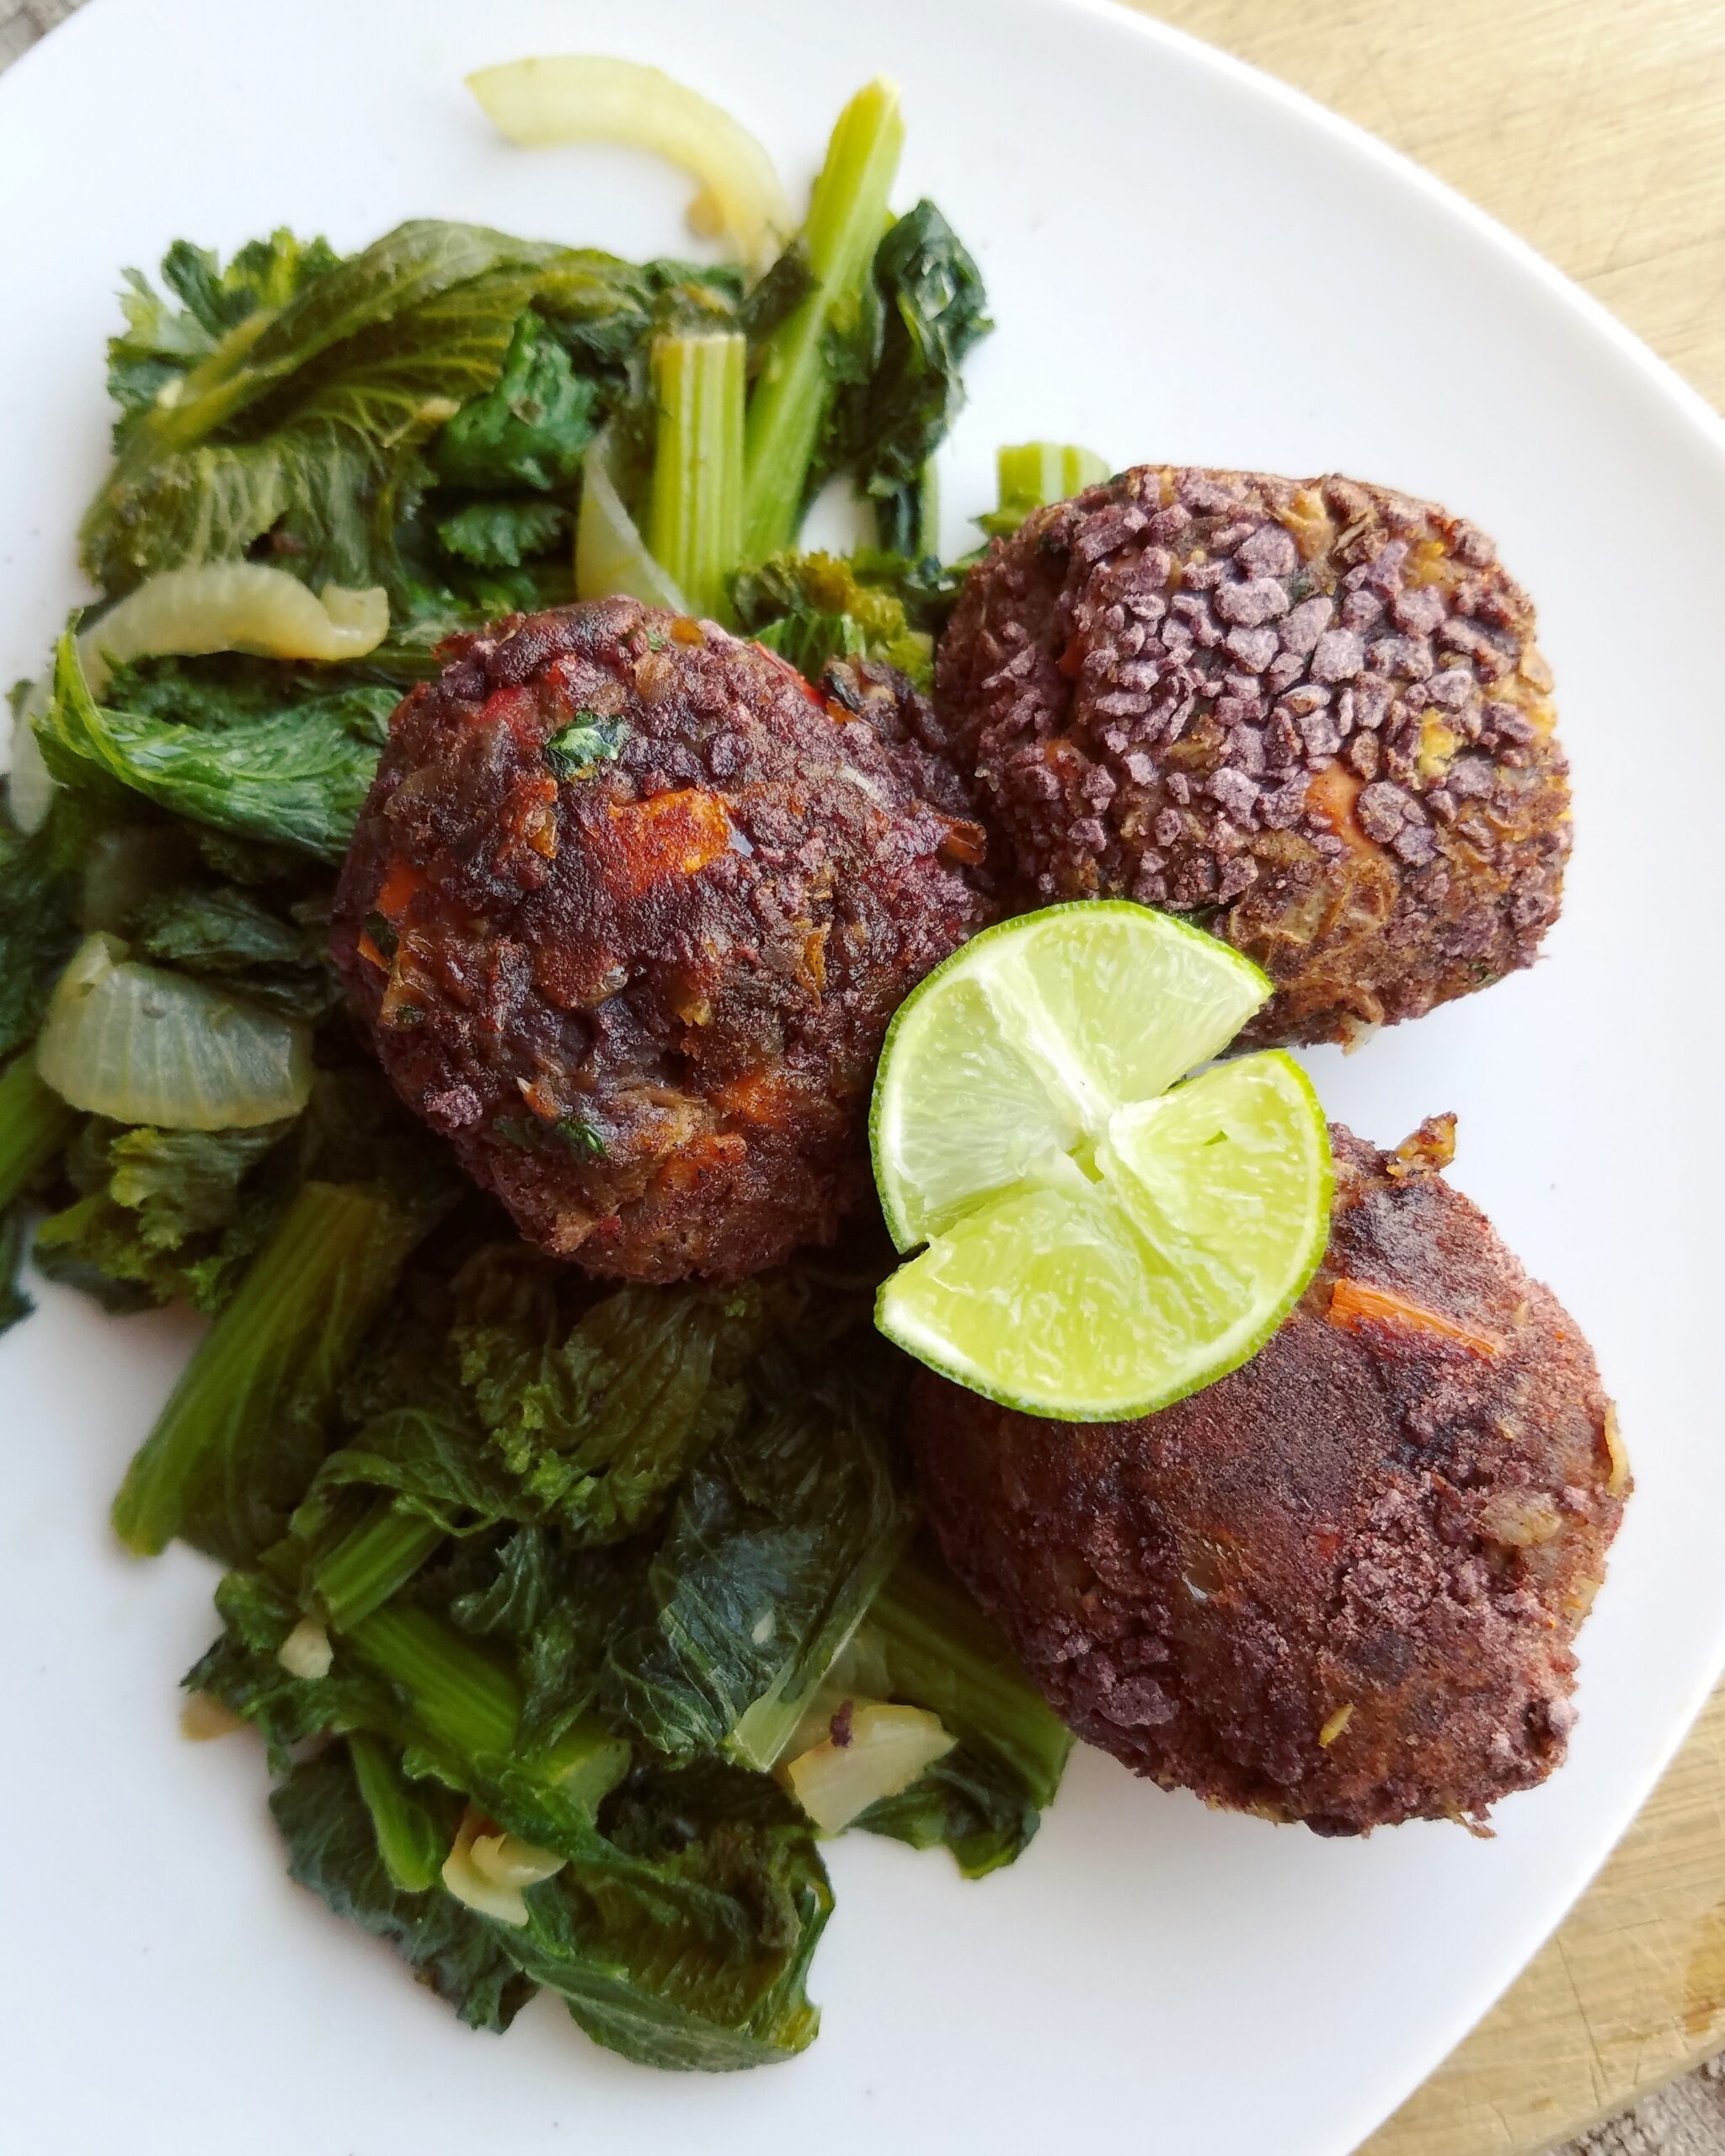
Enter: Sweet and Smoky Meatballs
I’m all about making recipes as easy as possible so these plant-based meatballs come together in little time and without any wild ingredients. The only thing you might need to pick up is a box of Purple Corn Flakes Peace Cereal. When Attune Foods sent over a few products for me to try, I knew the pretty purple corn flakes would be fun to add texture to some vegetarian patties.
I’m not too big on a bowl for breakfast but cereals can be such a versatile ingredient for cooking! The purple corn flakes are what provides the sweetness in the “sweet and smoky” element of my meatballs. These non-GMO corn flakes are also crispier than traditional corn flakes so that contributes a unique texture and flavor that you won’t want to miss! As a bonus, I love that the cereal is made from organic corn flour and organic brown rice flour so the meatballs are gluten free!
Sometimes veggie patties or meatballs can be a miss with my meat-eating family but I received pretty great reviews on these! Looks like I’ll be cooking them up again soon. 😉 Let me know if you try them out!
Sweet and Smoky “Meatballs”
Recipe Type: Main
Cuisine: Vegetarian, Vegan
Author: Melanie
Prep time:
Cook time:
Total time:
Serves: 10-12 meatballs
These plant-based meatballs come together easily, in little time, and without any wild ingredients.
Ingredients
Olive oil, for cooking
½ cup white onion, chopped
½ cup carrot, diced
1 clove of garlic, chopped or minced
Salt and pepper
1 ½ cups lentils or white beans, well-drained*
½ tsp cumin
1 tsp chili powder
½ tsp smoked paprika + ½ tsp for coating
2 tbsp fresh cilantro, chopped
1/3 cup packed chopped tomato (about 1 small roma)
1 cup Purple Corn Flakes Peace Cereal + ¾ cup for coating
Lime juice, optional for serving
Instructions
In a cast-iron skillet, on medium heat, warm olive oil. Add sauté the onion, carrot, and garlic until soft. Then, remove from heat.
Using a food processor, grind 1 cup of the purple corn cereal until a fine meal is achieved.
In a bowl, mash the drained beans or lentils and add spices. The texture should be mashed and chunky but not pureed. Add in the skillet mixture, along with the cilantro, tomato, and ground cereal. The mixture should look thick and slightly on the dry side.
To make the coating, add the remaining ¾ cup of the cereal, along with ½ tsp of smoked paprika, to the food processor. Process until a choppy meal is achieved. Then, transfer to a zip-top baggie.
At this point, cover the bowl of the meatball mixture and store in the fridge for later or form into 10-12 balls for immediate use.
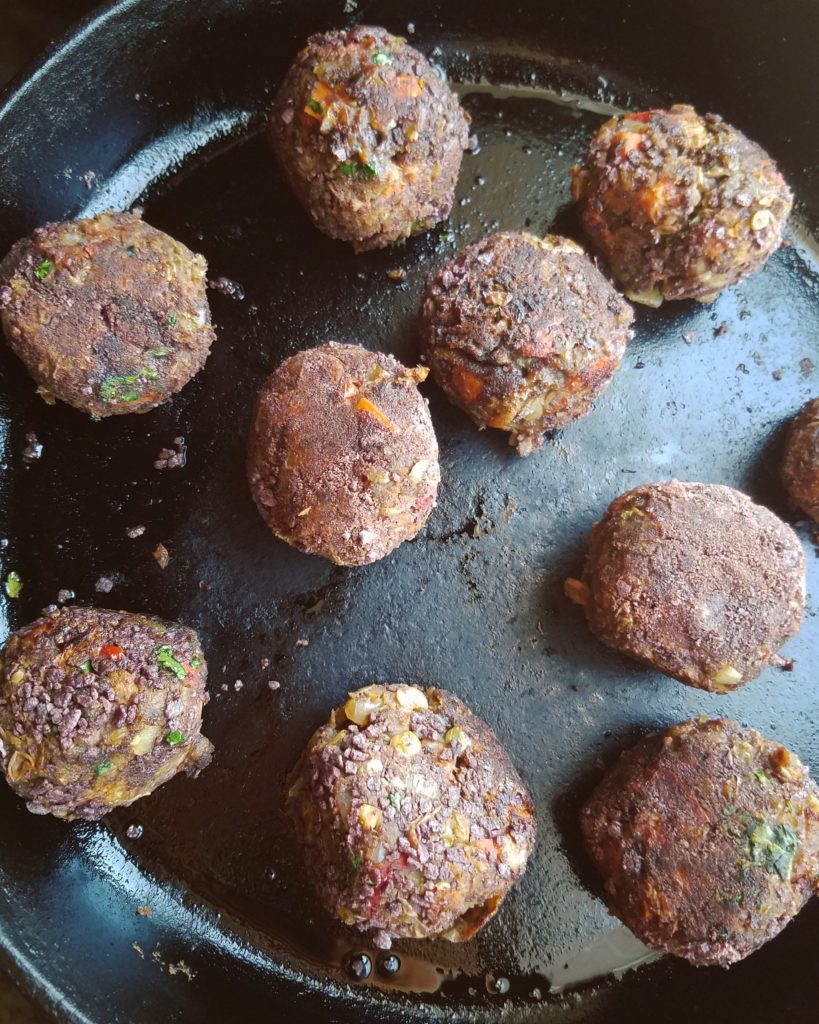
When ready to cook, heat up a few tablespoons of olive oil in a cast-iron skillet. Add one meatball to the baggie with the cereal coating and shake. Add the cereal-coated meatball to the skillet. Repeat with remaining meatballs. With the pan on medium heat, continue rotating the meatballs until they are browned all over.
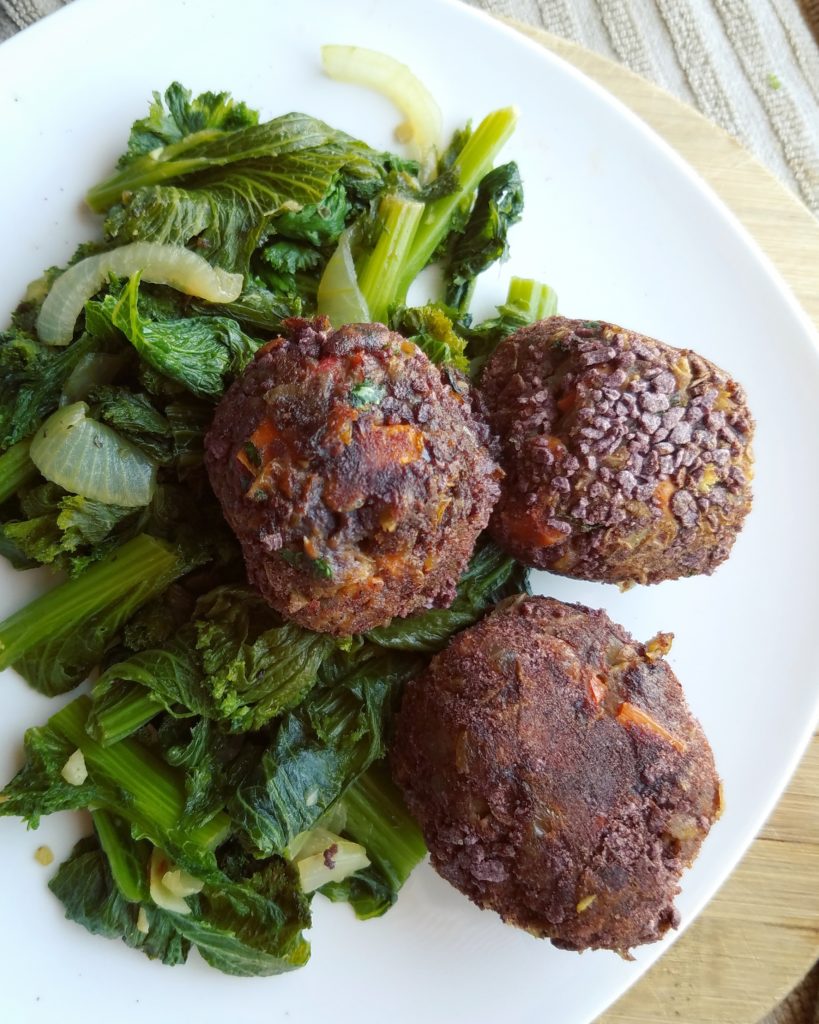
Serve warm with a squeeze of lime. They pair nicely with a salad or sautéed greens. Cauliflower mashed potatoes or roasted veggies would also be delicious.
Notes
*I tried two different versions of this recipe using white beans and then lentils. The white bean version seemed to allow a slightly more prominent smoky flavor but the lentil version is excellent, too. I suppose you could substitute other beans like black beans, though I haven’t tested that myself.
3.5.3226
Thank you to Attune Foods for sending me Peace Cereal and allowing me to showcase a recipe with their purple corn flakes. See their store locator to find Peace Cereal near you.
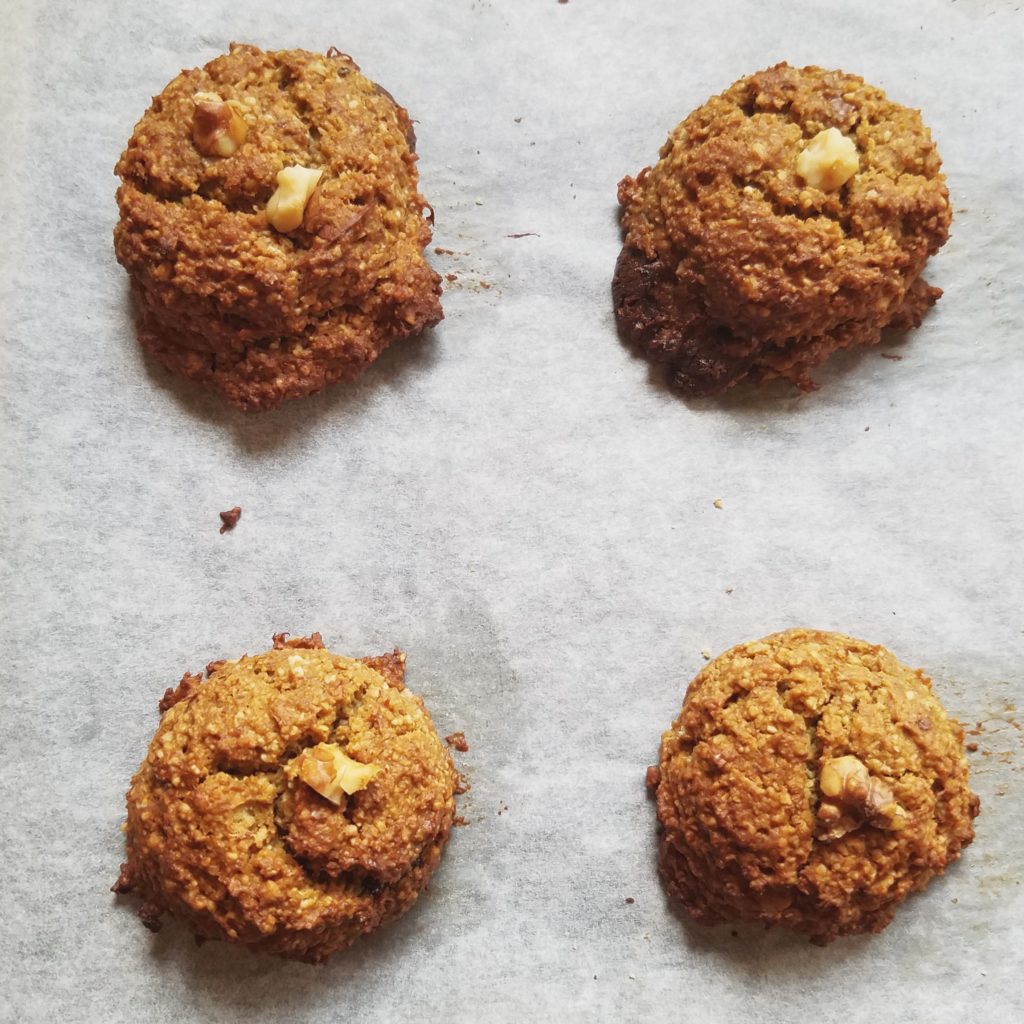
When I was younger, my mom used to bake up cookies every few weeks to feed the sweet tooth that my sister and I had. As a kid, nothing was better than a glass of milk and a belly full of cookies. YES. I had no self-restraint and never stopped at just one. Homemade cookies are best when fresh so I would eat 4-5 that first day…and the second day…and maybe just two or three after that…if there were still any cookies left.
Sadly, traditional cookies have several cups of sugar, white flour, butter, plus additional sugary add-ins. Yupp, I don’t know how young Melanie did it! If I tried to recreate my old 4-5 cookies indulgence these days I would definitely end up with a stomach ache. Nowadays, I don’t crave cookies in the same way. Though, sometimes your girl gets a craving for healthified versions of old favorites. Thus, I whipped up some cookies that I consider to be more nutritionally balanced.
Ingredients breakdown:
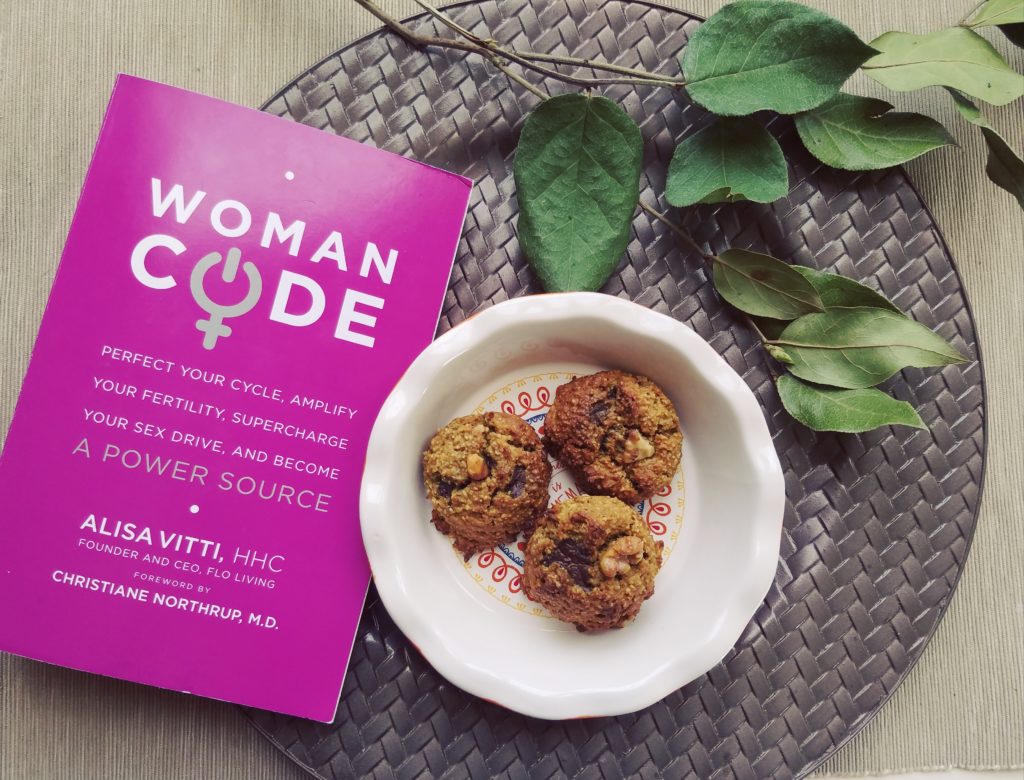
We’ve got banana and pumpkin to soften up the cookies and a mere ½ cup of sugar to sweeten them up. I am extremely cautious about my sugar intake and, ever since reading Woman Code, I try to avoid adding excess sugar unless absolutely necessary (sidenote: possible post on this in the upcoming future). The fact is: cookies just don’t taste like cookies without some kind of sweetener. These are just lightly sweetened with a mixture of brown and coconut sugar. Of course, you could add an extra ¼ cup of sugar for sweeter cookies. Feel free taste-test the batter 😉 Though, I think you’ll find there is something nice about the subtle level of sweetness in these.
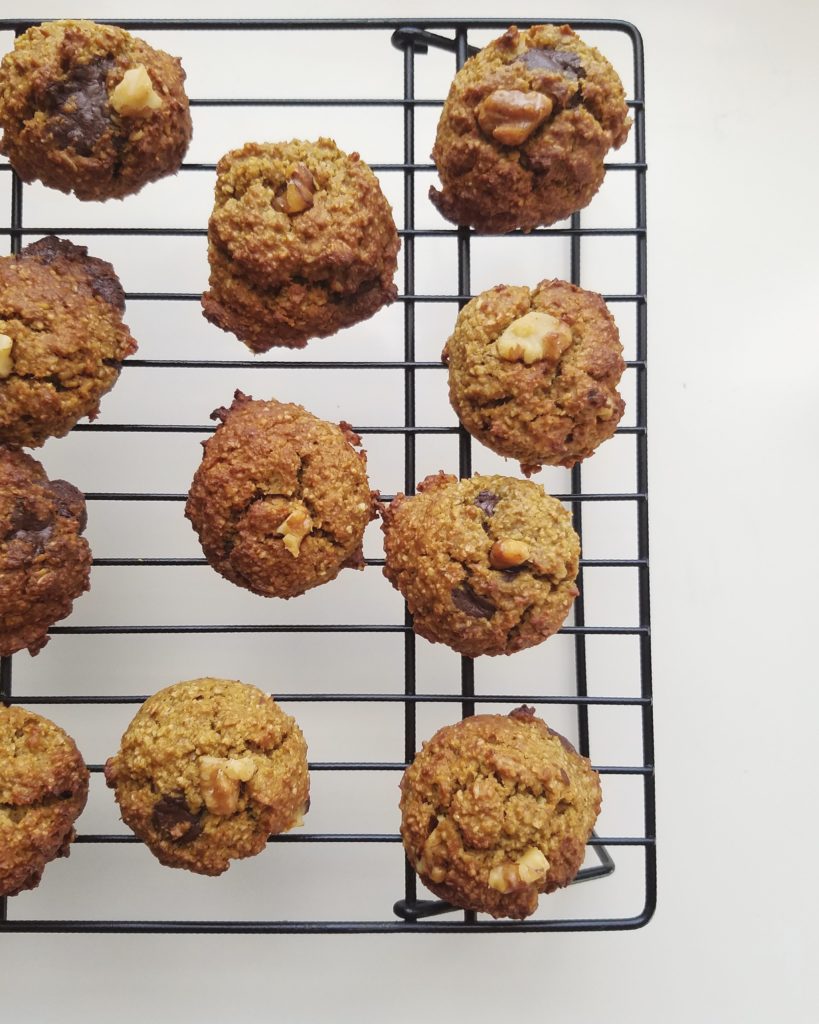
Also, let’s not forget about fats. I know there are some cookie recipes out there that might bake up with simply banana but I like incorporating healthy fats into my food. Why, you ask? Well, fat helps slow the absorption of sugar and keeps me satiated. Not to mention, it helps make the cookies crisp up on the outside and stay fluffy on the inside.
In addition, you can include up to a cup worth of dried fruit, nuts, ALOHA brand chopped chocolate, or whatever you like. I went with a small amount of chocolate and walnuts to add a bit more healthy fats and protein. Speaking of protein, definitely try adding a scoop of your favorite protein powder, if you’d like. Sometimes my family can taste the protein powder in baked goods so I went with an unflavored plant-based protein powder from The Natural Citizen. That is totally optional, though. I’ll provide alternatives to the protein powder in the recipe!
Without further ado, here is the recipe for the pumpkin cookies:
GF + V Pumpkin Cookies
Recipe Type: Snacks, Dessert
Cuisine: Cookies
Author: Melanie
Prep time:
Cook time:
Total time:
Serves: 24
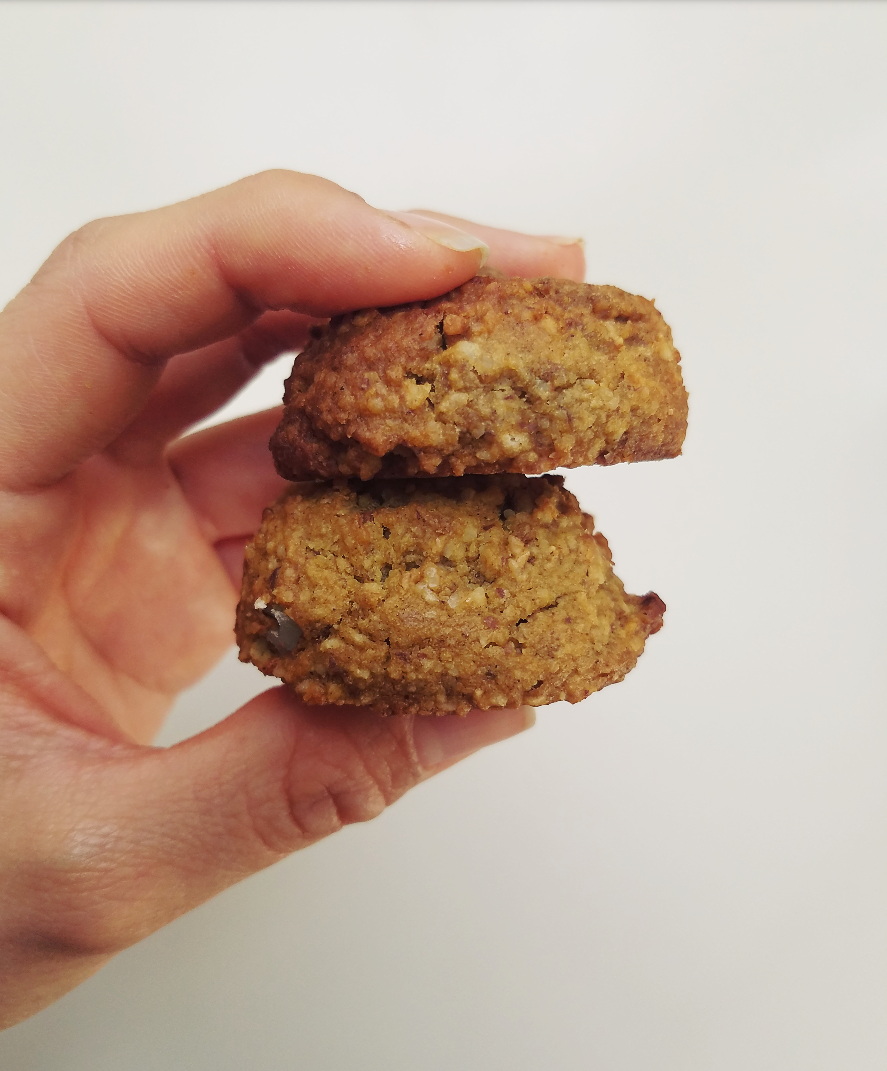
I call these cookies while my sister likes to call them muffins. Whatever you call them, they are good. My sister is hard to please but I got a thumbs up from her with these cookies (or muffins). They are lightly sweet but still delicious!
2 servings of unflavored plant-based protein powder (½ cup worth)*
1/3 cup chopped dark chocolate
½ cup chopped walnuts, save some for topping
Instructions
Preheat the oven to 375°F and line a large baking sheet with parchment paper or baking mat.
In a medium bowl, combine the banana and pumpkin puree. Then, stir in the sugars, baking soda, spices, coconut oil, and vanilla extract.
Use a food processor or blender to process the almonds to make a fine flour. Repeat for the oat flour.
To the wet ingredients, add the processed almond and oat flour, along with the whole rolled oats and protein powder.
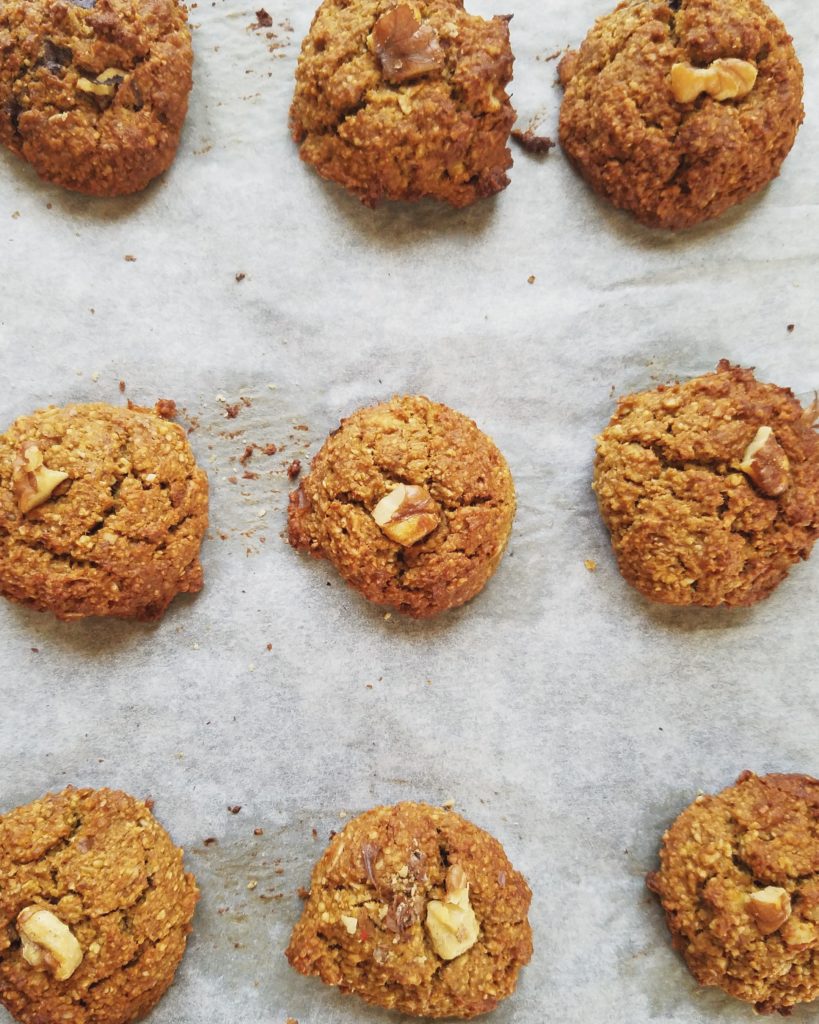
Next, fold in the chocolate chips and half of the walnuts. Use a large cookie scoop to drop dollops of the cookie dough onto the baking sheet. Place a few walnut crumbs on top of each cookie.
Bake for 13 to 14 minutes or until the tops have browned (don’t under-bake). Let the cookies cool on the baking sheet for a minute before moving to a wire rack to cool for 10 to 15 minutes more. Bake the remaining cookie dough until all is finished.
I know cookies are irresistible out of the oven but if you wait for them to cool, they will be much better. They won’t be as fall-apart delicate and their flavor will be more visible.
When cookies are completely cool, they can be stored in an airtight container or frozen.
Notes
*I use The Natural Citizen’s unflavored Organic Protein in this recipe. A flavored protein may mess with the taste so I recommend this one. Alternatively, you can easily substitute the ½ cup of protein powder for more oat flour or almond flour.[br]Evidently, if any of the ingredients are cold, that will make the coconut oil clump up. Small specks are okay but large clumps need to be dissolved. You can lightly warm the batter in a microwave safe bowl and proceed with the recipe.[br]Instead of grinding almonds yourself (which I recommend for the freshest taste), you can also use ½ cup almond or peanut flour.
Do you remember a year or two back when yogurt bowls were super trendy? It seemed like yogurt was all the rage for breakfast and healthy snacking—especially once Greek yogurt hit the scene. How, you might be thinking, can a food be trendy? Well, sorry, folks, that is a question for someone else. I don’t start the food trends I just utilize them.
In early 2016, I was on the biggest Greek yogurt kick and would start each day with a bowl. I’d eat it with berries and granola, melon, or stone fruit—oh, yogurt could do no wrong! Though, sometime during the summer, I had one too many bowls and got turned off. Now, it has been months since I’ve consumed it but recently I found myself craving the creamy, refreshing, gut-healthy food.
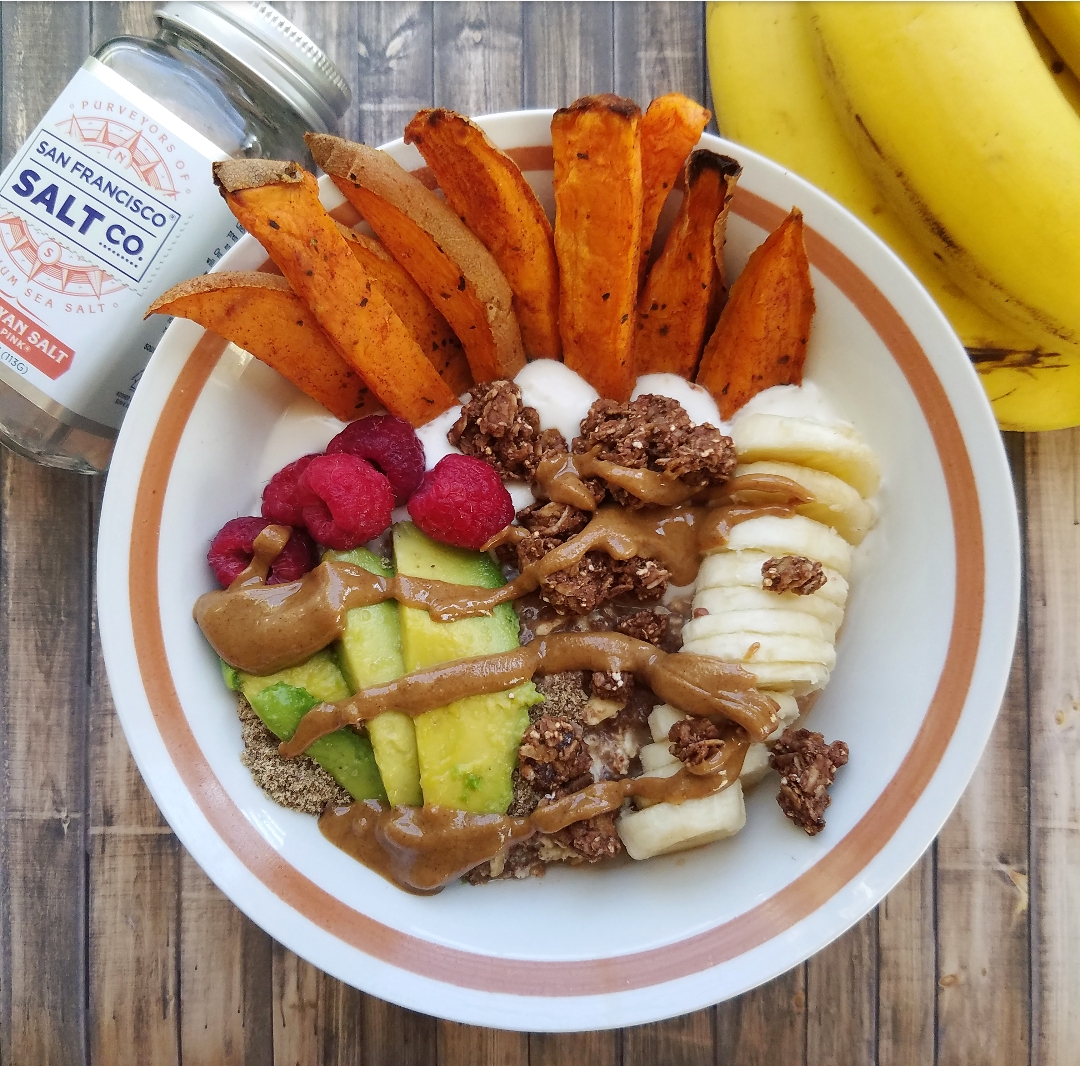
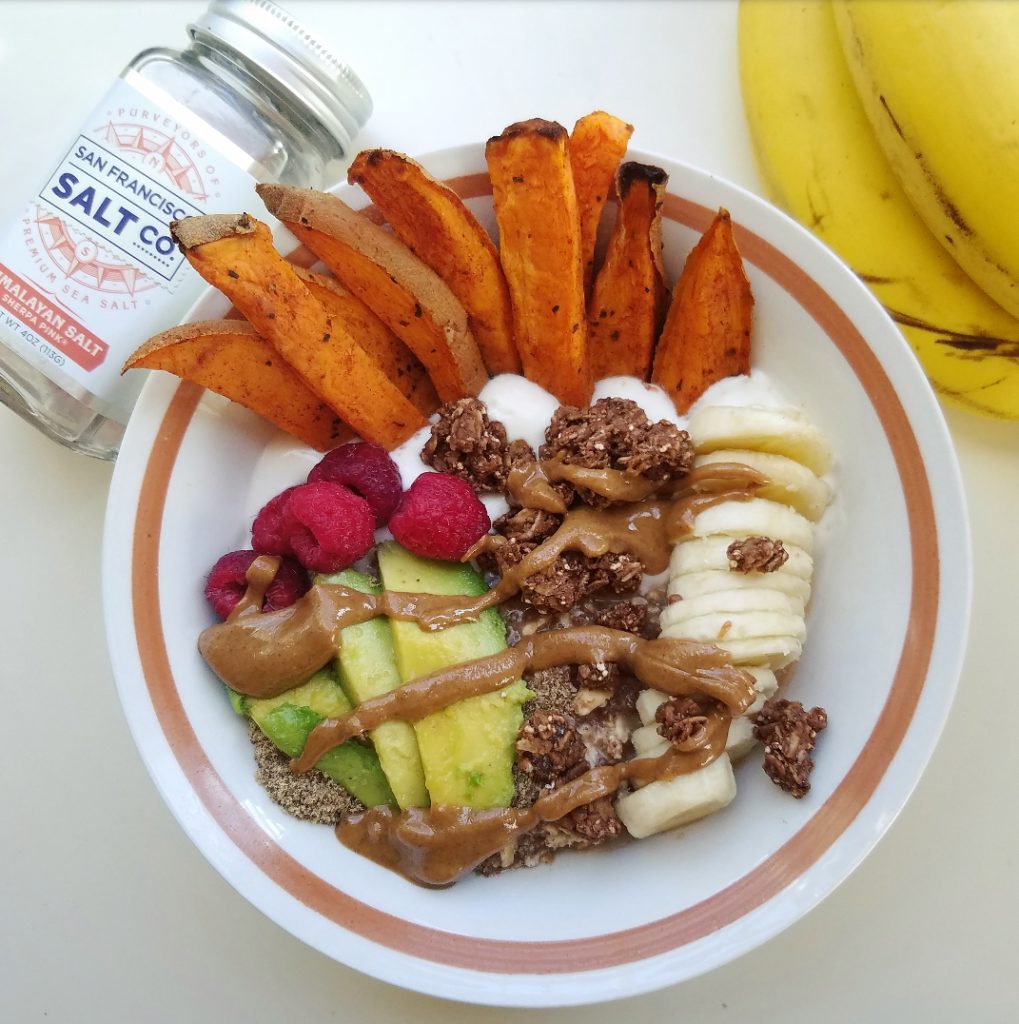
First things first, I picked up individual serving containers of Silk’s blueberry soy yogurt and Kite Hill’s plain almond milk yogurt. For the yogurt bowl shown above, I used the almond milk one but you can see me use blueberry coconut flavor in this Instagram post. I think I like the coconut version the most out of the two but use whatever non-dairy or regular yogurt you like.
As I previously mentioned, yogurt with fruit is an easy pairing. Nowadays, I want a little more out of my yogurt bowls so I like to add sweet potato, oatmeal, and nut butter to tackle all the food groups at once! Side note: I like to give credit whree credit is due so, I first saw the idea from @olive.eeeats on Instagram. It’s hearty, comforting, and a breakfast I can get behind. It’s a total Yogurt Pro Bowl, if you will. Also, if some of the items I included aren’t your thing, I’ve included suggestions at the end of this post on how to jazz up your yogurt bowl in an unconventional way.
For a well-rounded yogurt bowl, I like to include:
Whole grains
Vegetables
Berries or other fruit
Fats
Admittedly, my yogurt bowls turn out different each time so, while I’ve provided my recipe, this is just a guideline. If you want more or less food, adjust as needed. There’s no wrong way to measure or plate any of these foods so just eat according to what you’re craving and enjoy!
Yogurt Pro Bowl
Recipe Type: Breakfast
Cuisine: American, Vegan, Vegetarian
Author: Melanie
Prep time:
Total time:
Serves: 1 yogurt bowl
The yogurt pros (that’s us!) prep their ingredients ahead of time. So, use your breakfast yogurt as a chance to toss in some roasted veggies, fruit of choice, and healthy fats. It will give your mind and body the fuel it needs to tackle the day!
Ingredients
Overnight oats: 1/3 cup oats, 2 tsp chia seeds, 1/2 cup water or milk, 1/2 tsp maca powder, 1/2 tsp cacao powder
1 tbsp of peanut butter (I used Wild Friends Pumpkin Spice)
2 tbsp granola, optional but recommended for texture (I used Purely Elizabeth Chocolate Probiotic)
A pinch of Himalayan pink sea salt, recommended to sprinkle on avocado (I used San Francisco Salt Company)
Instructions
For the oats, combine all of the ingredients the night before. Alternatively, warm, stovetop oats could be substituted.
For the yogurt bowl, first add the oatmeal to one half of the bowl and the yogurt to the other half.
Then, I like to strategically lay out all of the toppings in different sections of the bowl but feel free to toss them all in together. Though, I should say, the sweet potato fries are best left on the sides of the bowl to utilize as yogurt dippers. 😉
Lastly, sprinkle salt on avocado, drizzle nut butter, and add a few clumps of granola before taking a spoon and devouring!
3.5.3226
In my opinion, what makes this elevated yogurt bowl different is that it doesn’t solely rely on fruit to make it awesome. Plus, it doesn’t shy away from carbs or fat. Normally yogurt is considered the low-calorie, dieter’s choice breakfast. Which it can be but I’d like to prove yogurt can be fun so long as you know how to jazz it up! 🙂 Actually, as a matter of fact,…
There are many choices for yogurt bowl add-ins!
Whole grains:Stovetop oats or overnight oats, buckwheat, quinoa cooked in coconut milk, warm barley, or simply use a homemade whole grain muffin—YES!
Vegetables: Roasted or sautéed carrots, sweet potato, butternut squash, cauliflower, or Brussels sprouts if you’re feeling adventurous!
Spice it up: Cinnamon, nutmeg, turmeric, rosemary, paprika, or sweeten with maple syrup or raw/coconut sugar.
Fruit: As you probably know, ANY fresh, frozen, or sautéed fruit you like will work!
Fats: 1-2 tbsp peanut, almond, or sunflower seed butter; toasted walnuts or pumpkin seeds, cinnamon-maple glazed pecans, ¼ of an avocado, or coconut flakes will do.
Bonus: Granola, hemp seeds, adaptogens, flax or chia seeds.
Here are some pairing ideas I cannot wait to try:
Roasted carrots with blackberries, quinoa, and sunflower seed butter; crispy roasted Brussels, with cinnamon maple-glazed pecans, blueberries, and barley; also, sautéed turmeric butternut squash with coconut oil sautéed apples, and toasted walnuts.
Of course, those are just a few ideas. Mix and match according to your taste buds! Also, please let me know how you enjoy yogurt or if you’ve got any wild yogurt pairings. I’d love to try out something new!
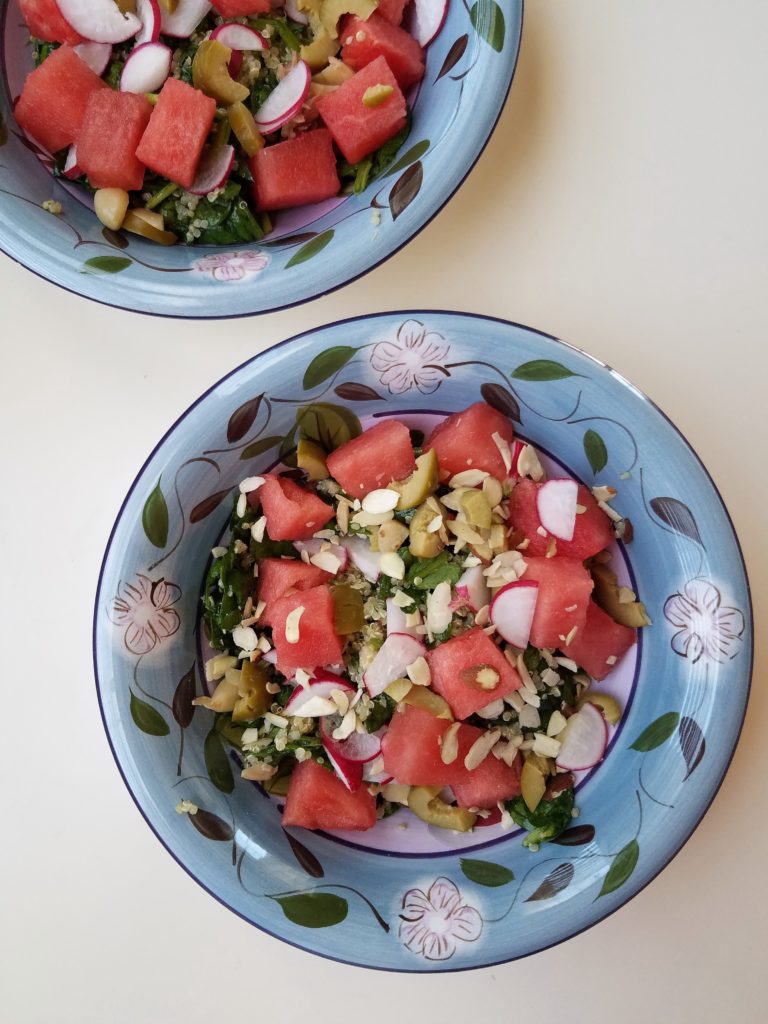
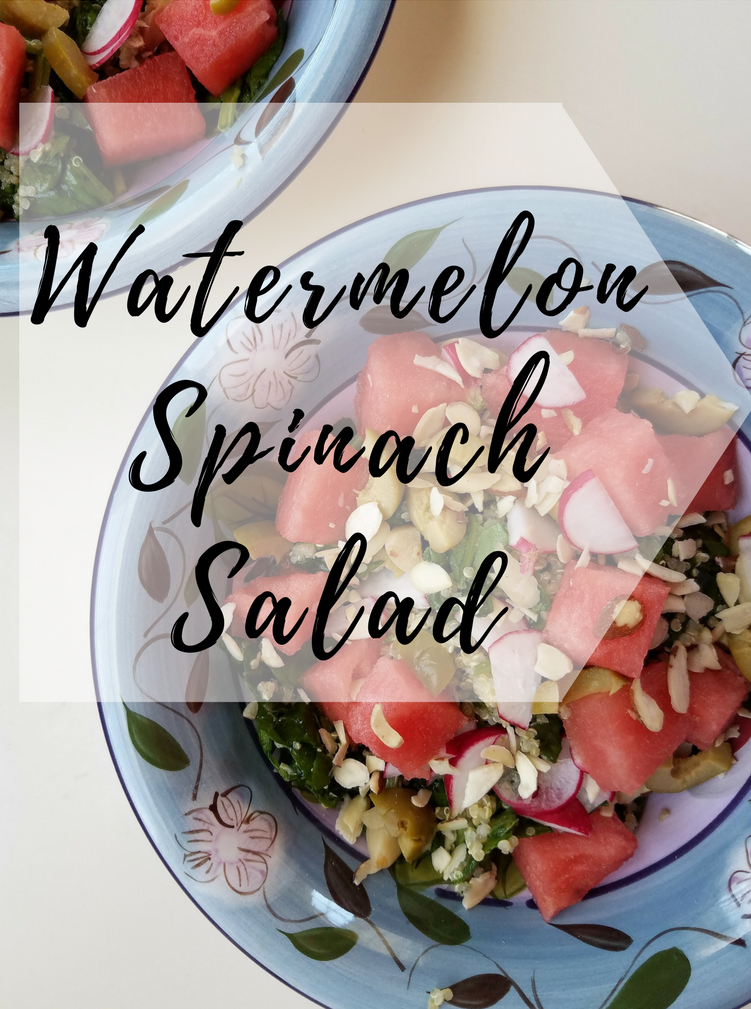
Happy hump day, folks! Who else is planning their summer menu? I’ve got the perfect recipe for barbecues, family potlucks, and all of the upcoming summer festivities! Picnic or potluck style food used to be my jam. I loved eating potato salad, cold pasta salad, deviled eggs—basically anything with mayonnaise. 😋 Though, why have mayo when you can have fresh, colorful food?! The Watermelon Spinach Salad I’ve whipped up will be the game-changing healthy side dish or main to jazz up summertime meal spreads!
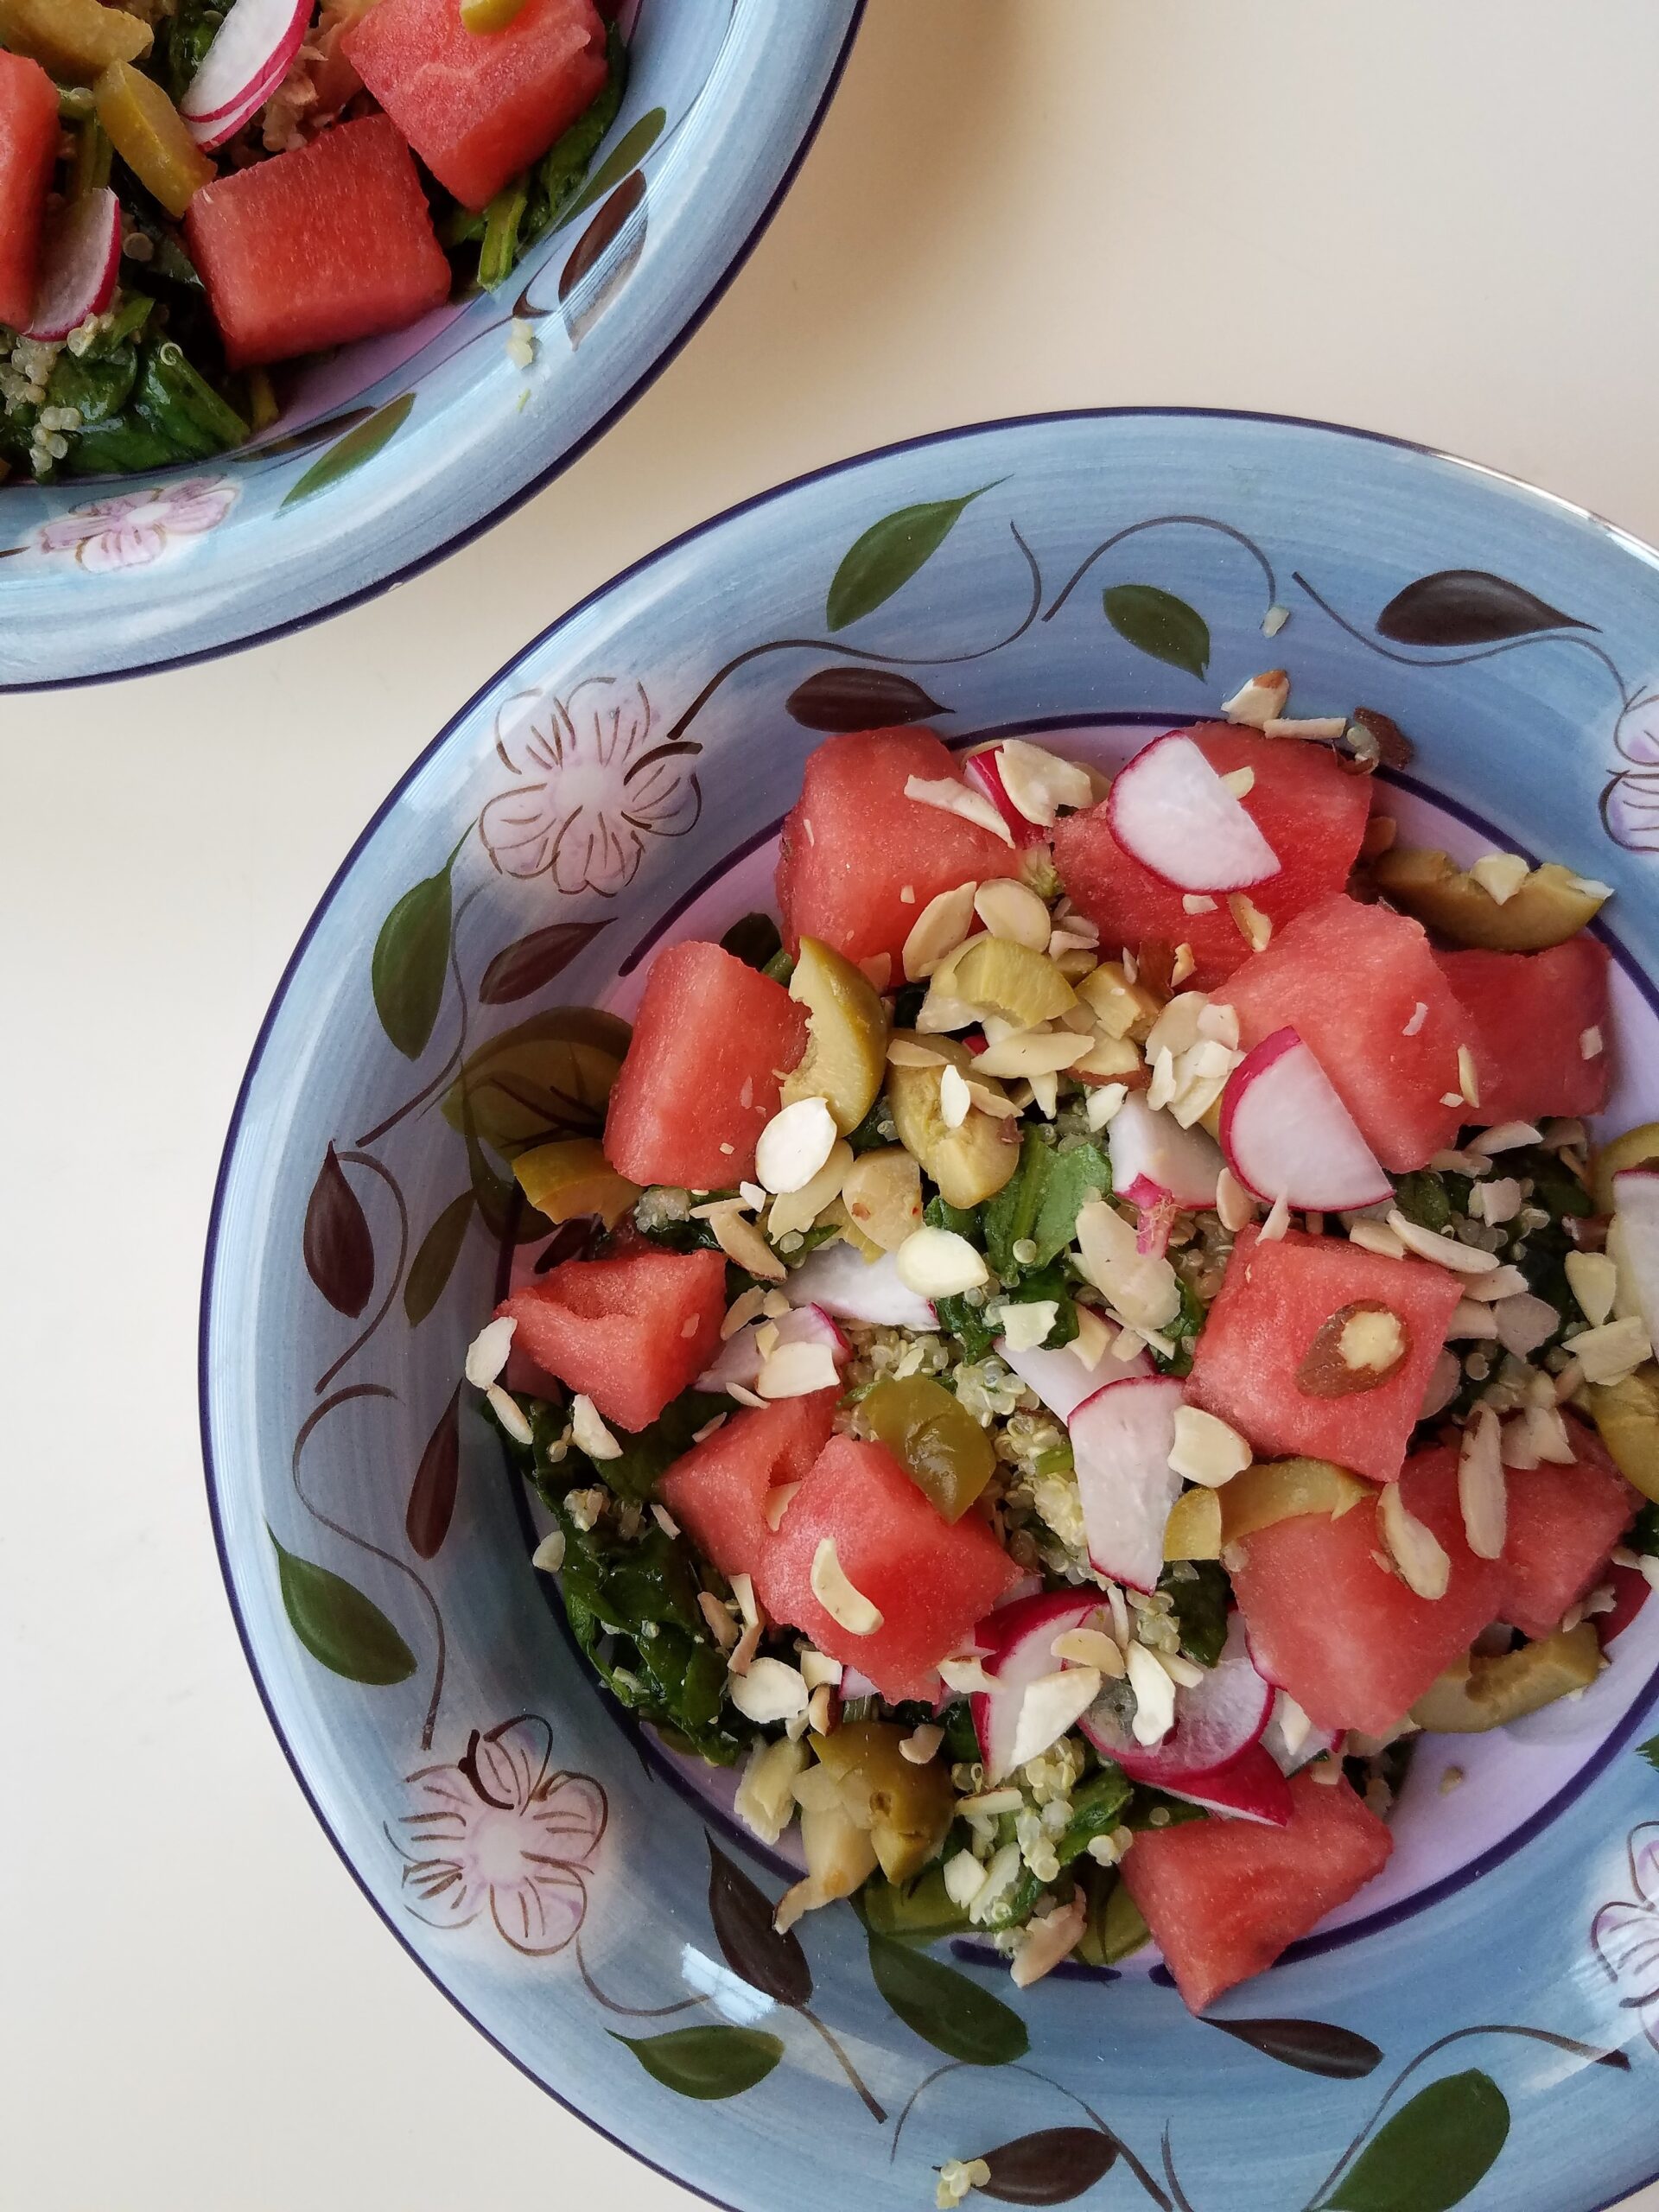
Occasionally, salads make an appearance at the average summer get-together but a big pile of green leaves does not usually appeal to people. Add in a little texture and color and bam! Suddenly the dish takes on a whole new kind of appetizing. Watermelon is abundant and affordable during summer months so make sure you use a fresh and firm one for this salad. Grainy or barely-sweet watermelon is not something we want in this salad.
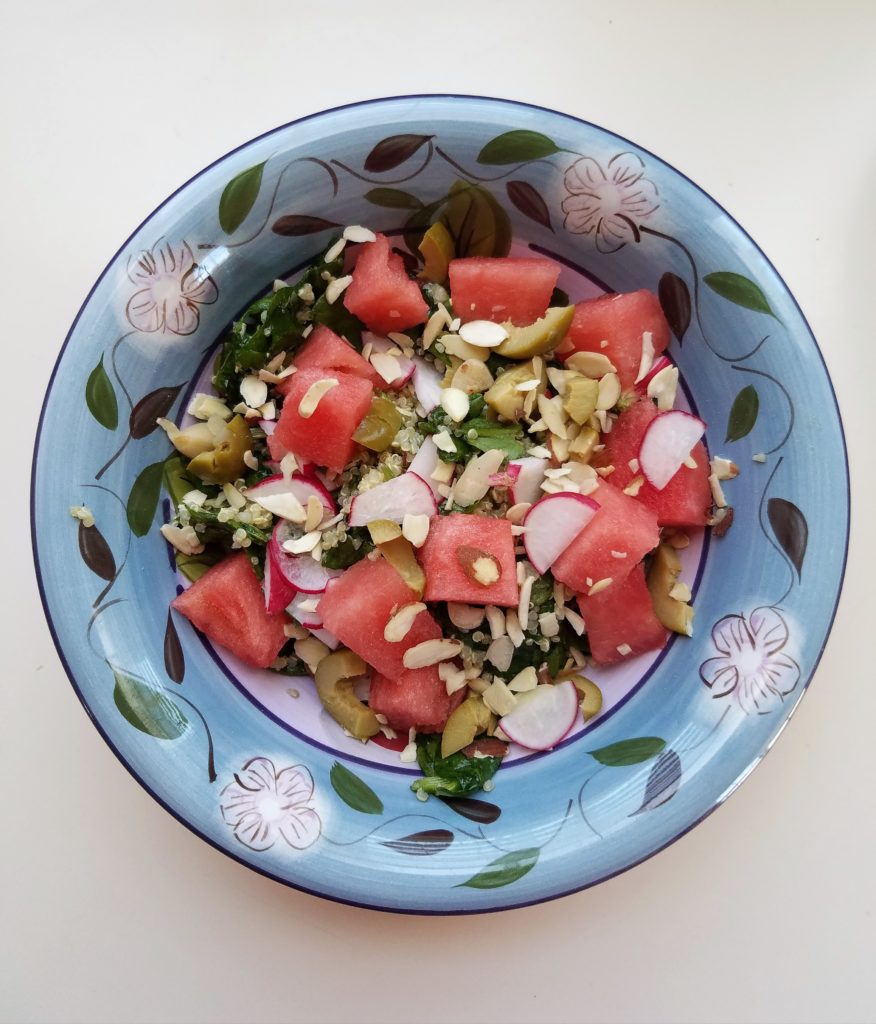
Refreshing watermelon, briny green olives, and the texture of the quinoa and sliced almonds make this salad so satisfying!
It works great as a side dish but it’s also easy to turn into a meal. Just add protein of choice like chickpeas (or lemon pepper tuna, if you’re like my mom) and then it’s a complete meal! To coat the salad, I used an adaptation of a lemon dressing from Cookie and Kate that I’ve been head over heels for. It’s seriously the best for drizzling on ANYTHING! It is a subtle complement to make this salad come alive. I know I’ll be making this again and again throughout the summer!
Have a great rest of your week! Also, don’t forget to subscribe so you don’t miss out on any of my new posts. Subscribe via the right-hand side panel or at the bottom of this page. 😉
Watermelon Spinach Salad
Recipe Type: Main, Side
Cuisine: American
Author: Melanie
Prep time:
Total time:
Serves: 2-3
I’ve created a fun salad to take to all of the upcoming summer festivities! It’s perfect for barbecues to potlucks, or simply enjoy at home with a glass of lemonade. Recipe makes 2 main salads or 3 side servings but can easily be multiplied.
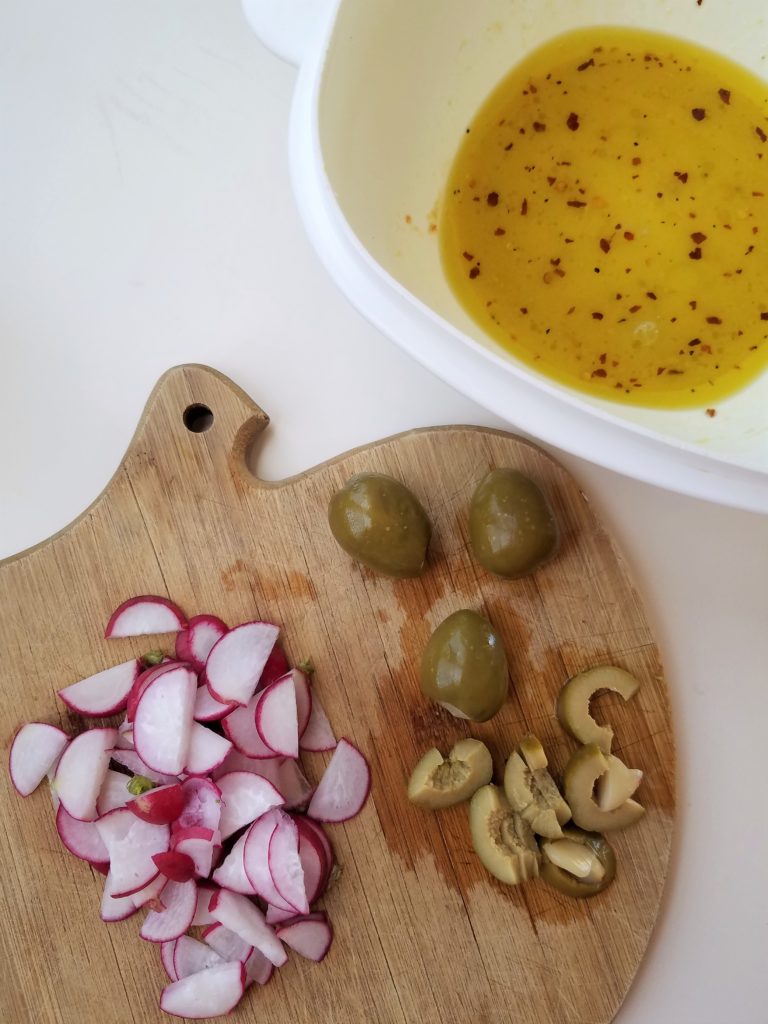
4 large green olives from a jar (I used garlic-stuffed, marinated olives)
For serving: 3 cups cubed watermelon, 3 tbsp sliced almonds, and, optional, protein of choice—I went with 1/2 cup garbanzo beans
Instructions
First, combine ingredients for the dressing in a medium bowl. Everything from the olive oil through the black pepper.
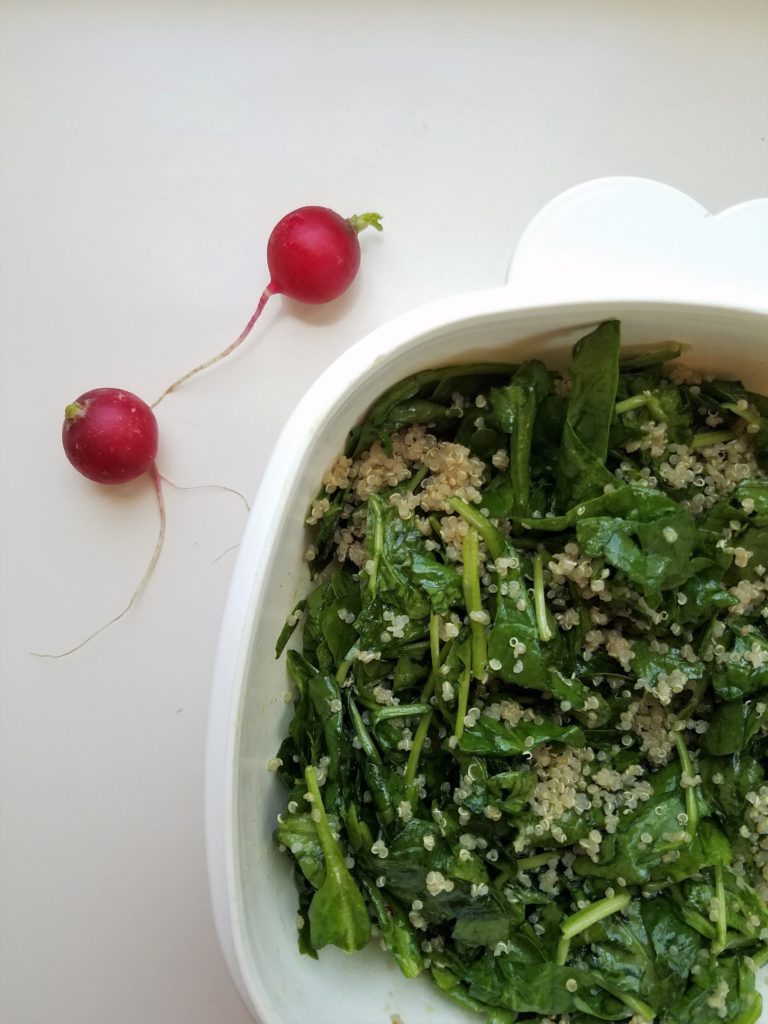
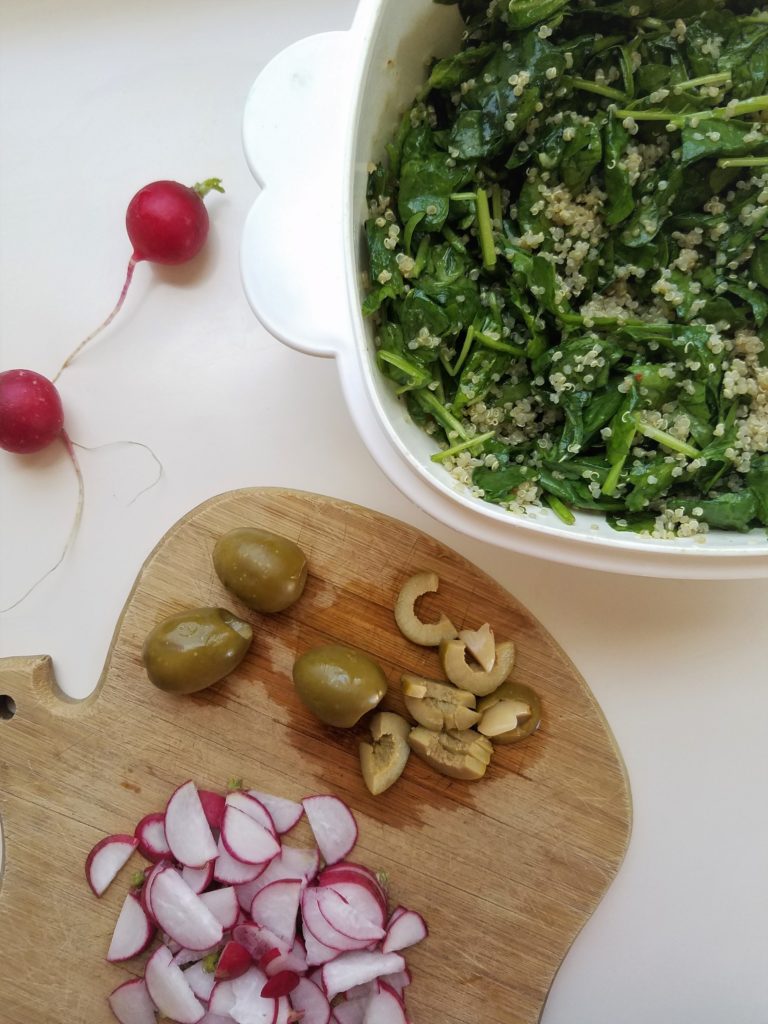
Then, add the spinach to the bowl and lightly massage or toss to thoroughly coat with the dressing.
Incorporate the cooked quinoa, radishes, and green olives.
To serve, add the watermelon and sliced almonds. Plus, optional protein, if eating the salad as a main dish.
Notes
Salad is best eaten right away but can last up to a day if made ahead of time. If saving for later, store the watermelon separately so it doesn’t water down the salad and combine when ready to serve.
We use cookies on our website to give you the most relevant experience by remembering your preferences and repeat visits. By clicking “Accept”, you consent to the use of ALL the cookies.
This website uses cookies to improve your experience while you navigate through the website. Out of these, the cookies that are categorized as necessary are stored on your browser as they are essential for the working of basic functionalities of the website. We also use third-party cookies that help us analyze and understand how you use this website. These cookies will be stored in your browser only with your consent. You also have the option to opt-out of these cookies. But opting out of some of these cookies may affect your browsing experience.
Necessary cookies are absolutely essential for the website to function properly. These cookies ensure basic functionalities and security features of the website, anonymously.
Cookie
Duration
Description
cookielawinfo-checbox-analytics
11 months
This cookie is set by GDPR Cookie Consent plugin. The cookie is used to store the user consent for the cookies in the category "Analytics".
cookielawinfo-checbox-functional
11 months
The cookie is set by GDPR cookie consent to record the user consent for the cookies in the category "Functional".
cookielawinfo-checbox-others
11 months
This cookie is set by GDPR Cookie Consent plugin. The cookie is used to store the user consent for the cookies in the category "Other.
cookielawinfo-checkbox-necessary
11 months
This cookie is set by GDPR Cookie Consent plugin. The cookies is used to store the user consent for the cookies in the category "Necessary".
cookielawinfo-checkbox-performance
11 months
This cookie is set by GDPR Cookie Consent plugin. The cookie is used to store the user consent for the cookies in the category "Performance".
viewed_cookie_policy
11 months
The cookie is set by the GDPR Cookie Consent plugin and is used to store whether or not user has consented to the use of cookies. It does not store any personal data.
Functional cookies help to perform certain functionalities like sharing the content of the website on social media platforms, collect feedbacks, and other third-party features.
Performance cookies are used to understand and analyze the key performance indexes of the website which helps in delivering a better user experience for the visitors.
Analytical cookies are used to understand how visitors interact with the website. These cookies help provide information on metrics the number of visitors, bounce rate, traffic source, etc.
Advertisement cookies are used to provide visitors with relevant ads and marketing campaigns. These cookies track visitors across websites and collect information to provide customized ads.