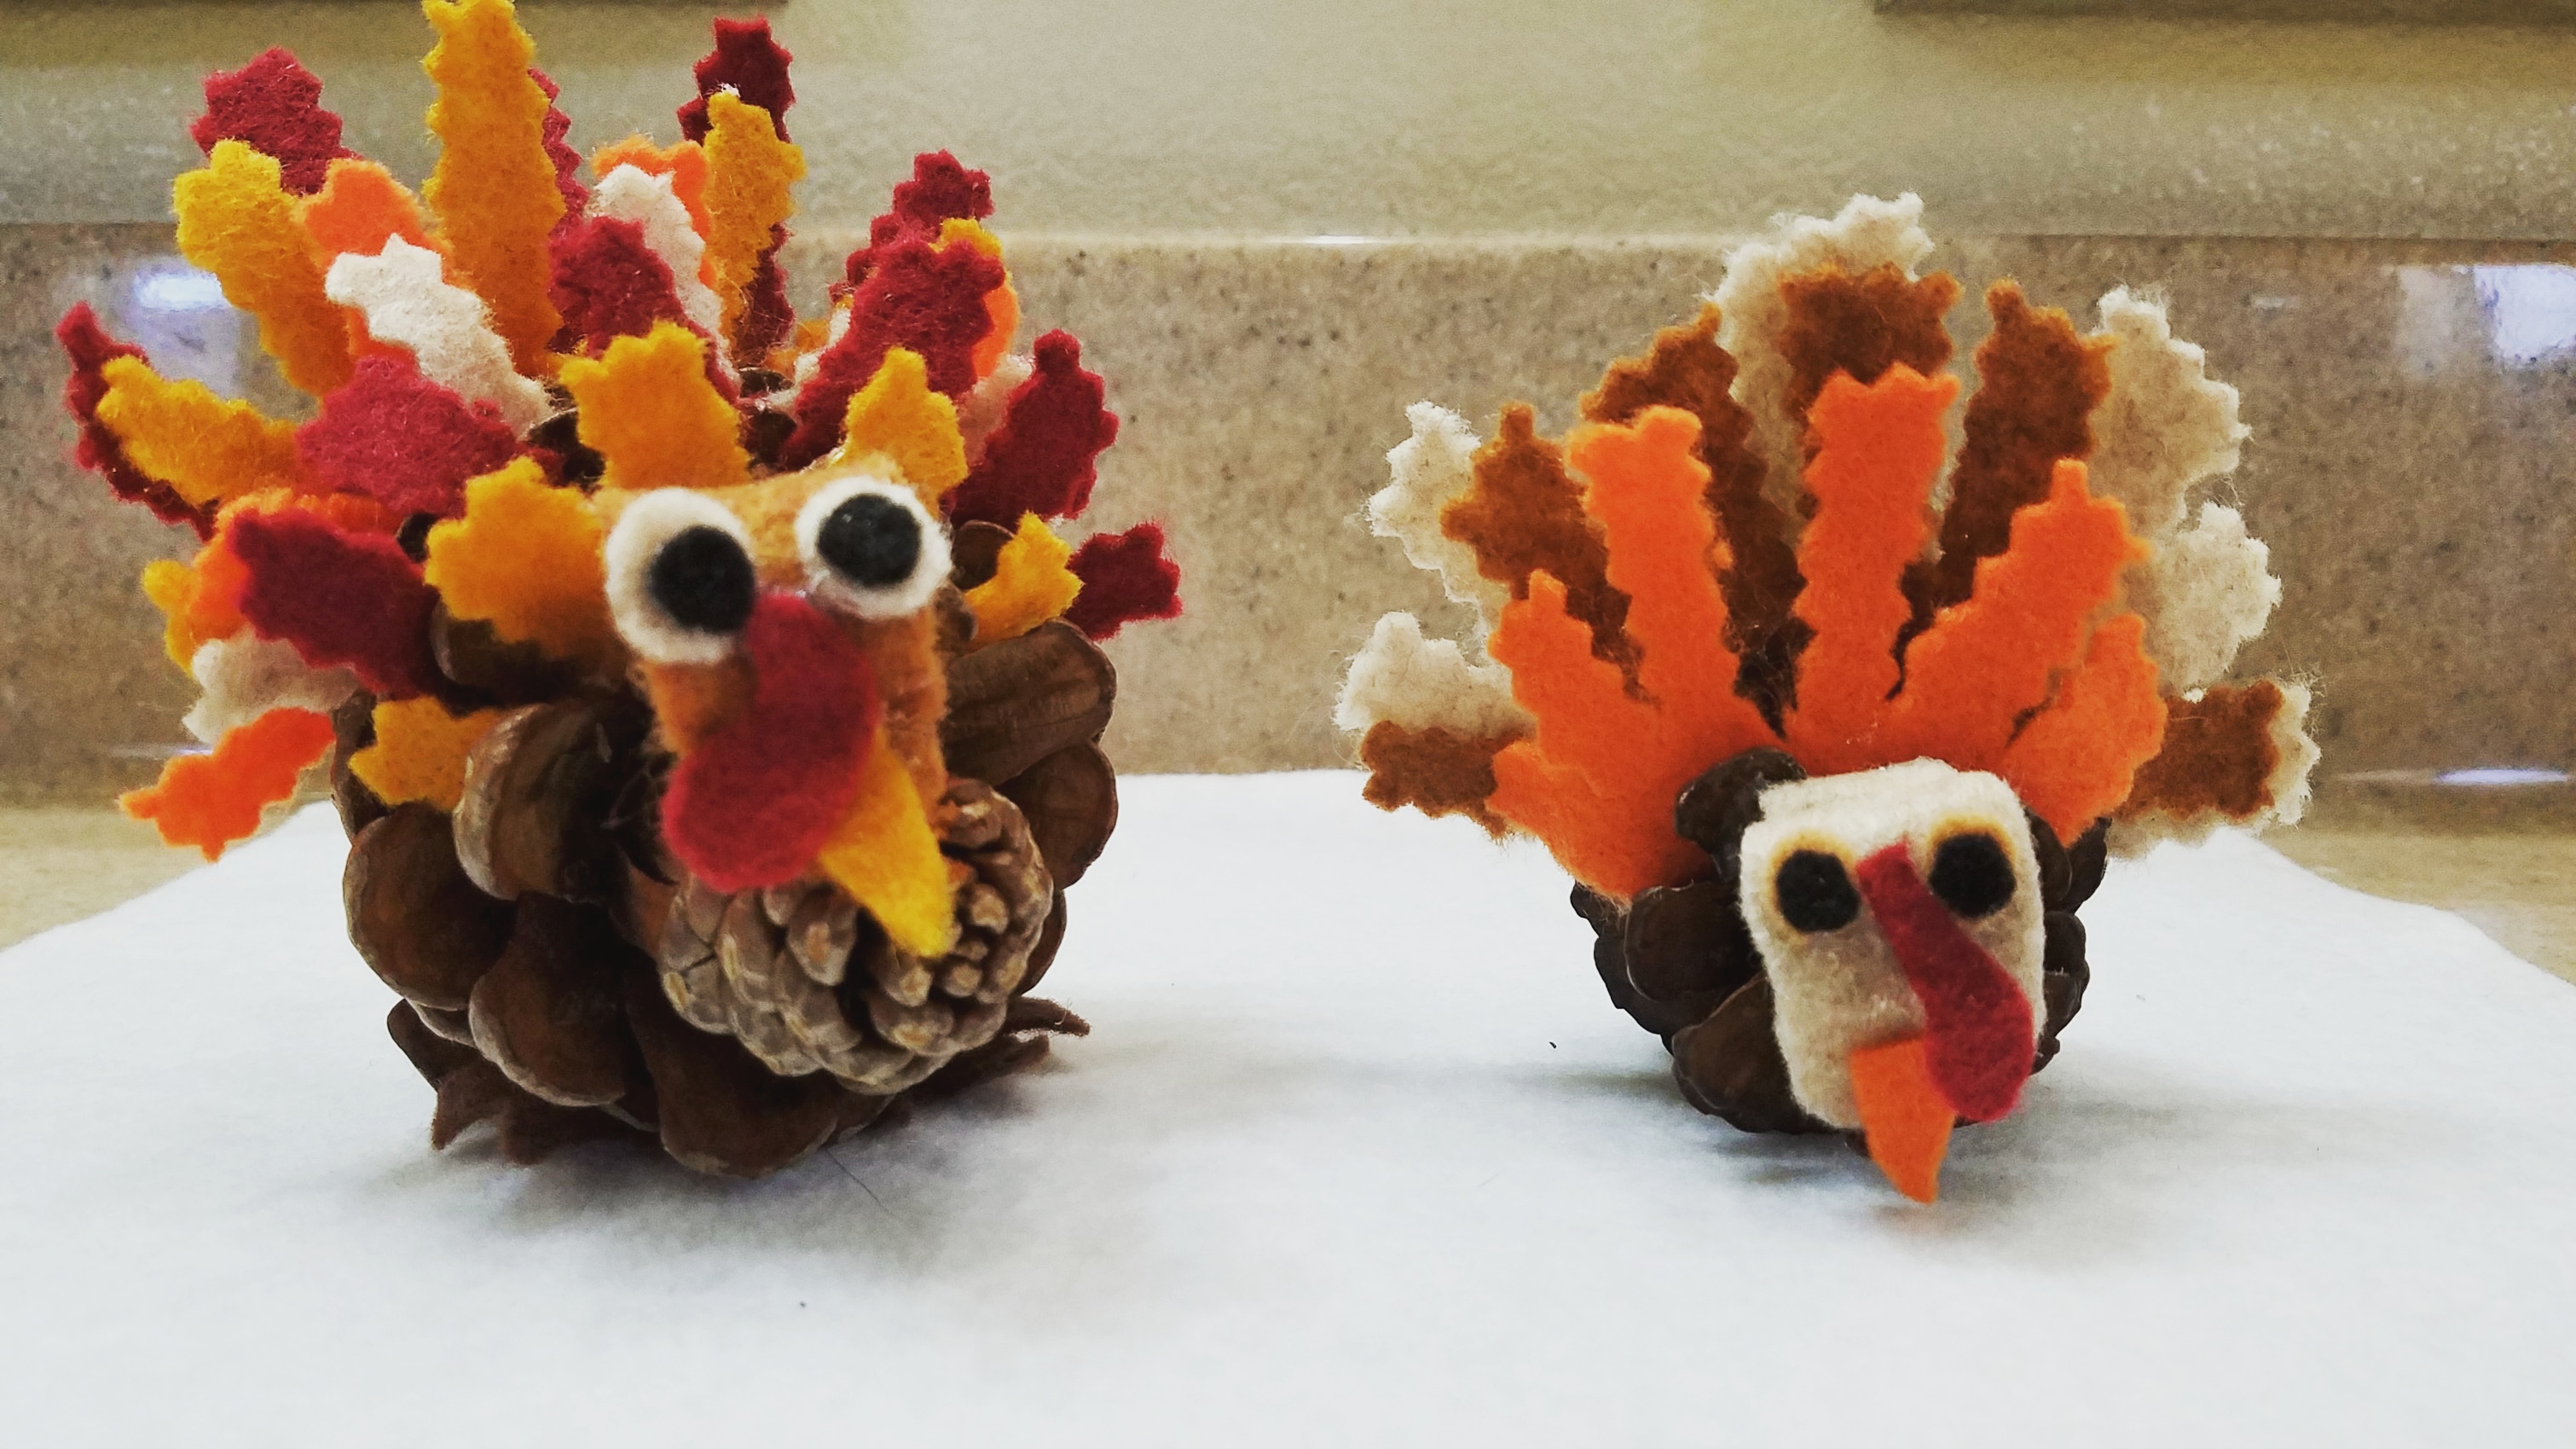
All you need is a few craft supplies and you’ll have the cutest little pinecone turkeys for your festive home or Thanksgiving table spread.
Who else likes to window shop at Michael’s, Home Goods, and Kirkland’s around the fall/winter season? The reason I say window shop is because seasonal decorum is so pretty but sometimes so expensive. Depending on what you’re looking for, there are some ways to craft decorations at home for a fraction of the price at stores.
Convenience plays a big part in the reason we buy those pre-made items. Especially if you’re like me and worried it won’t come out if you try making it yourself. Well, let me tell ya, these pinecone turkeys are easy enough that even I can make them. So, I think you can, too!

My mother is the queen of crafts and, as creative as I like to think I am, my DIY skills are limited. Most of the crafts she comes up with just by looking at what she already has available. She actually came up with the turkey friends after we acquired a large quantity of pinecones. Now, we have a couple of pinecone turkeys gracing the hutch in our home.
I loved the quaint and kitschy look of the decorations so much that I asked my mom if I could feature them on my blog. So here I bring you a DIY project for Pinecone Turkeys!
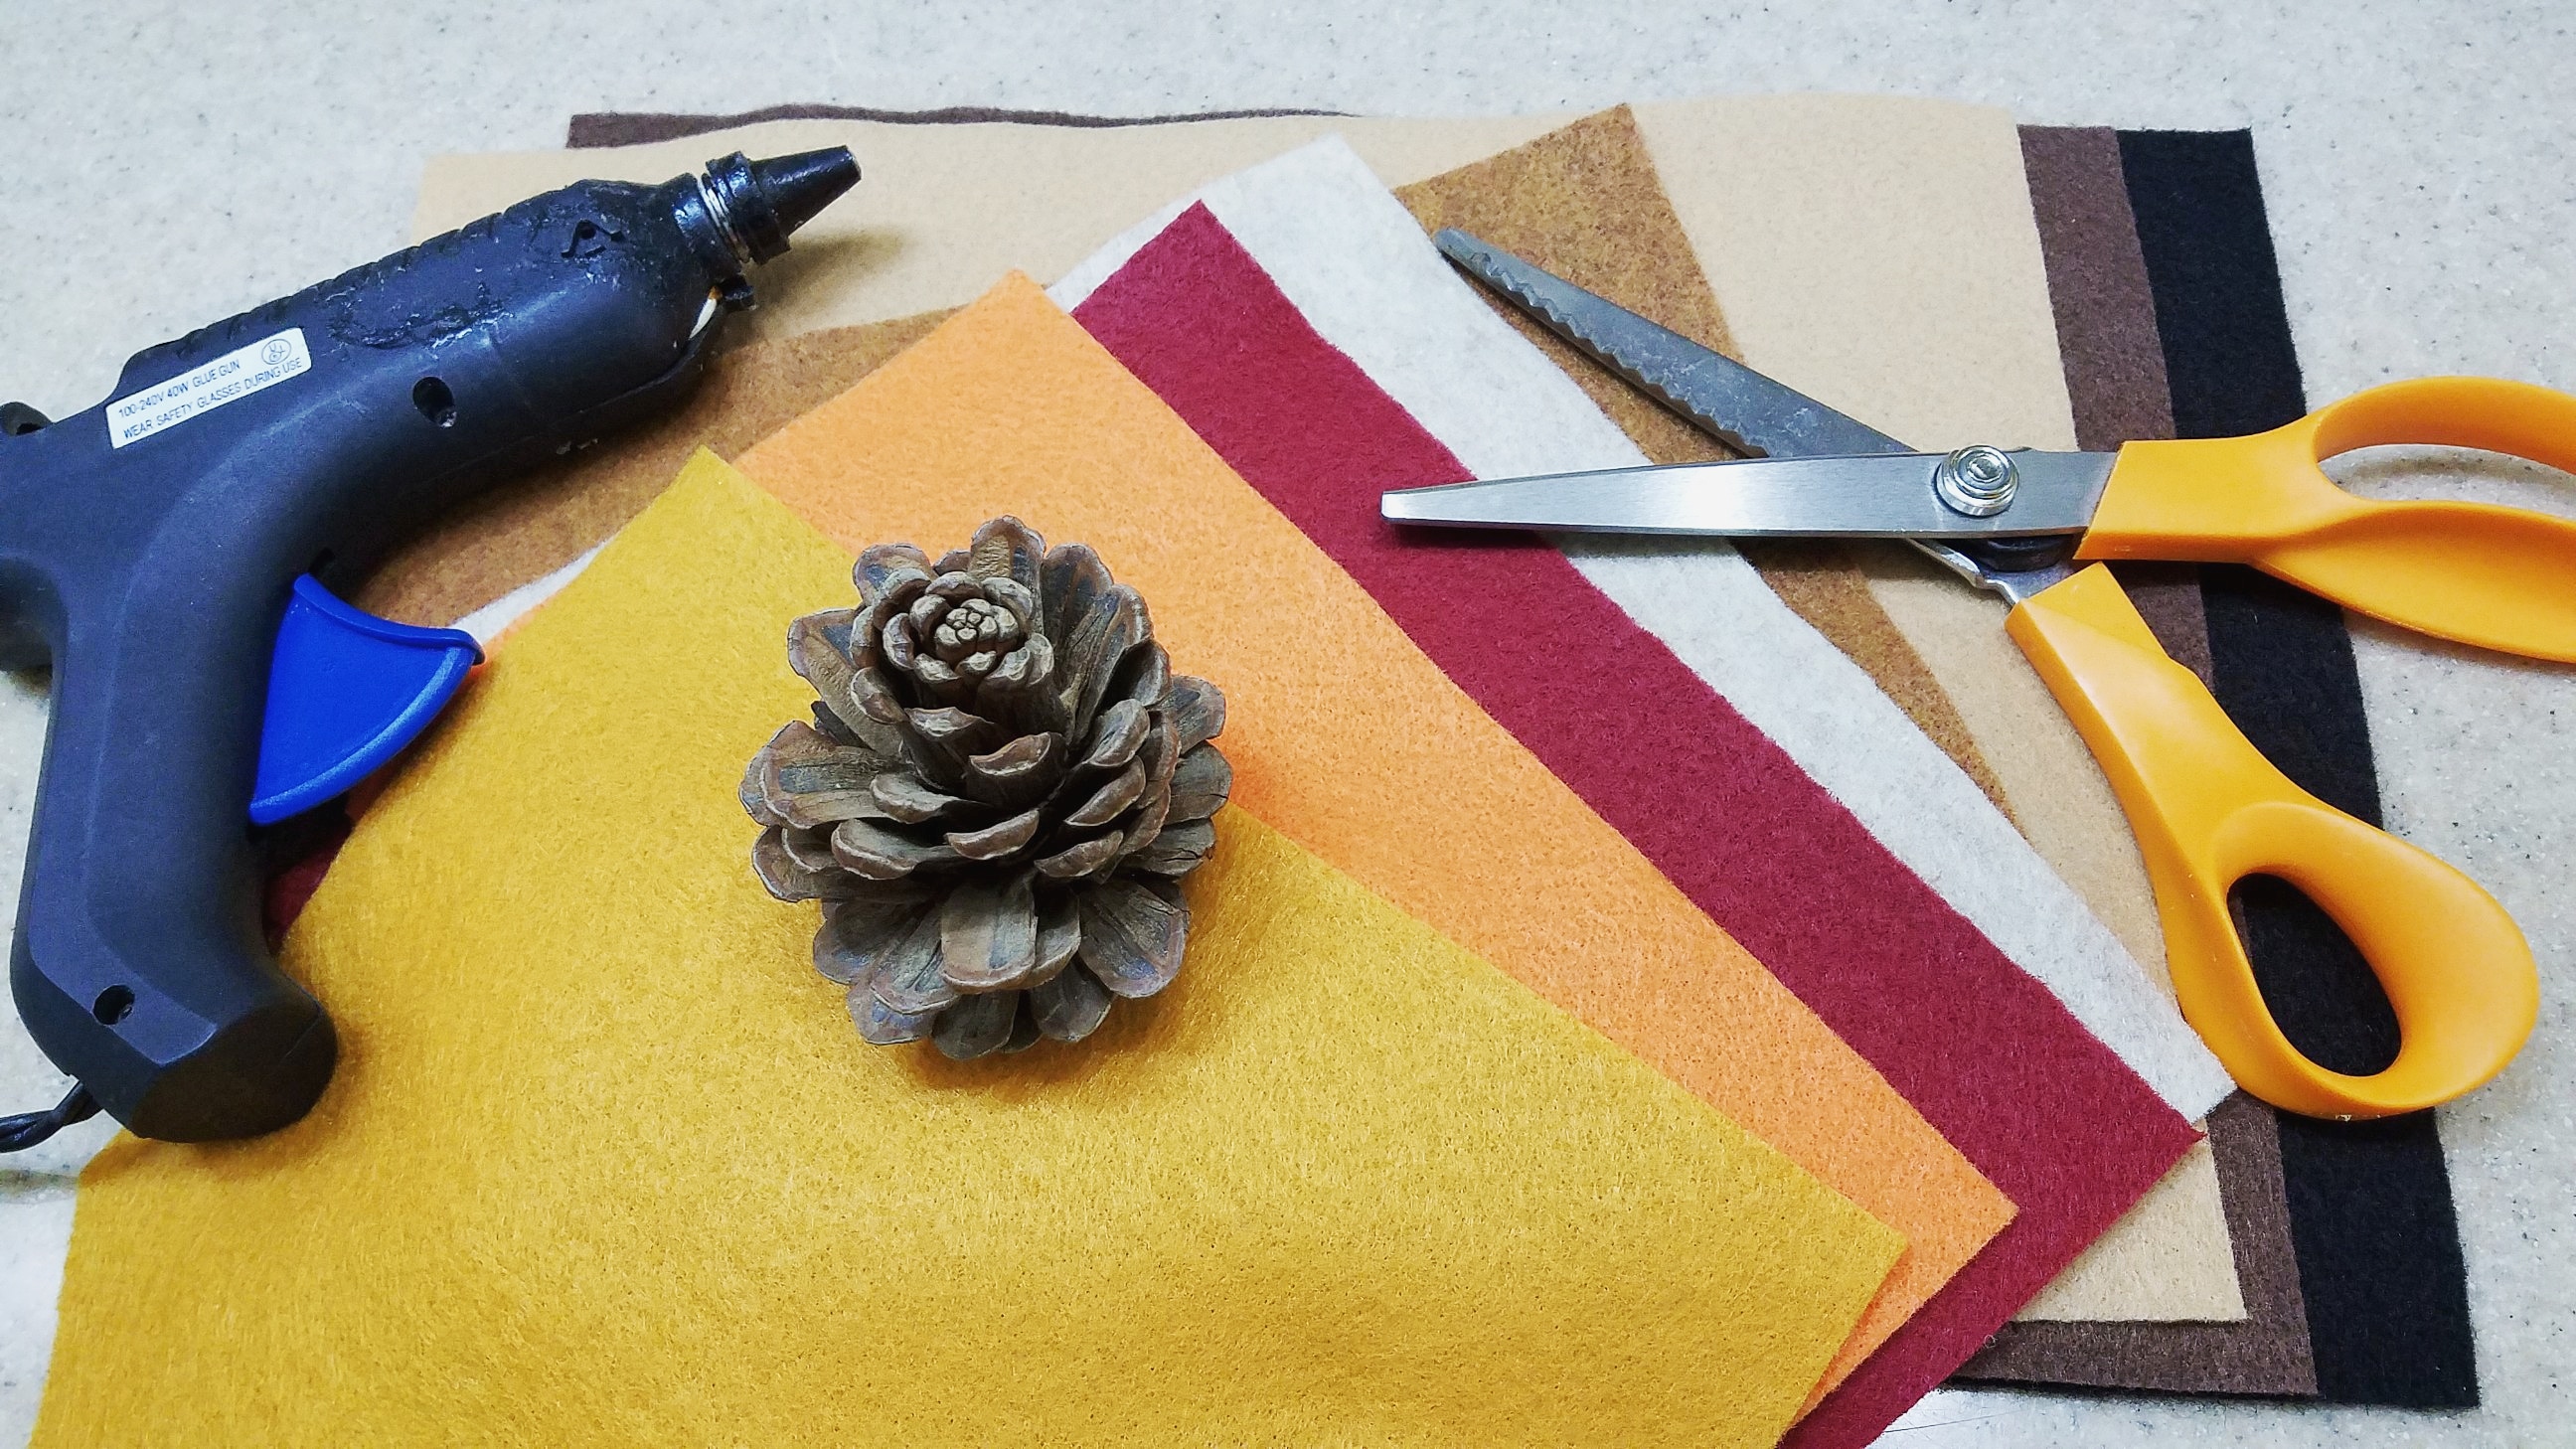
What You’ll Need:
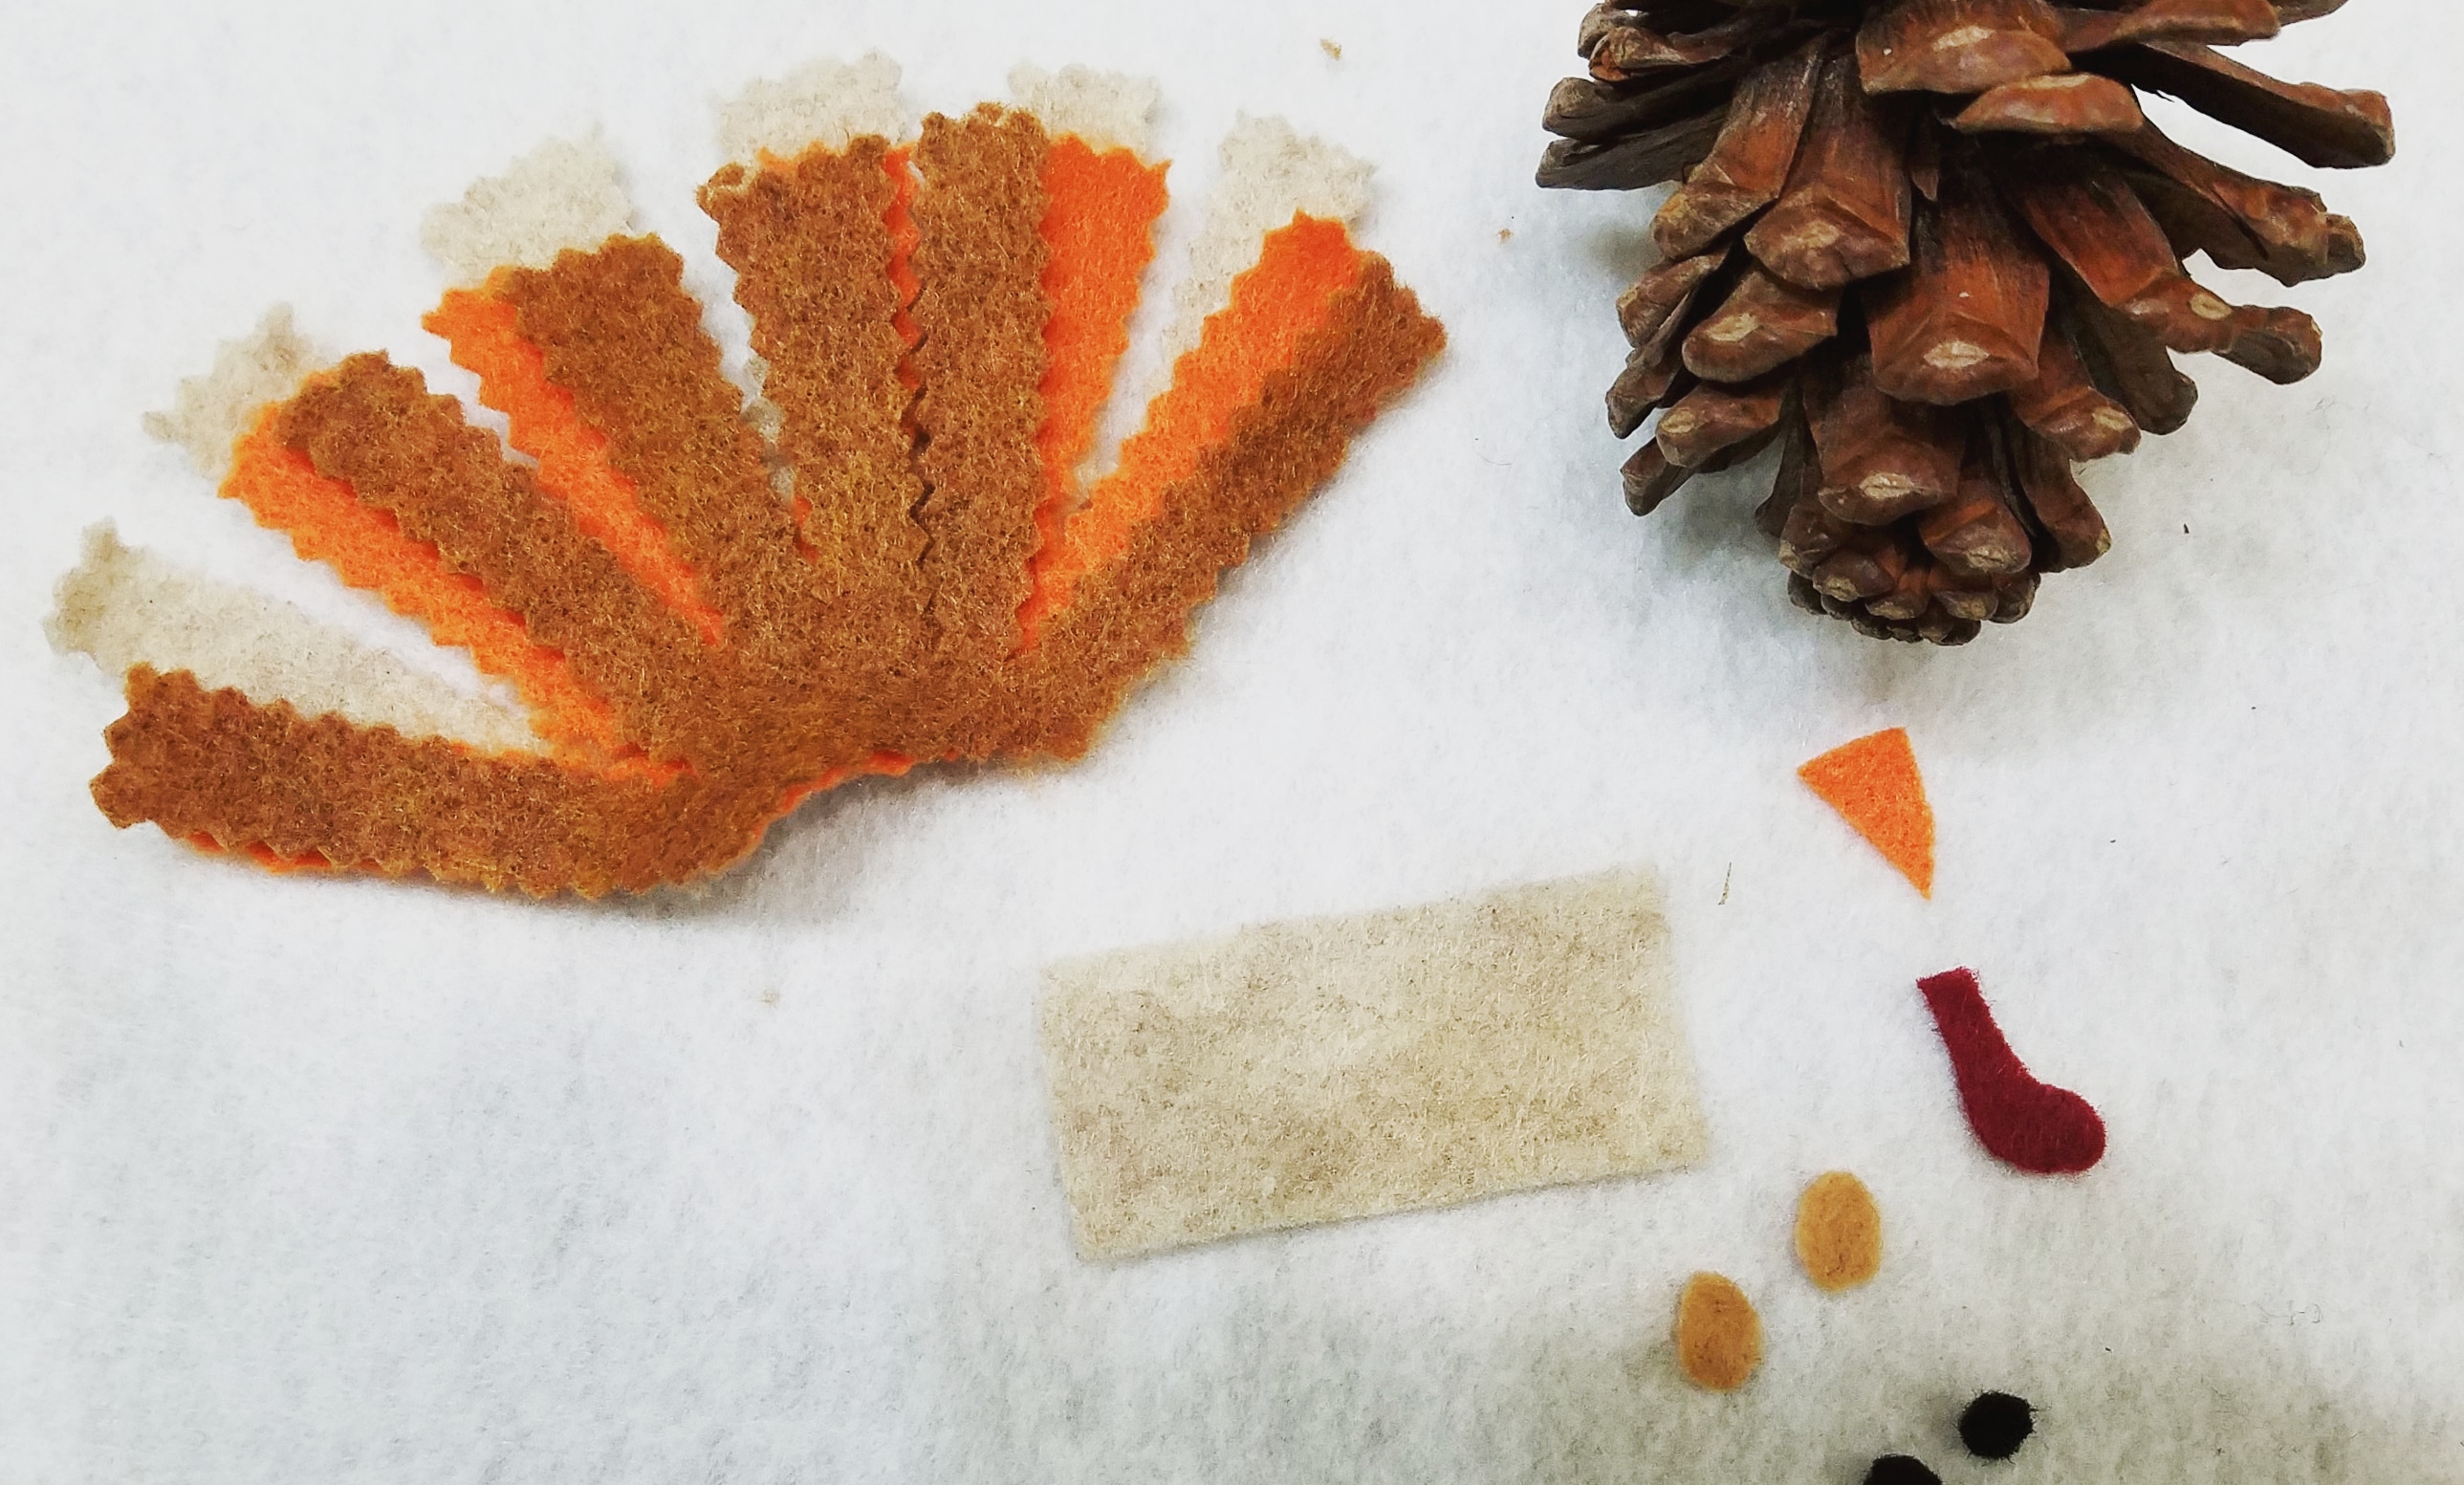
Pinkering shears or sharp scissors
A few sheets of felt in autumn colors
Hot glue gun + glue sticks
Large or small pinecone with open scales
Directions:
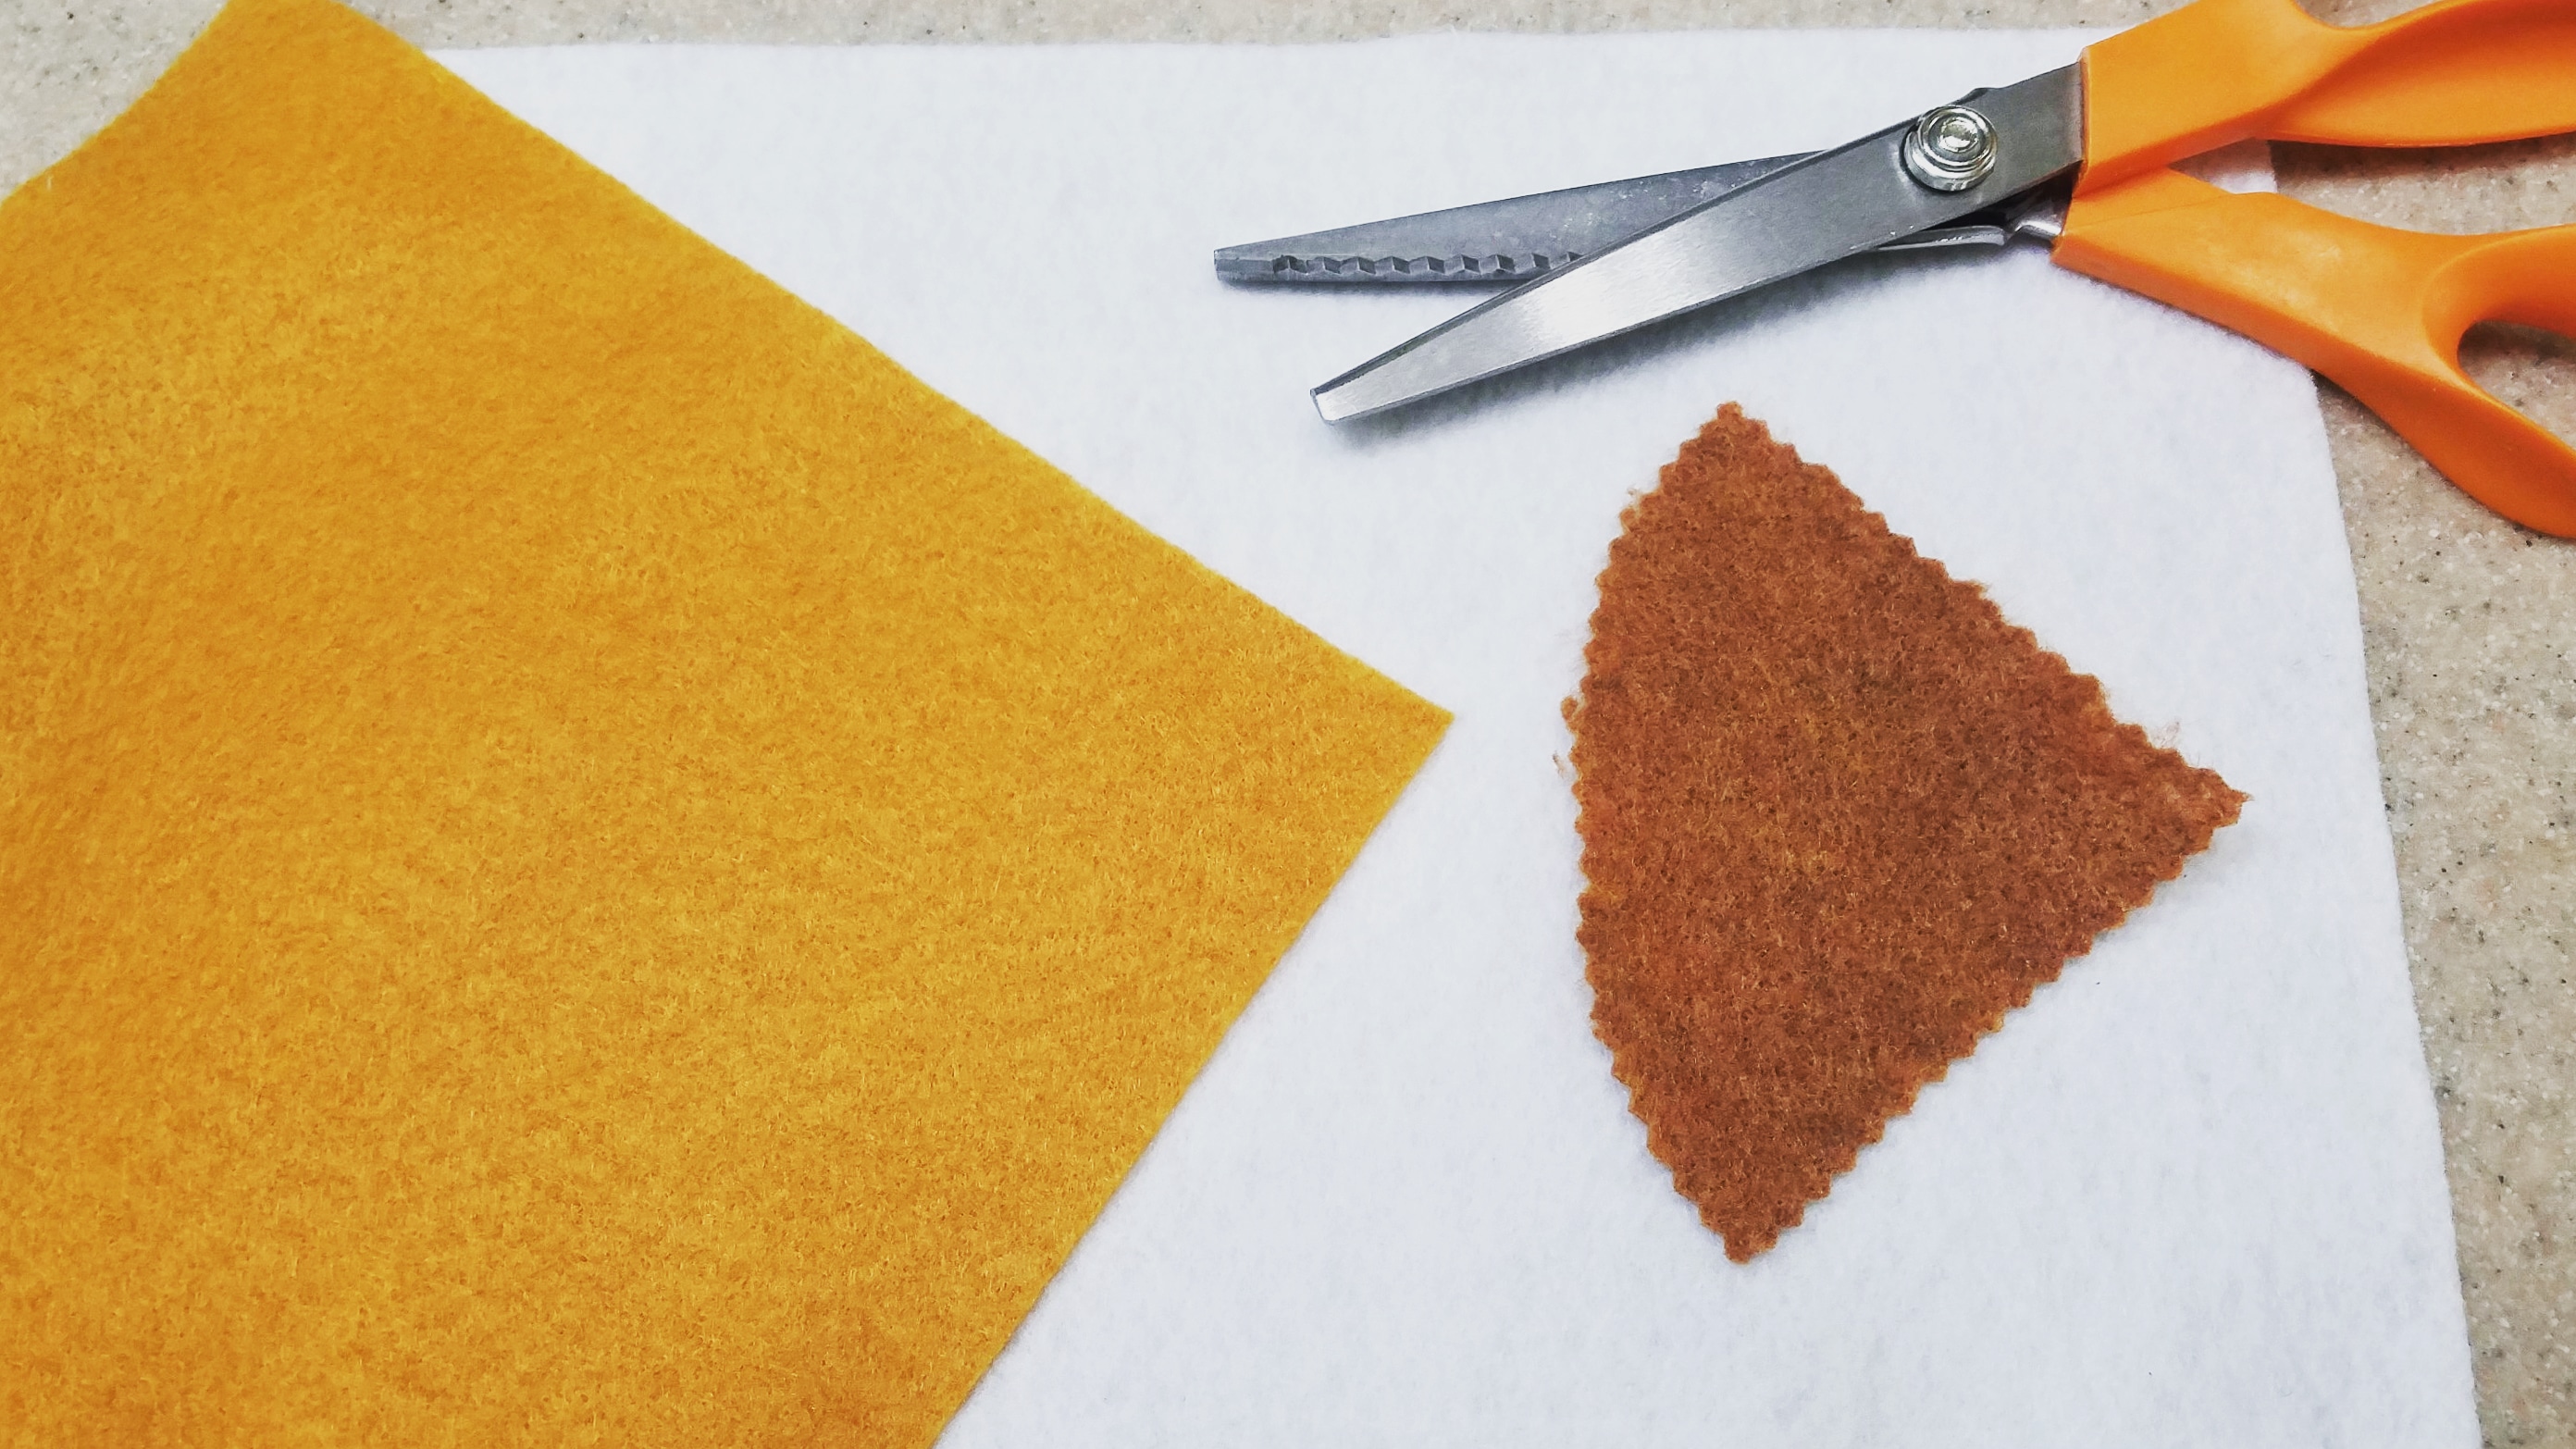
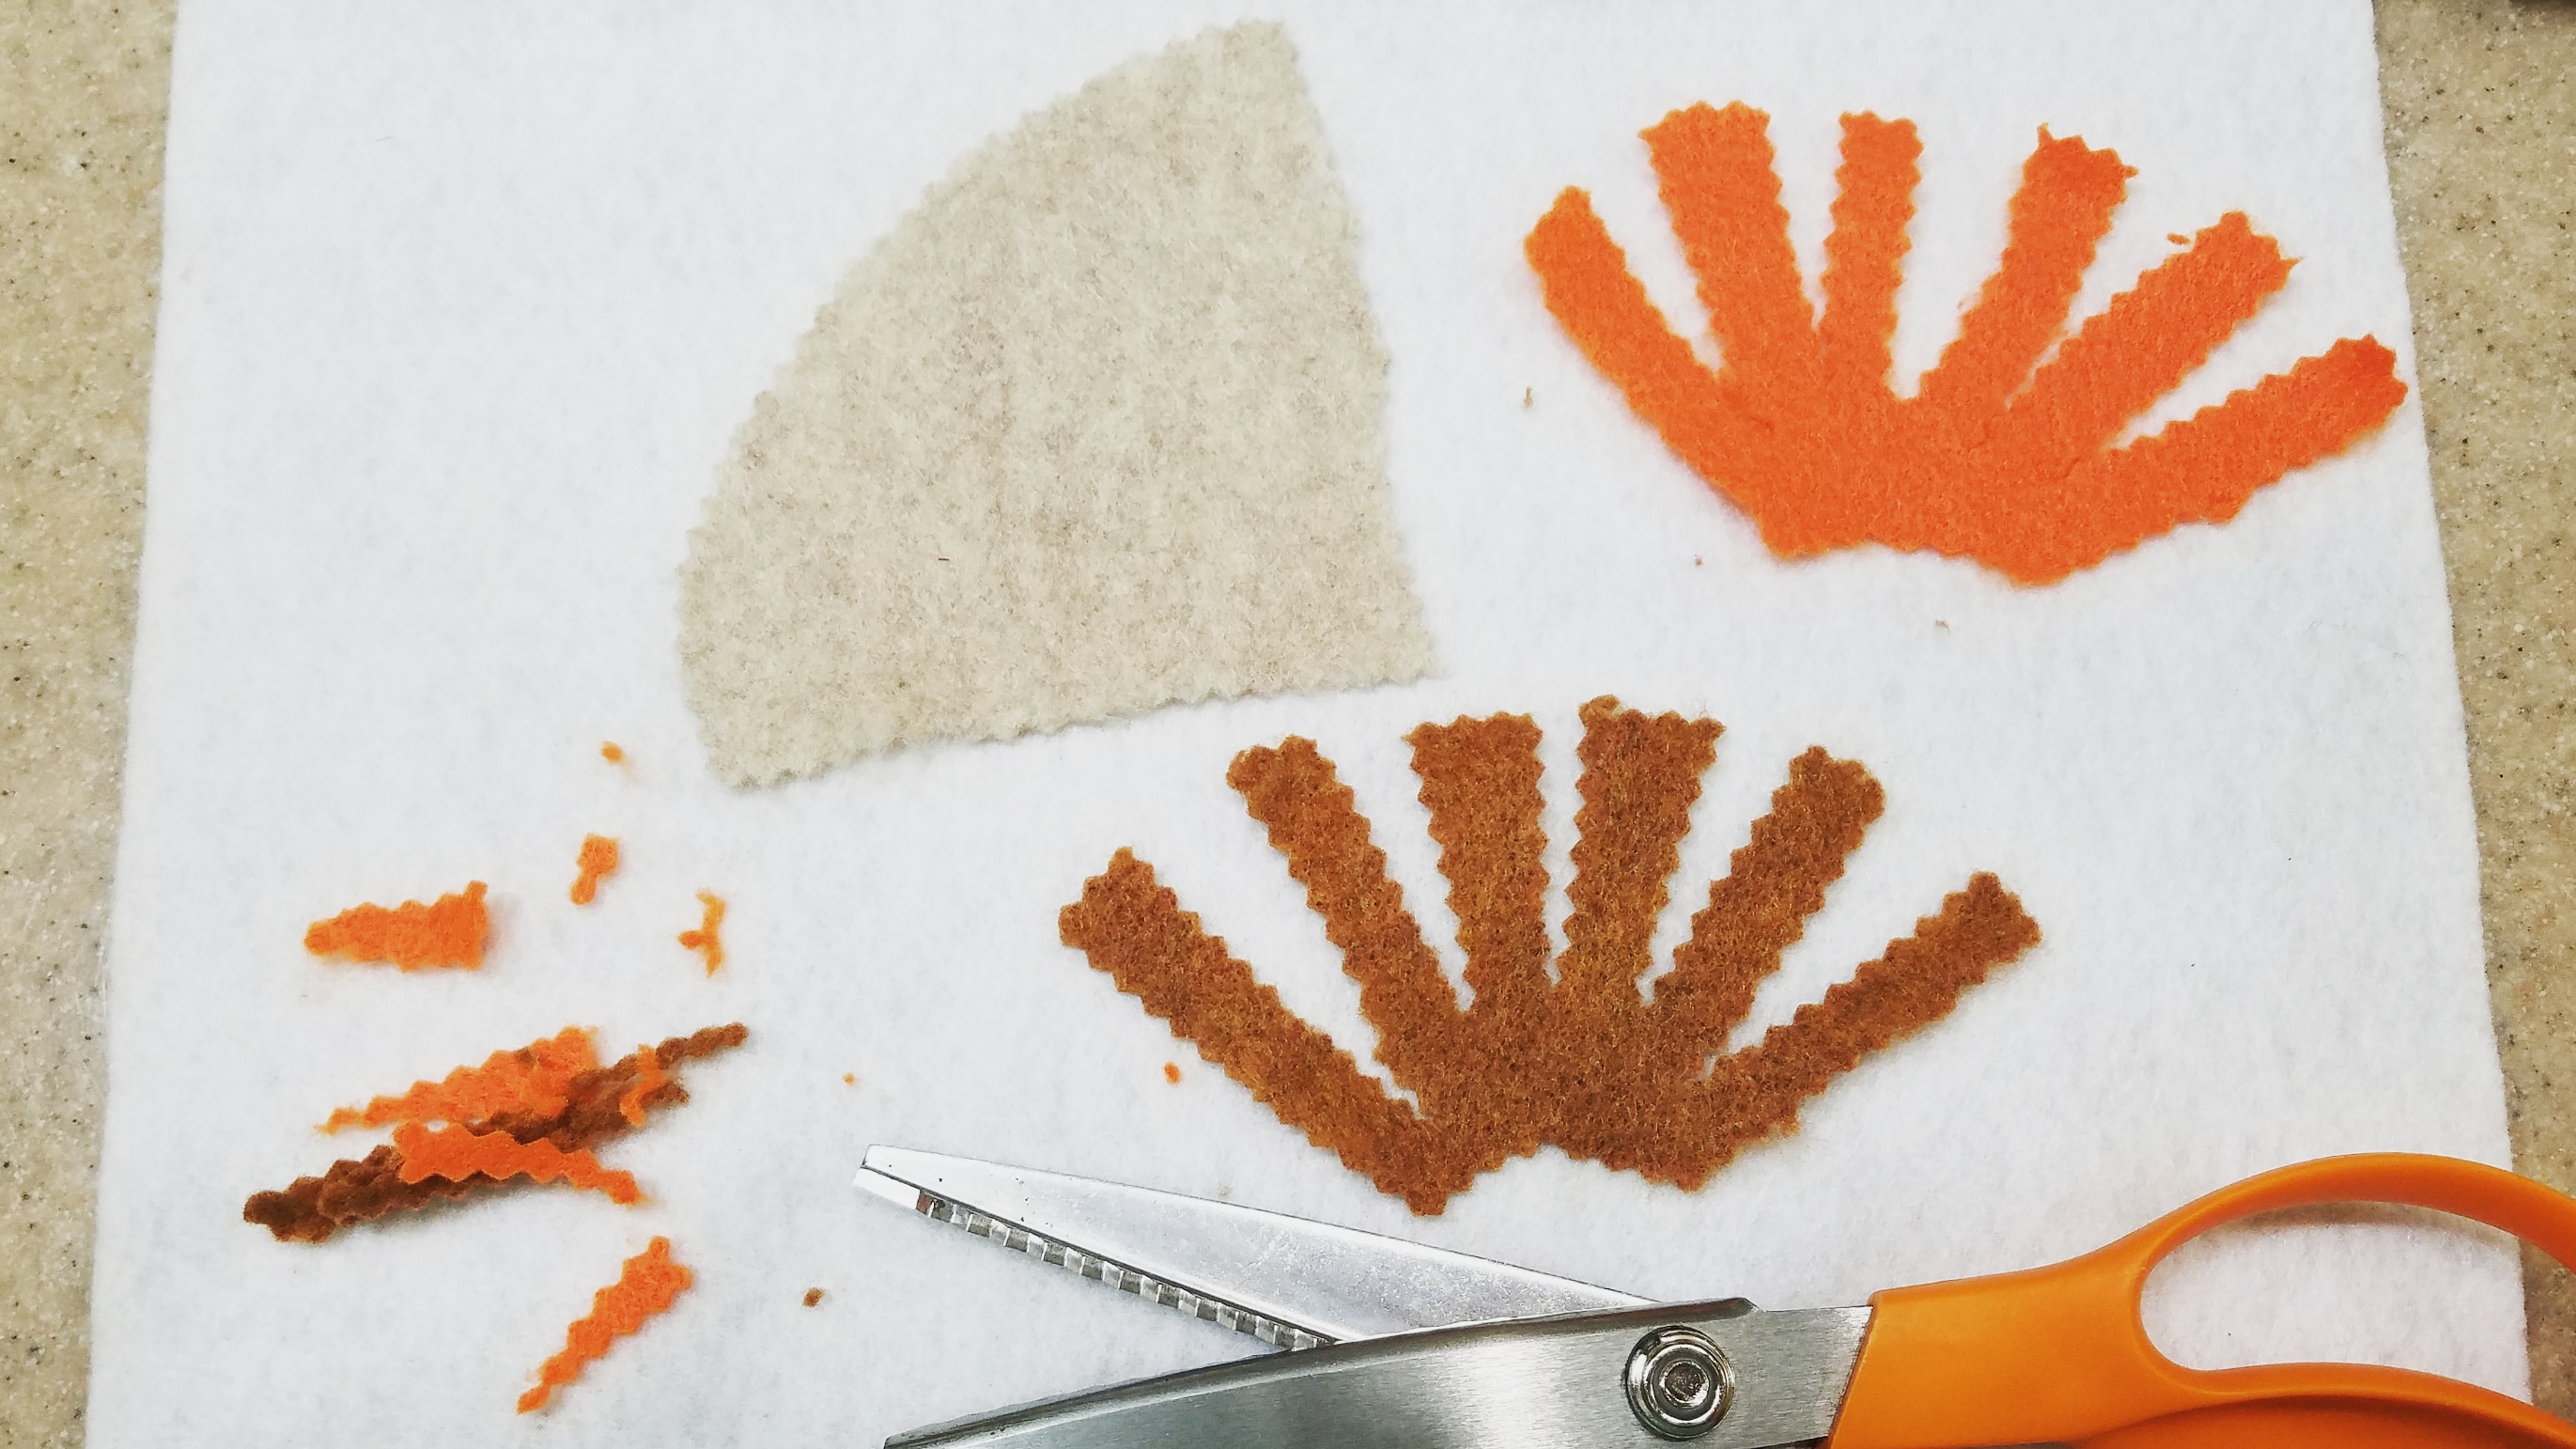
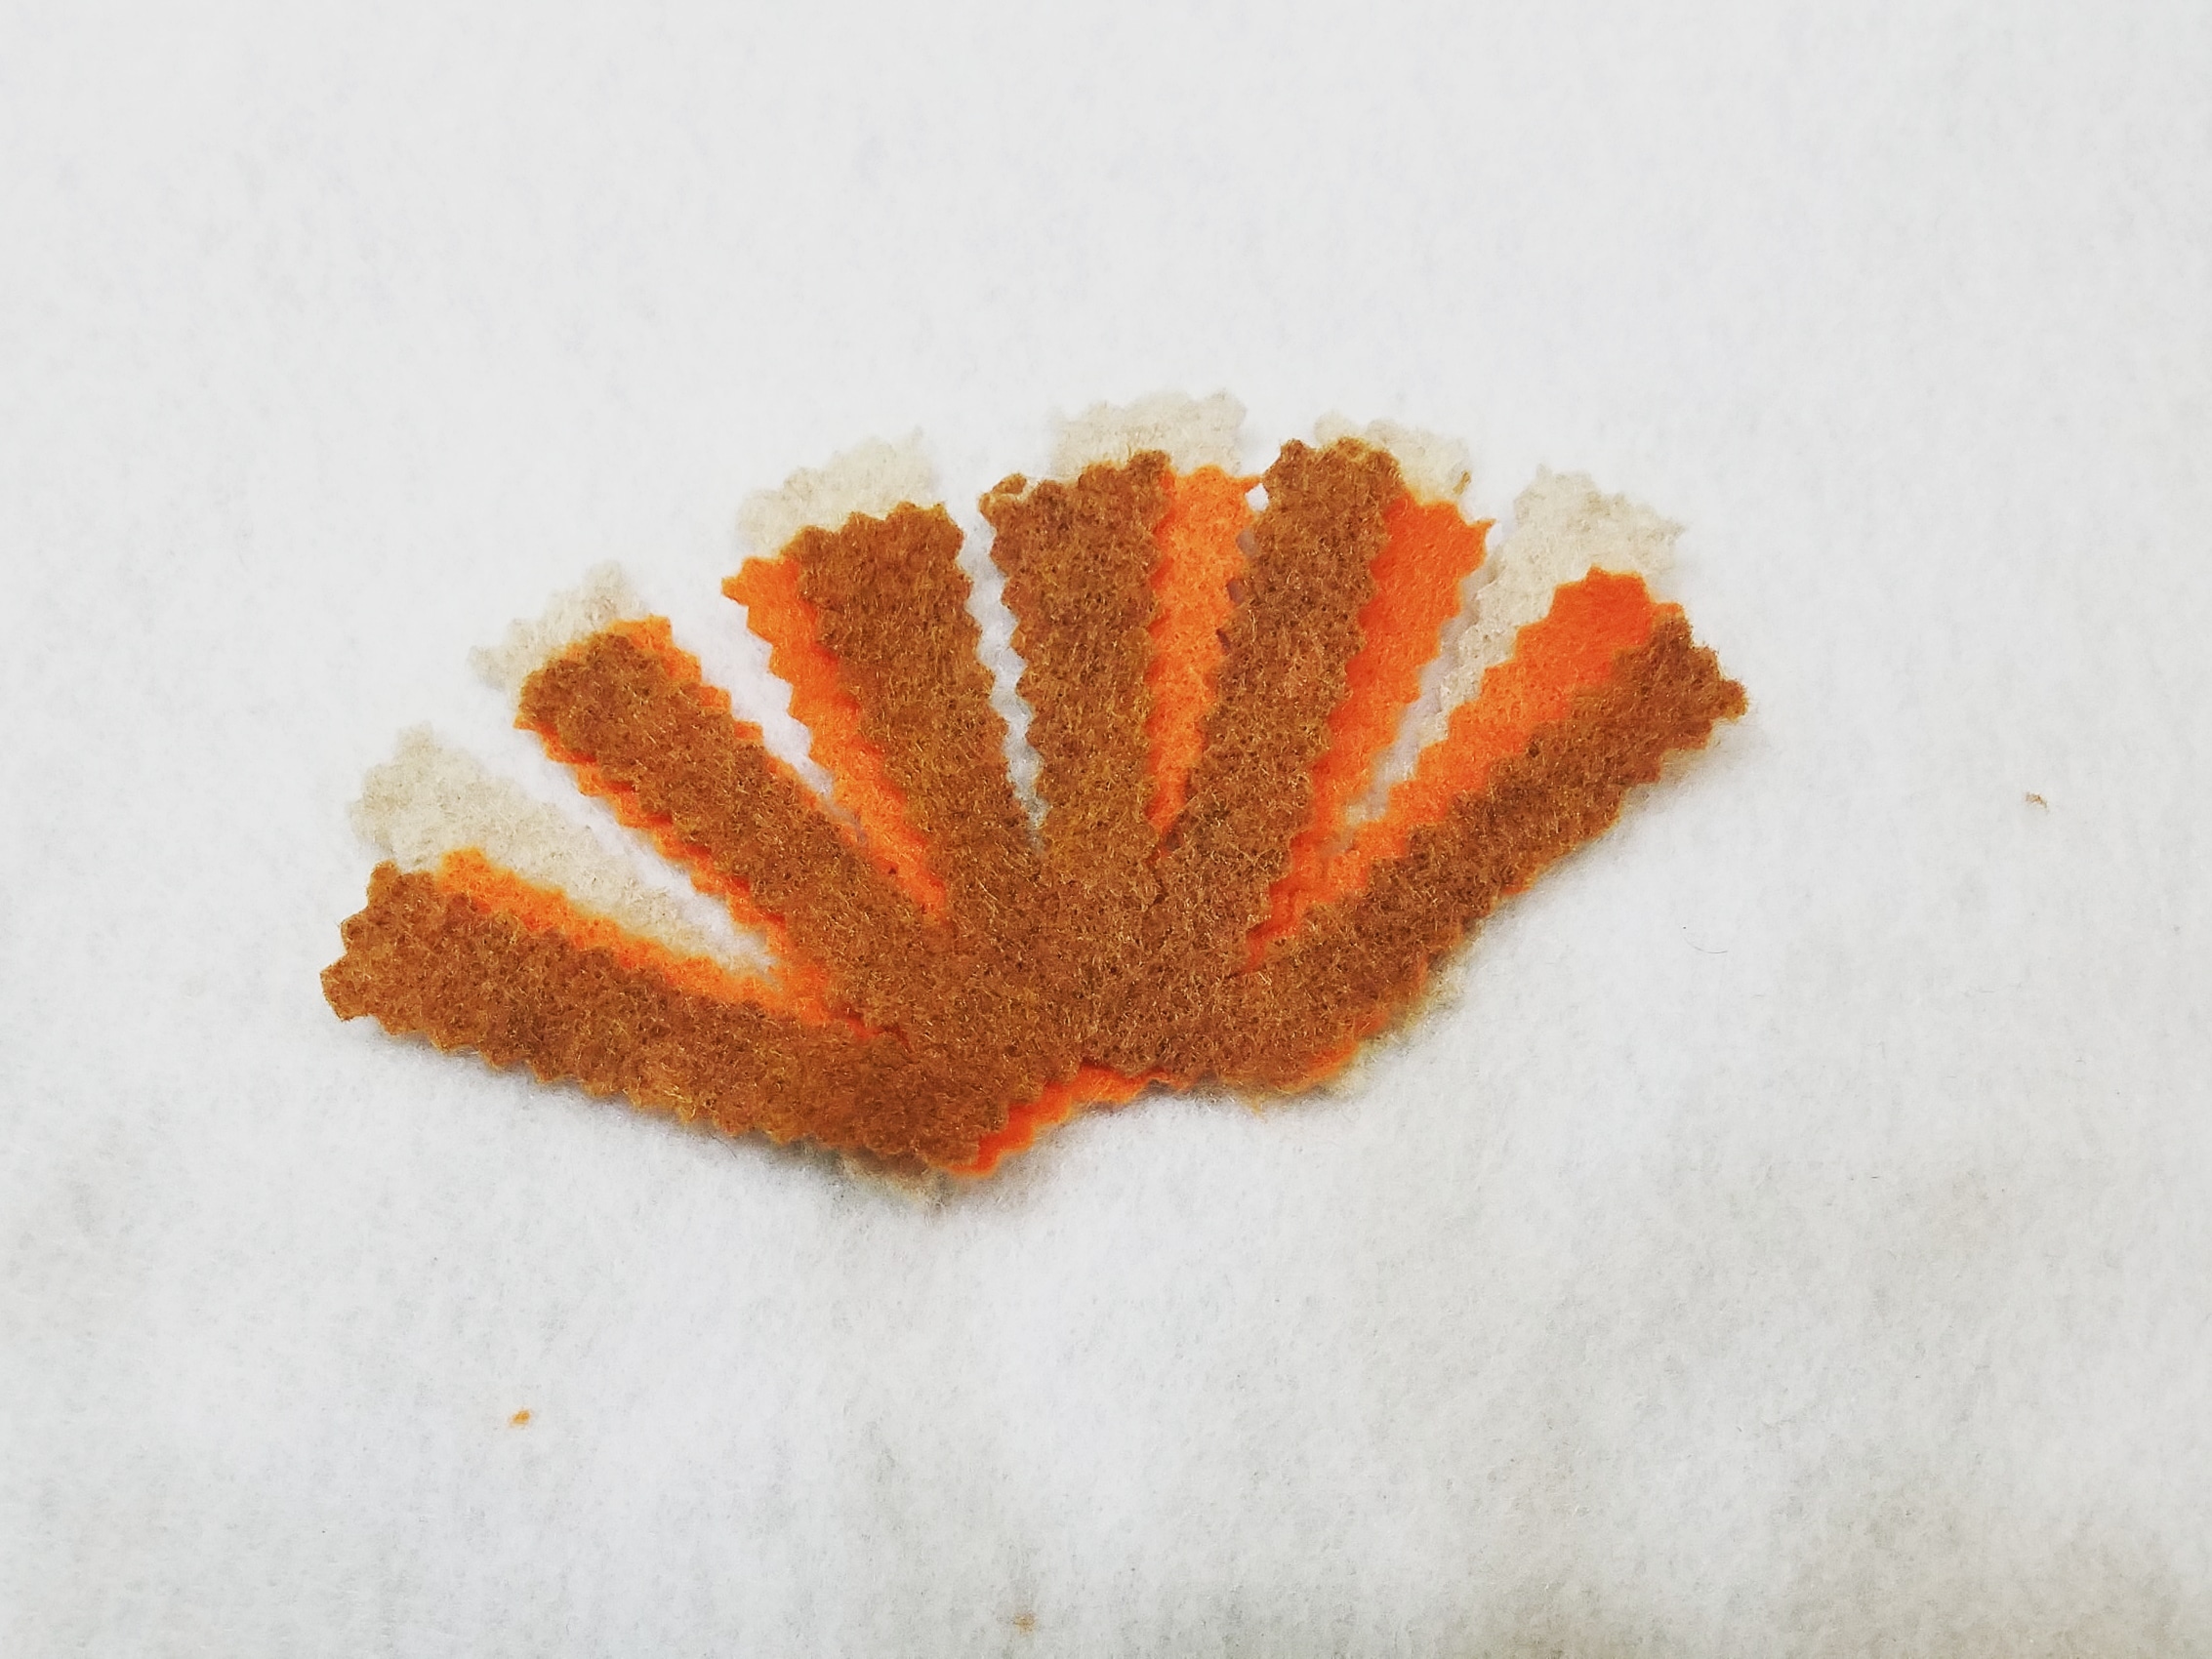
- Cut corners of felt sheets from your chosen colors into a fan shape. (I used 3 for the small turkey’s tail and 6 for the larger turkey’s tail)
- With pinkering shears, cut slits into the fan from the outside towards the center. This will create the plumage, or tail feathers.
- Cut a strip of felt for the turkey’s face in a tan or beige color. For small turkeys, a 1-inch long piece is ideal. For larger pinecone turkeys, use about a 1 ½ inch piece.
- For the eyes, cut out 2 small circles in white felt and 2 smaller circles in black felt. The white circles should be larger than the black ones because they need to show after the black center is adhered.
- Make the beak and a snood (the dangling part on the turkey’s forehead) in your choice of color. I cut out two triangles: one in orange and one in garnet felt.
- Assemble the plumage cut outs between the open scales of your pinecone, using hot glue to adhere the plumage. Then hot glue the felt pieces for the turkey’s face where you imagine the head should be.
- Let dry for a few minutes before handling. Place the pinecone turkeys wherever you need some festive decorations.
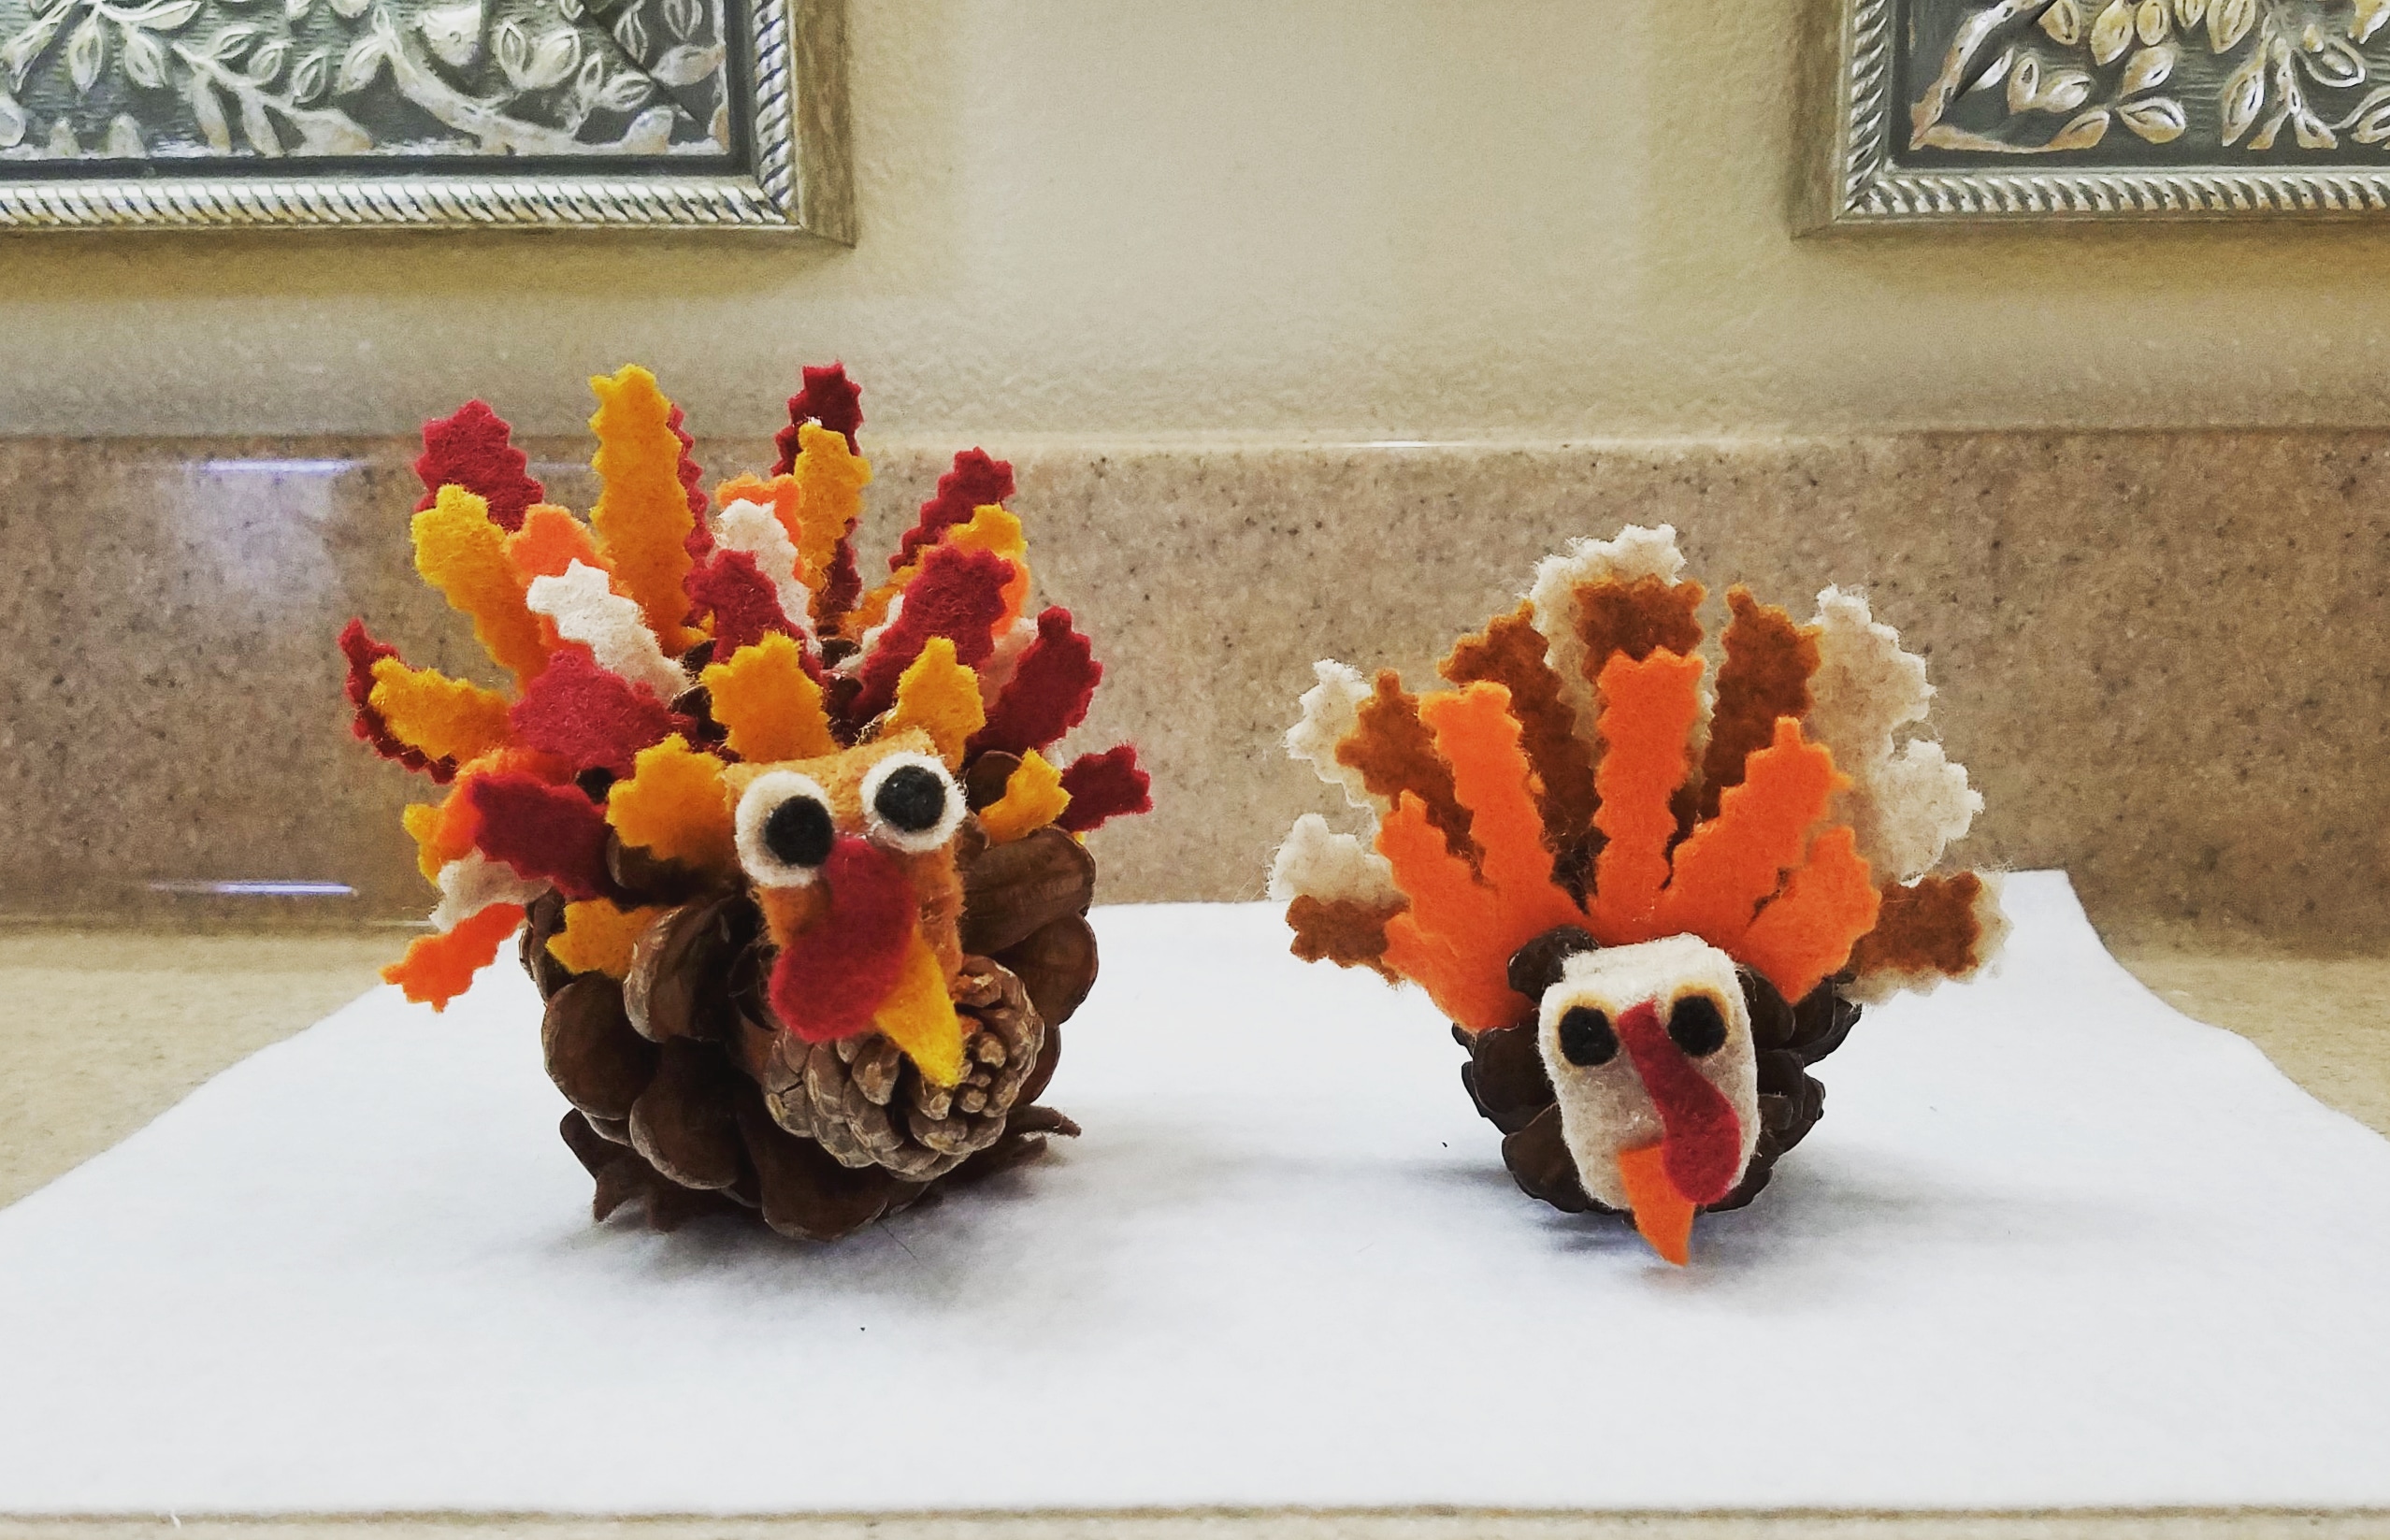
In the most basic of explanations: just cut out some pieces of felt for the turkey’s tail, face, and beak and glue it onto the pinecone. If your shapes aren’t perfect, it’s okay. The decoration is supposed to be rustic and whimsical so don’t overthink it.
Let me know if you give this easy craft project a try. Also, do you want to see more DIY projects here on my blog?
Happy Crafting!