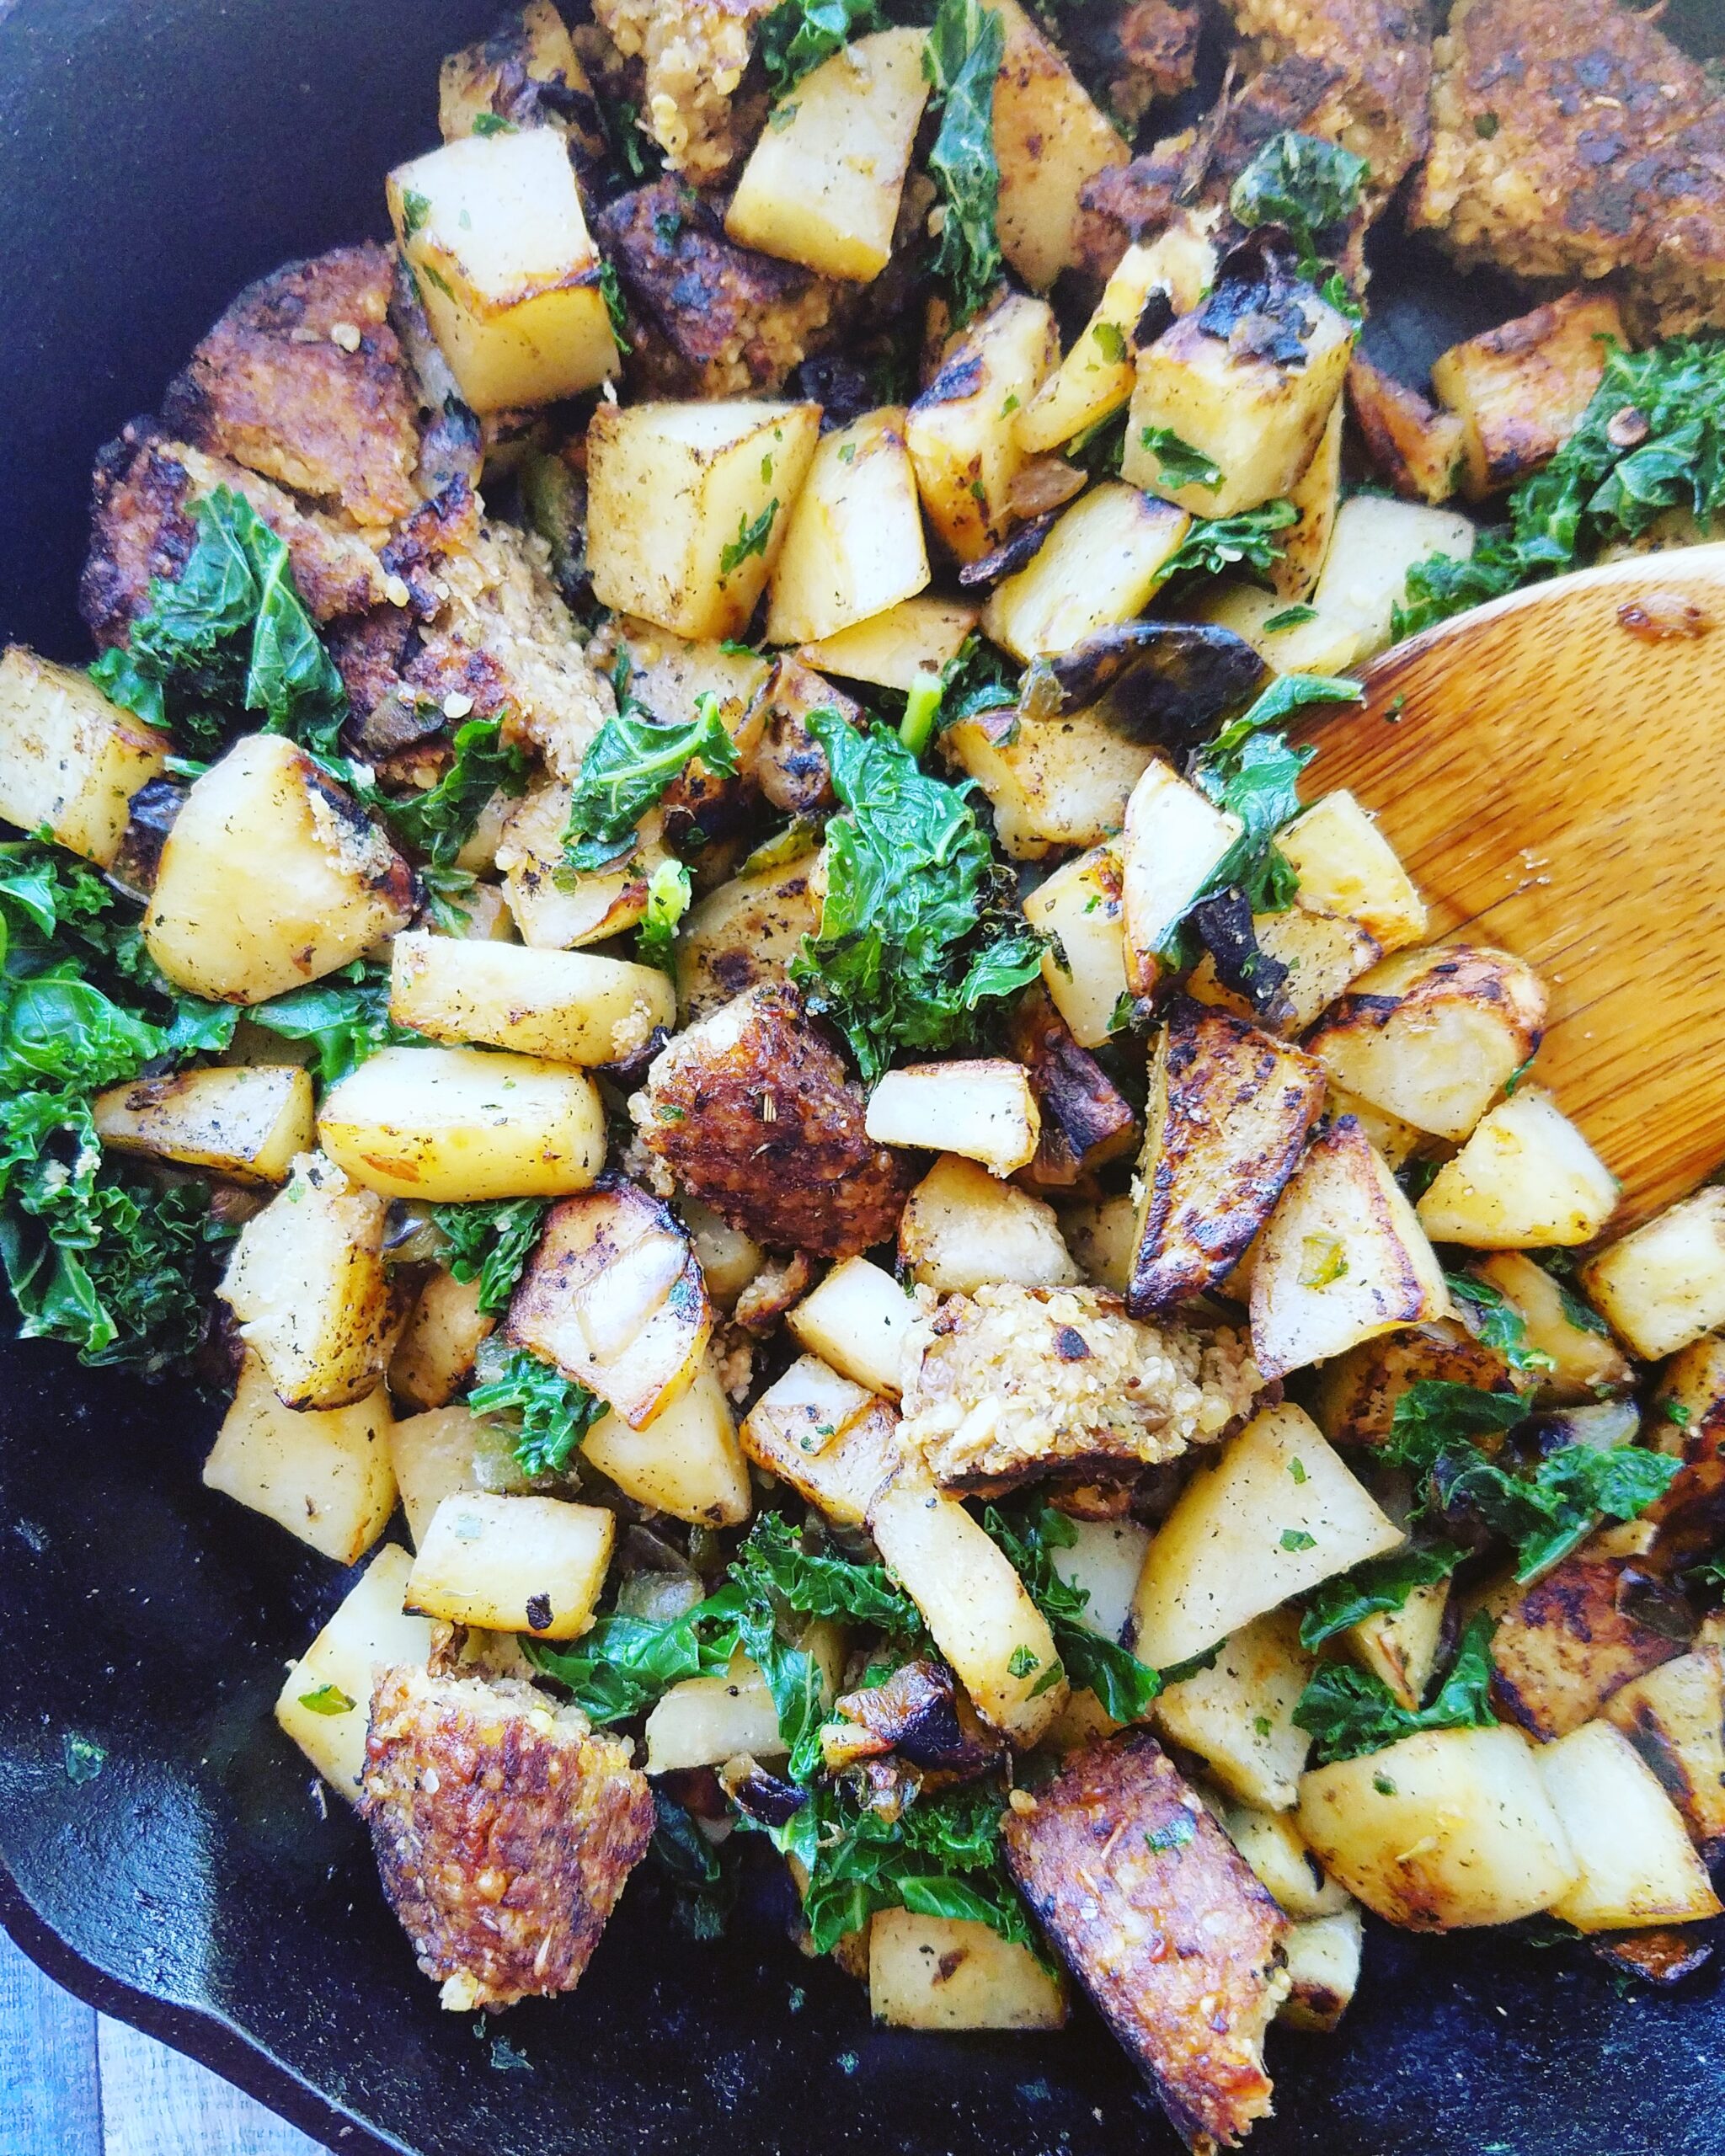
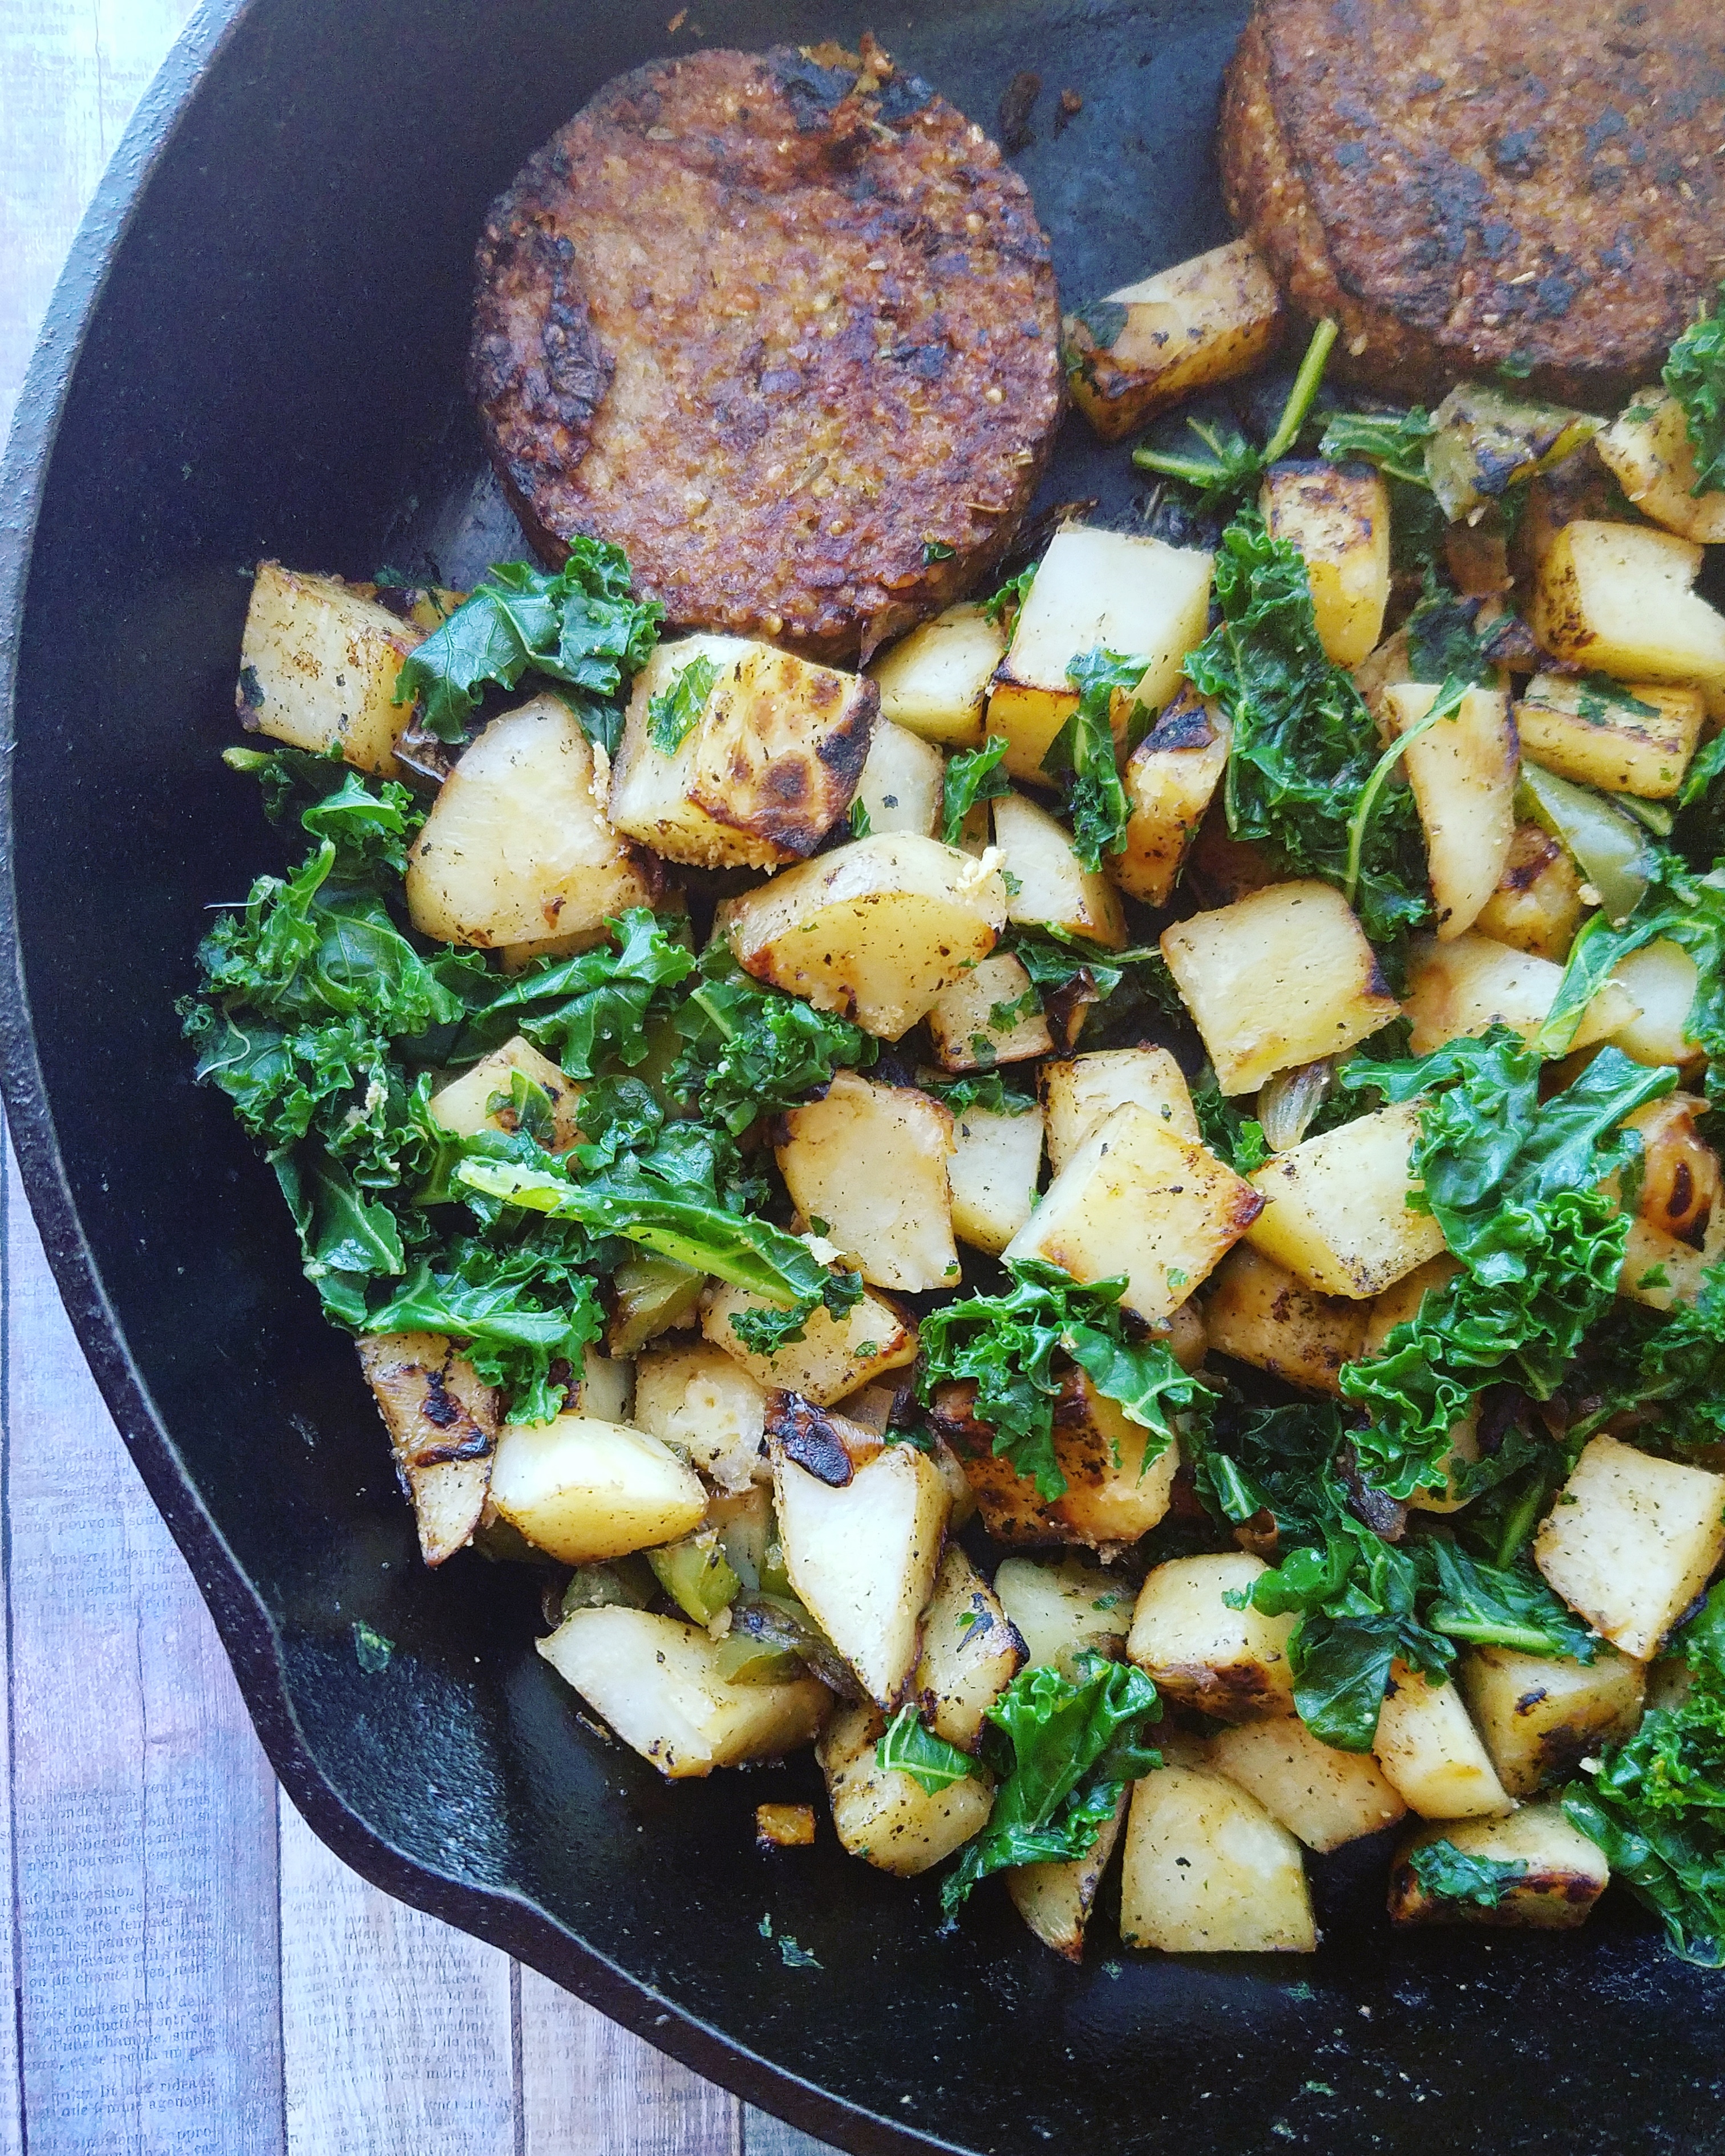
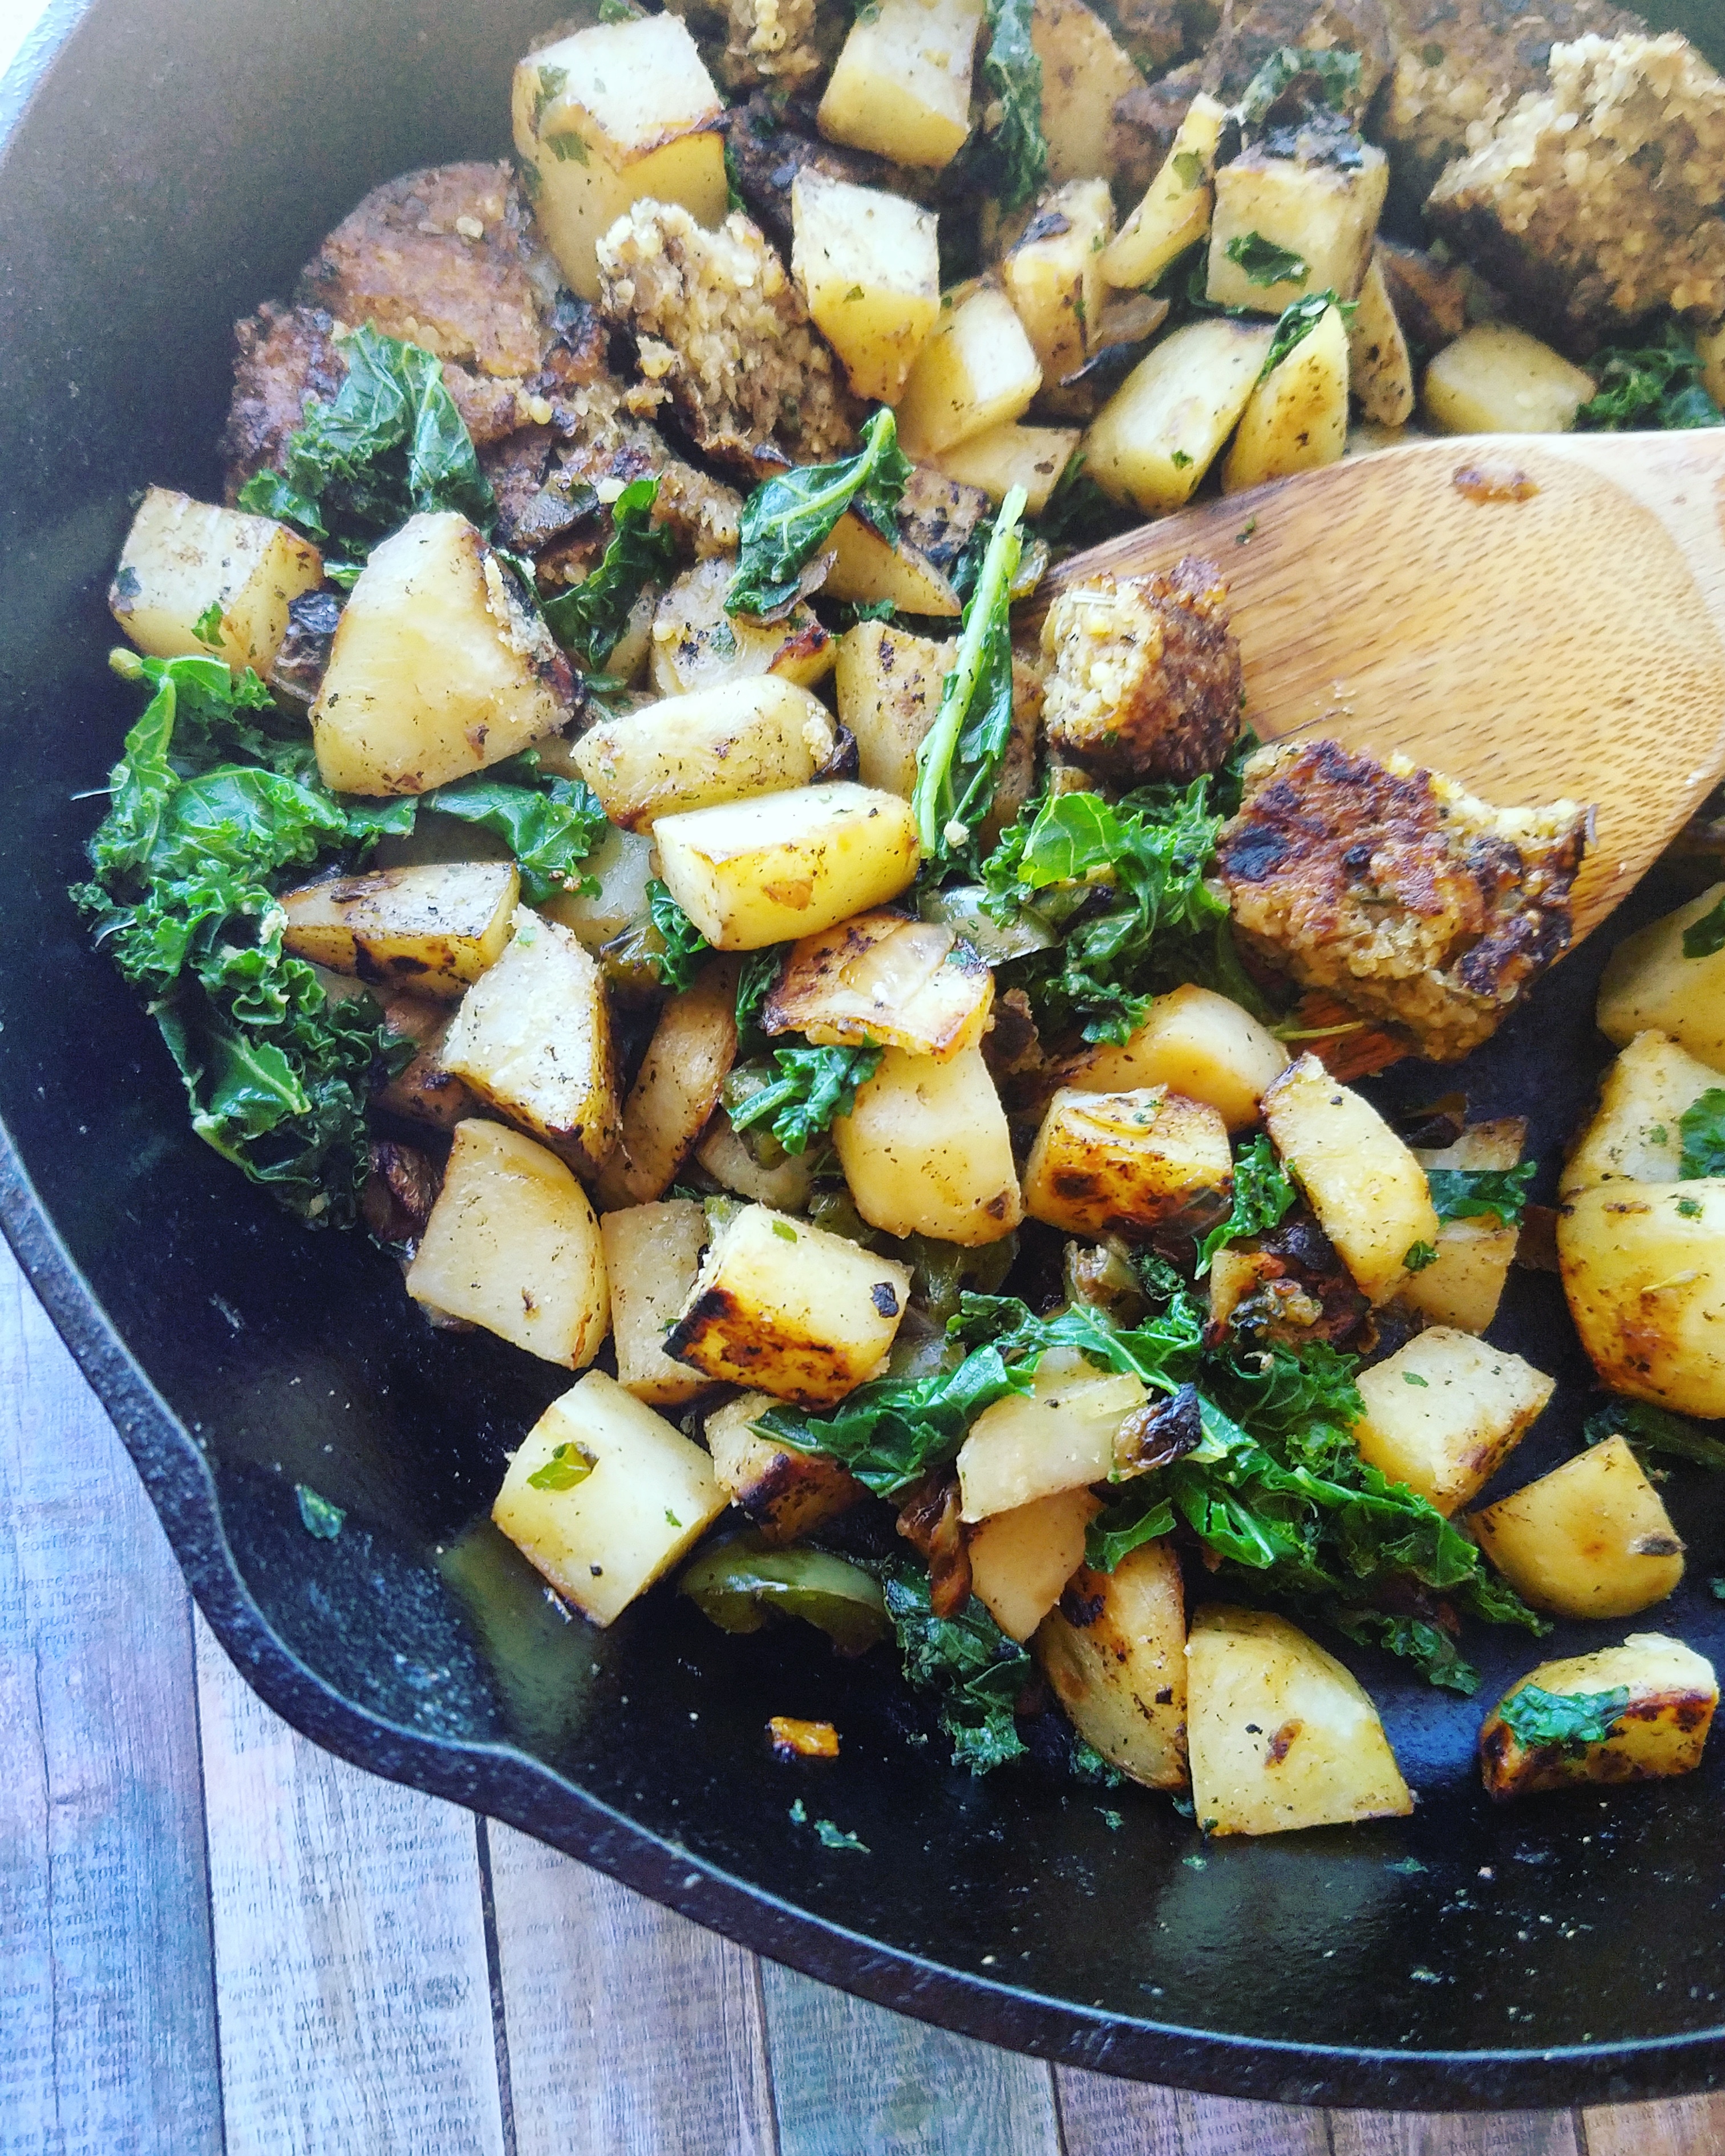
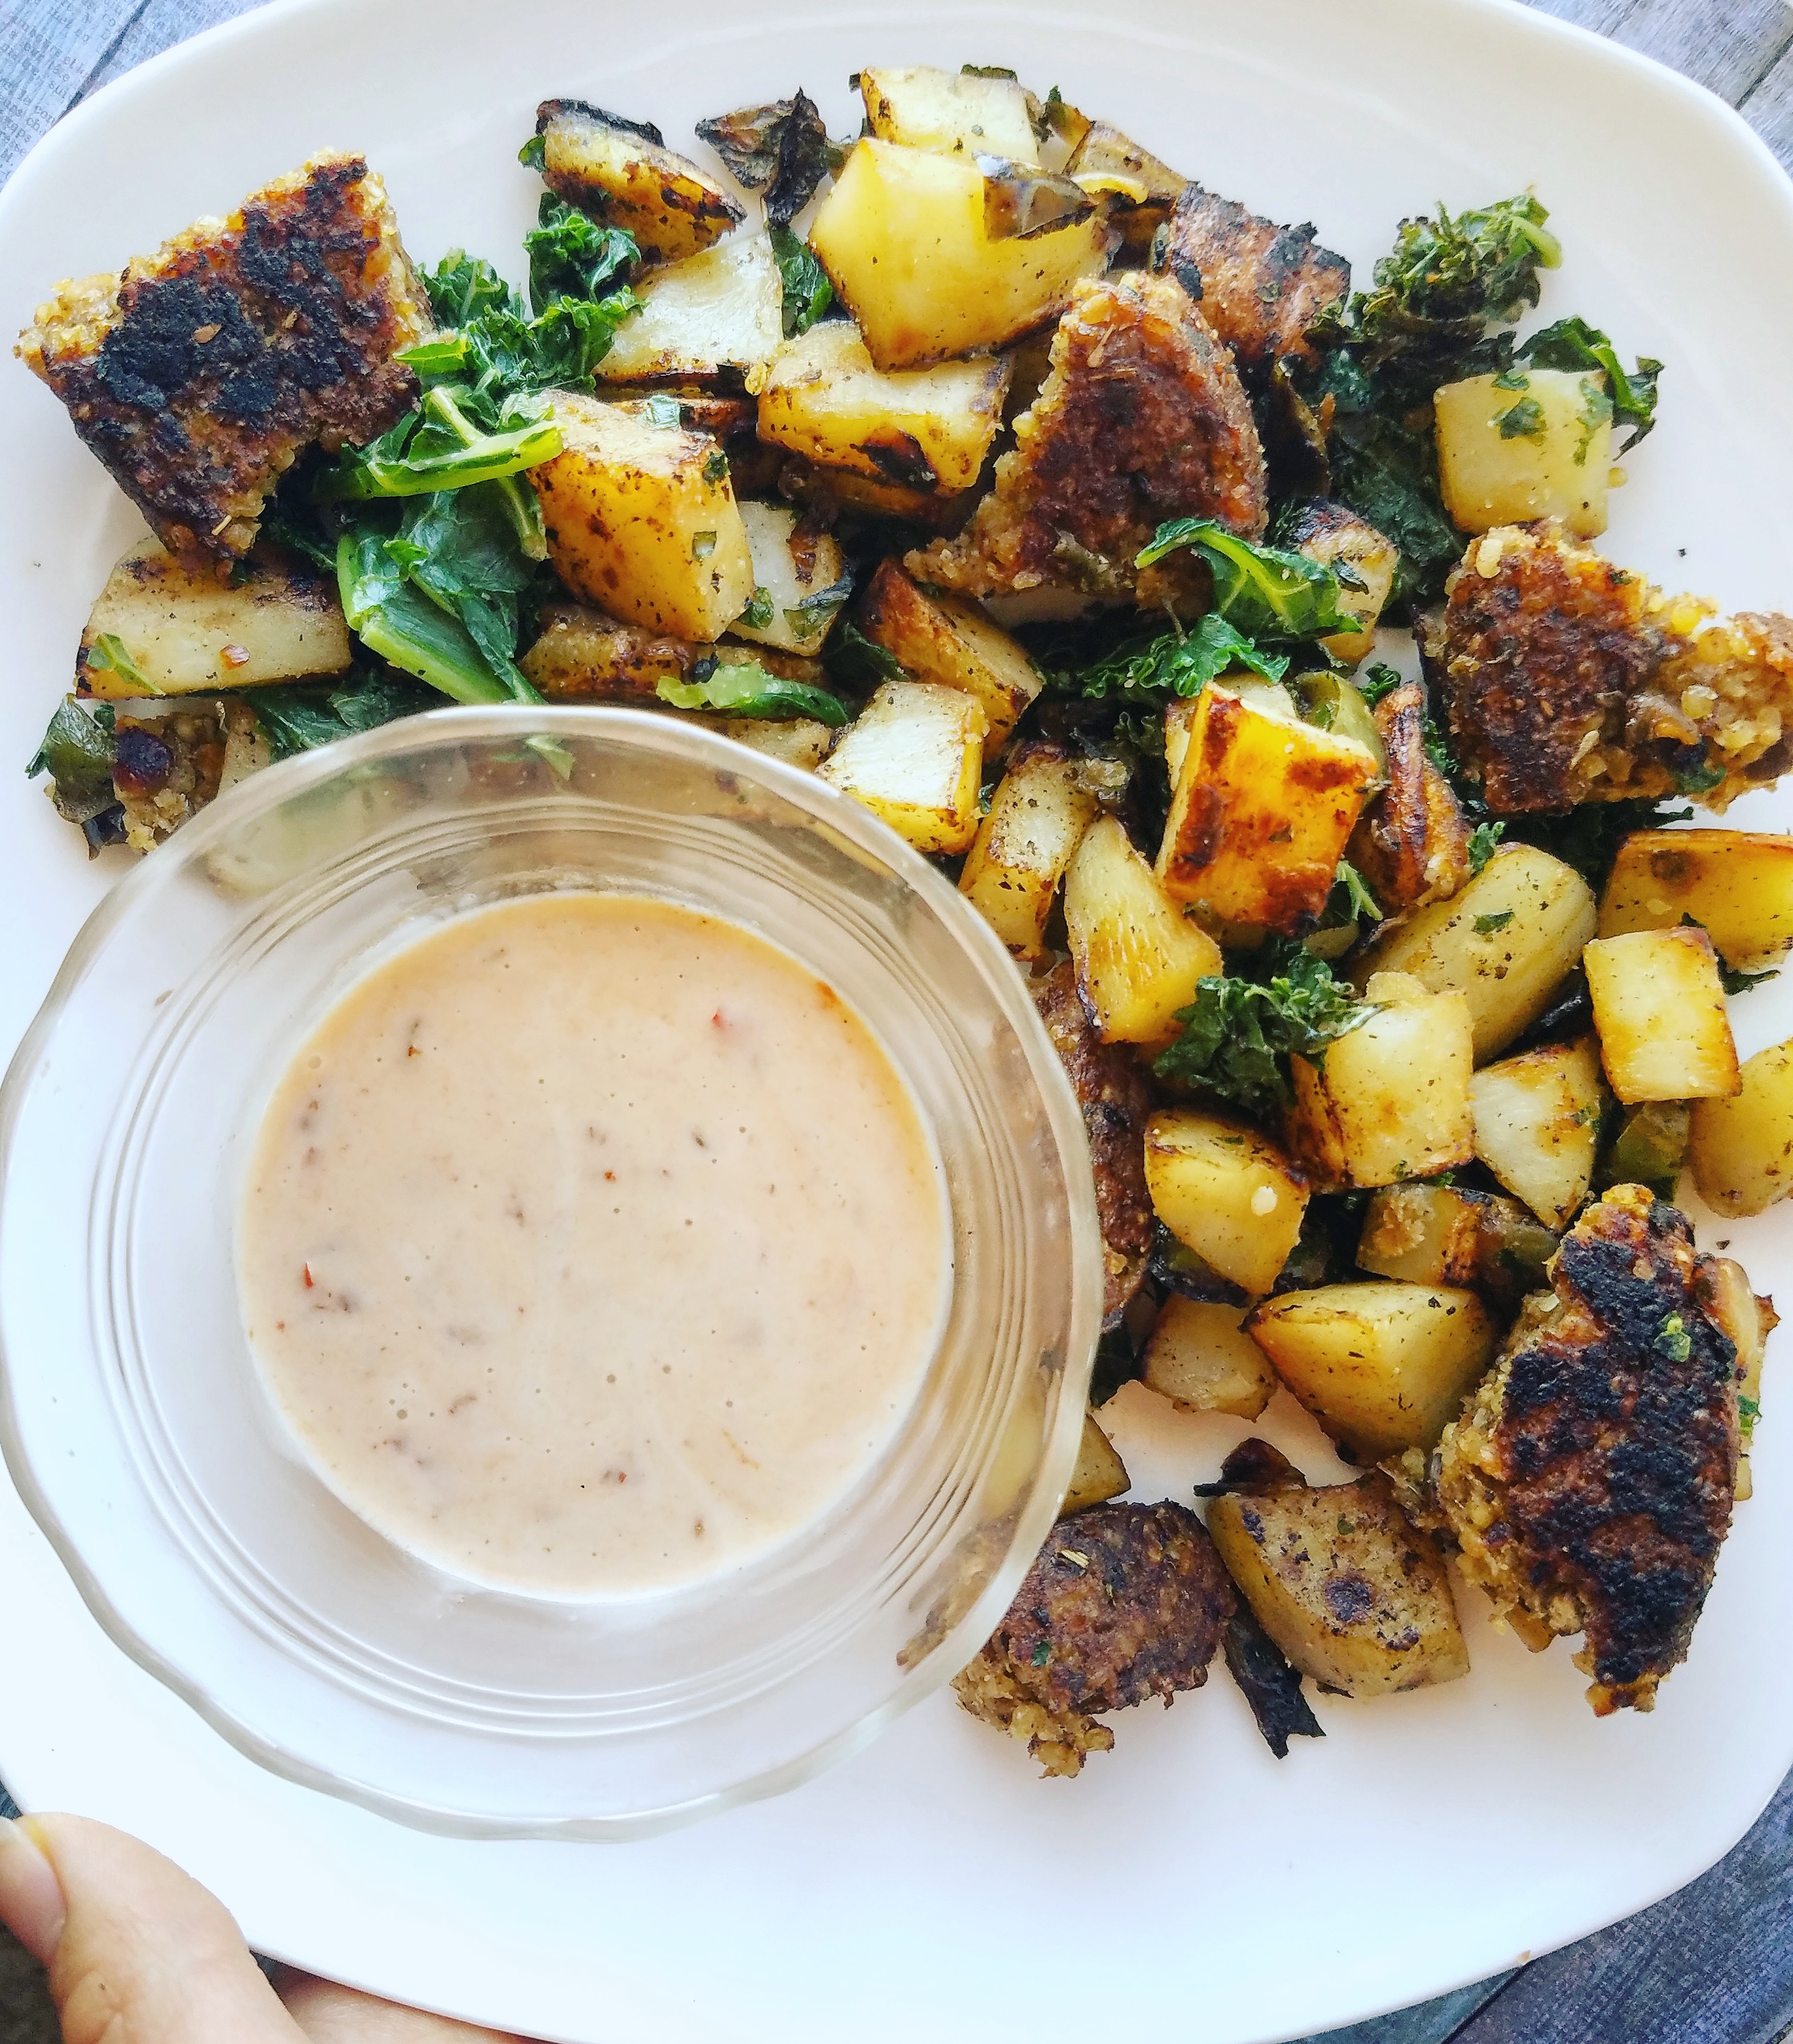
Tender skillet potatoes are a hearty companion to veggie sausage, and kale in this savory skillet dish.
What is a food you’ve been afraid to eat but recently decided to incorporate? I’ve learned many people tend to have what they deem “good” foods and “bad” foods. I don’t think it is fair to write off vegetables or food groups needlessly.
I think what’s important is to make meals with foods in a way that is beneficial to your health and well-being.
If you guys have been following me along since the beginning of this blog, then you may know I believe in cycle-syncing. This is lifestyle created by Alisa Vitti, the author of WomanCode, which involves eating and exercising based on where you are in your menstrual cycle. You can read about how I got started with it and how it helped me here.
Let’s circle back to what I was talking about initially: good and bad foods. So, during my luteal phase, I lean towards roasted, hearty dishes. Earlier this year I began craving white potatoes during this phase. While I do like potatoes (who doesn’t?), they were a feared food. I’ve always heard they are nothing but carbs and mess with your blood sugar.
Personally, I did feel the effects of white potatoes on my blood sugar. Though, the little root vegetable is a host of some valuable nutrients so I wanted to find a way to alleviate that problem. The blood sugar spike can be mostly avoided by pairing potatoes with other substantial ingredients or reducing their starch.
Yes, you read that right. It is possible to reduce the starch in potatoes!
Here is how:
It’s no secret potatoes are super starchy. Though, there is a way to cut down that starch and get crispier potatoes! If you can plan ahead, peel and chop your potatoes and cover them in water. Let them soak in a water bath in your fridge for at least 24 hours. If you soak them longer, you can change out the water, too.
Then, when you’re ready to cook, drain the water and rinse the potatoes. Pat them dry and cook up in a skillet or in the oven. The interiors will still get soft and fluffy but the outside develops a crispy coat. I’ve tried this method for cooking potatoes different ways and I notice a difference in how I feel after eating them. My blood sugar isn’t spiked and I satisfy my craving for potatoes. WIN-WIN!
Give this method a try by cooking some homemade oven fries or the following skillet country potatoes with veggie sausage. 😉
Spicy Veggie Sausage and County Potatoes
Recipe Type: Brunch
Author: Melanie
Prep time:
Cook time:
Total time:
Serves: 2 servings
Tender skillet potatoes are a hearty companion to veggie sausage and kale in this savory skillet dish.
Ingredients
1/3 cup onion, finely chopped
1/3 cup green bell pepper, finely chopped
2 ½ cups, russet potatoes, chopped into cubes
¼ tsp garlic powder
2 Hilary’s Spicy Veggie Breakfast Sausages
1 ½ cups frozen or fresh kale, chopped
Salt and pepper
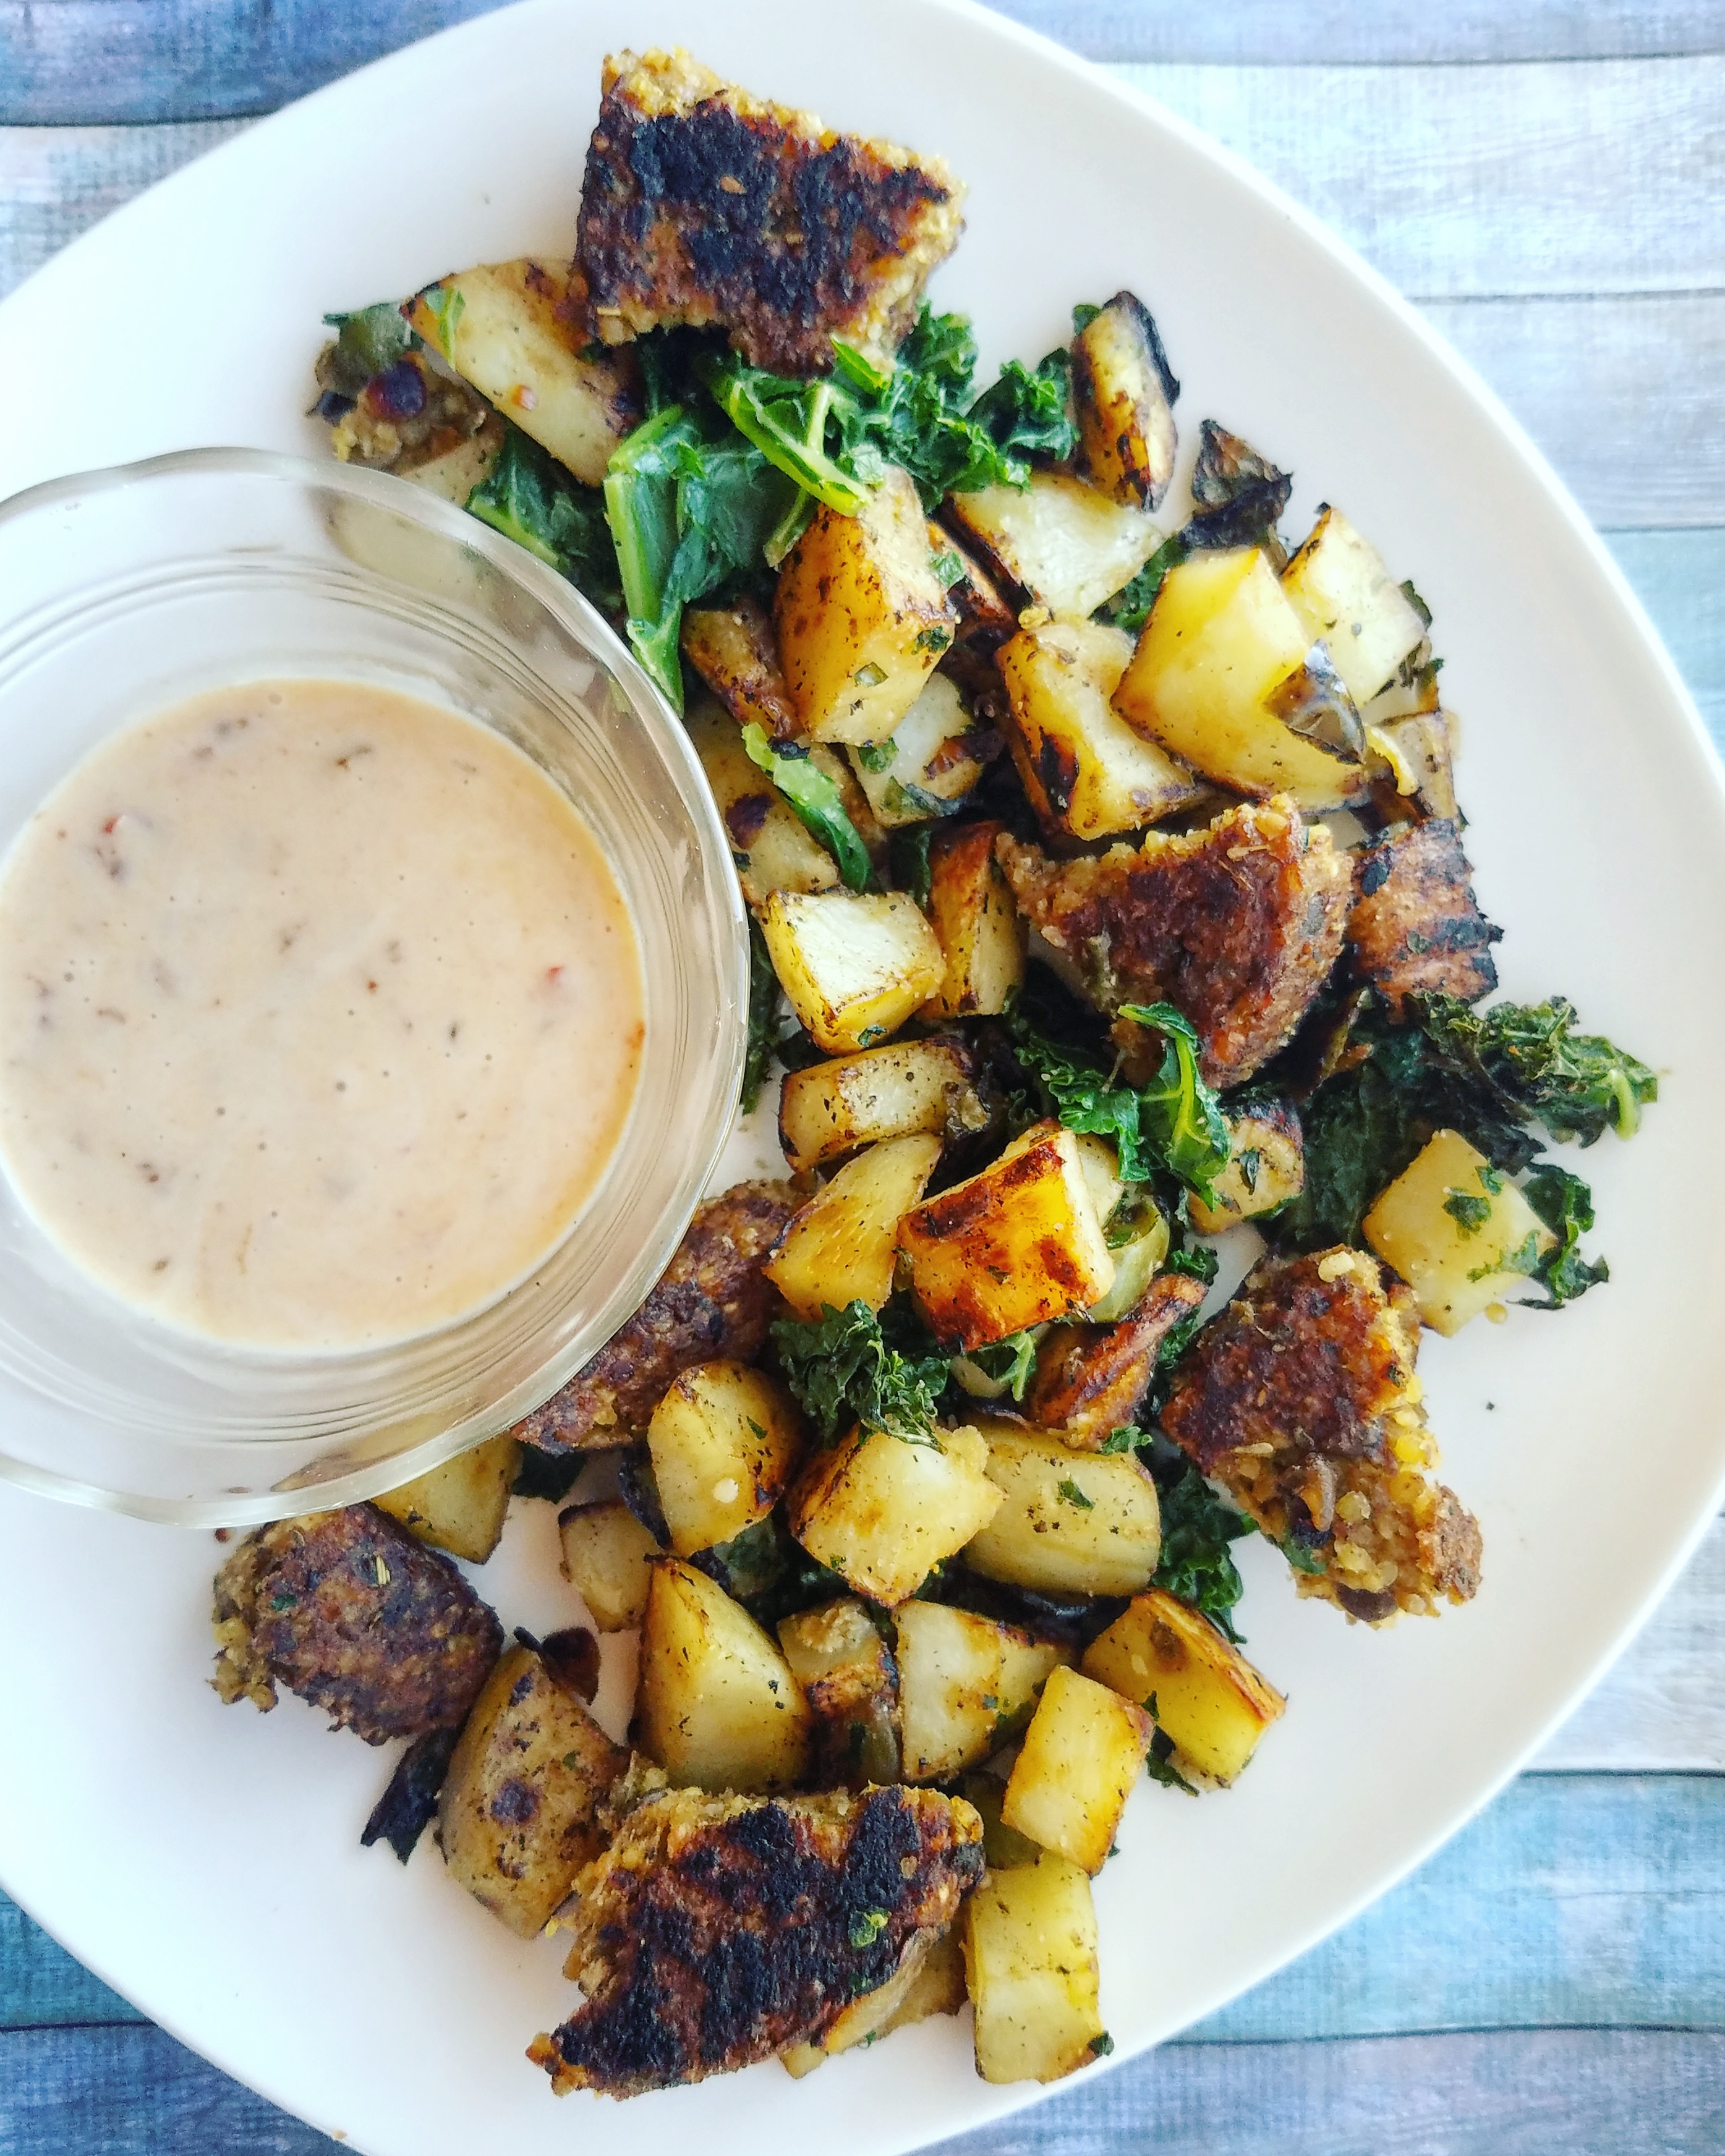
Optional: Spicy Mayo, for serving (see notes)
Instructions
In a cast-iron skillet, on medium heat, sauté the onion and green bell pepper with a pinch of salt until soft—about 5 minutes.
Add the chopped potatoes, garlic powder, and another couple of shakes of salt. Don’t skip this or the potatoes won’t be nearly as tasty!
Cook until the potatoes start to brown and then stir them around. When it looks like the potatoes are slightly browned on the outside, place the veggie sausages into the skillet. Then, cover the pan with a lid so the potatoes can cook through. I like to let mine get nice and soft on the inside but cook time will vary depending on how small you chopped the potatoes. Cook time is anywhere from 20-40 minutes.
While the potatoes cook, you can make the optional spicy mayo.
The potatoes are ready when you can pierce a potato cube with a fork. Taste it to see if it is tender enough for your liking and, if so, stir in the frozen or fresh kale. This only takes about a minute so the kale can wilt and soften. Sprinkle some fresh cracked blacked pepper over it all and enjoy!
Notes
Spicy Mayo two ways:[br][br]Chipotle Mayo[br]2 tbsp chipotle in adobo sauce, finely chopped[br]4 tbsp vegan mayo or mayo of choice[br][br]Kimchi Mayo[br]4 tbsp spicy kimchi with brine[br]3 tbsp vegan mayo or mayo of choice[br][br]The spicy mayos will not be smooth but the flavors will still be excellent. This is how I enjoy them but you may also blend these us to make them smooth.
3.5.3251
The veggie sausage and country potatoes serves 2 modest portions as a meal or side. I like to eat this skillet dish as a meal with the spicy mayo drizzled on top. You can eat it with a spinach and tomato salad (yum!) or eggs, if you eat eggs.
Thanks for reading and thank you to Hilary’s for allowing me to test out some of their plant-based patties. You can find these in a store near you using the store locator on the Hilary’s Eat Well website!
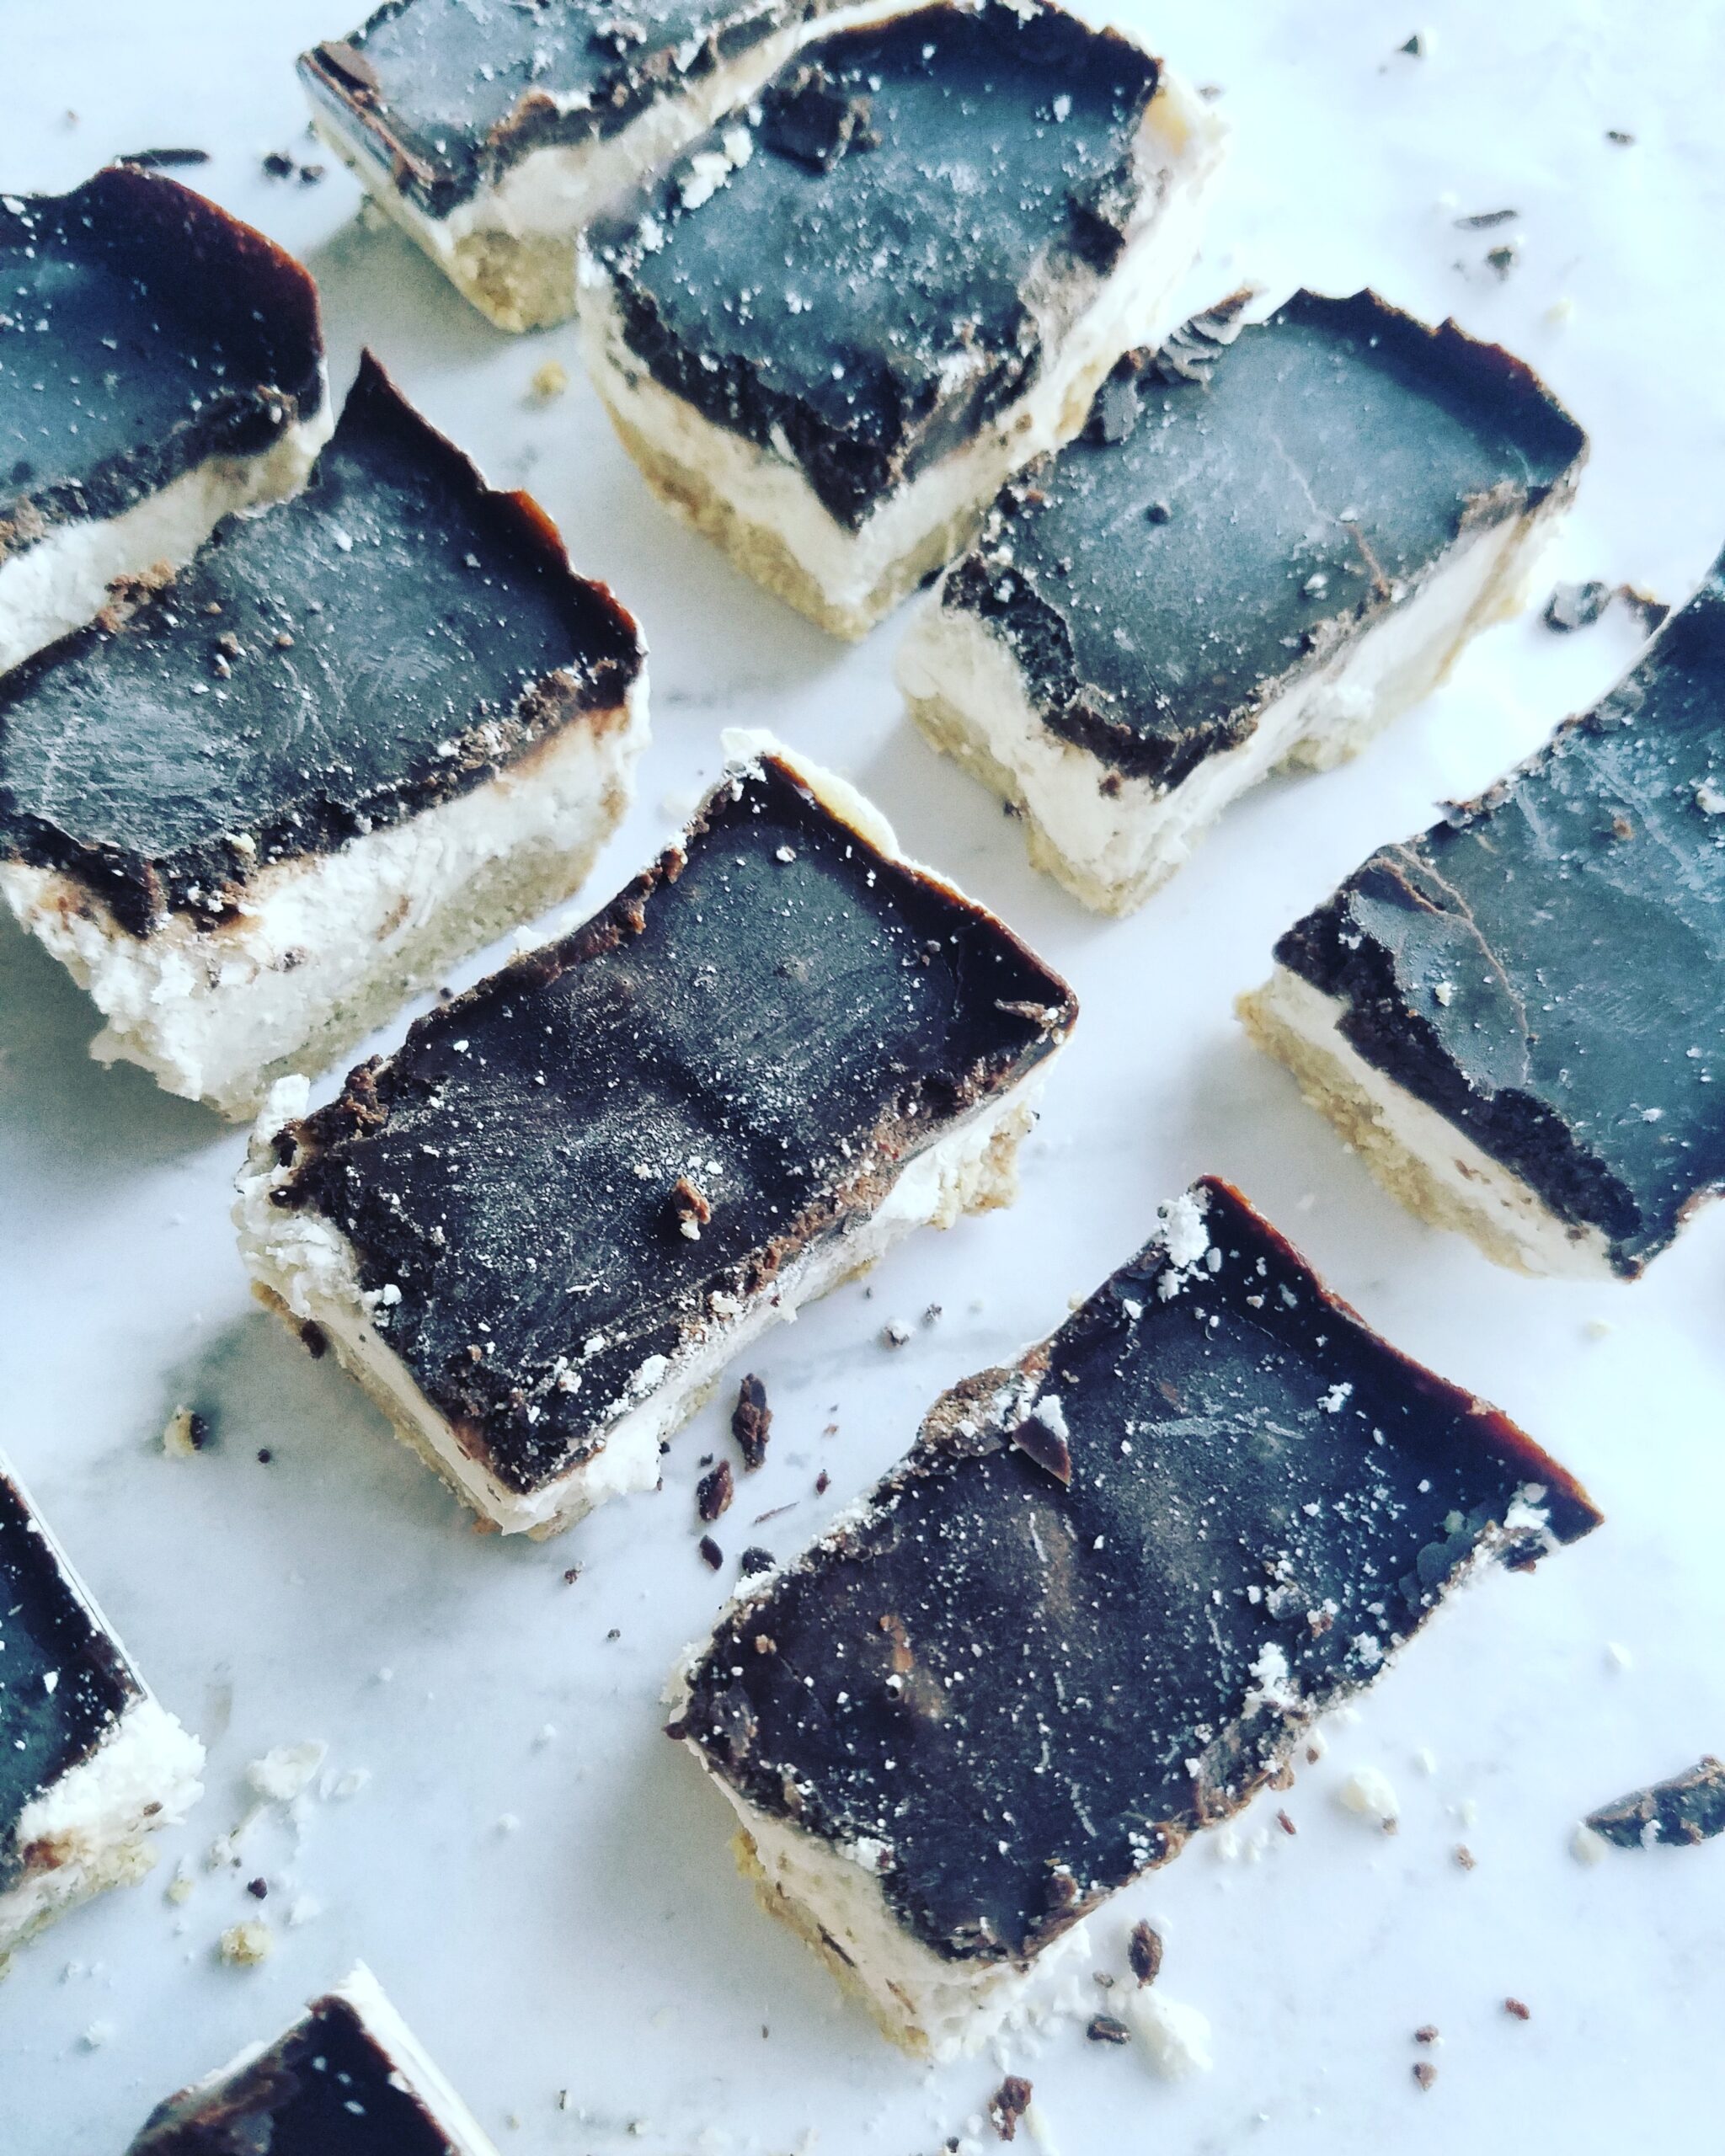
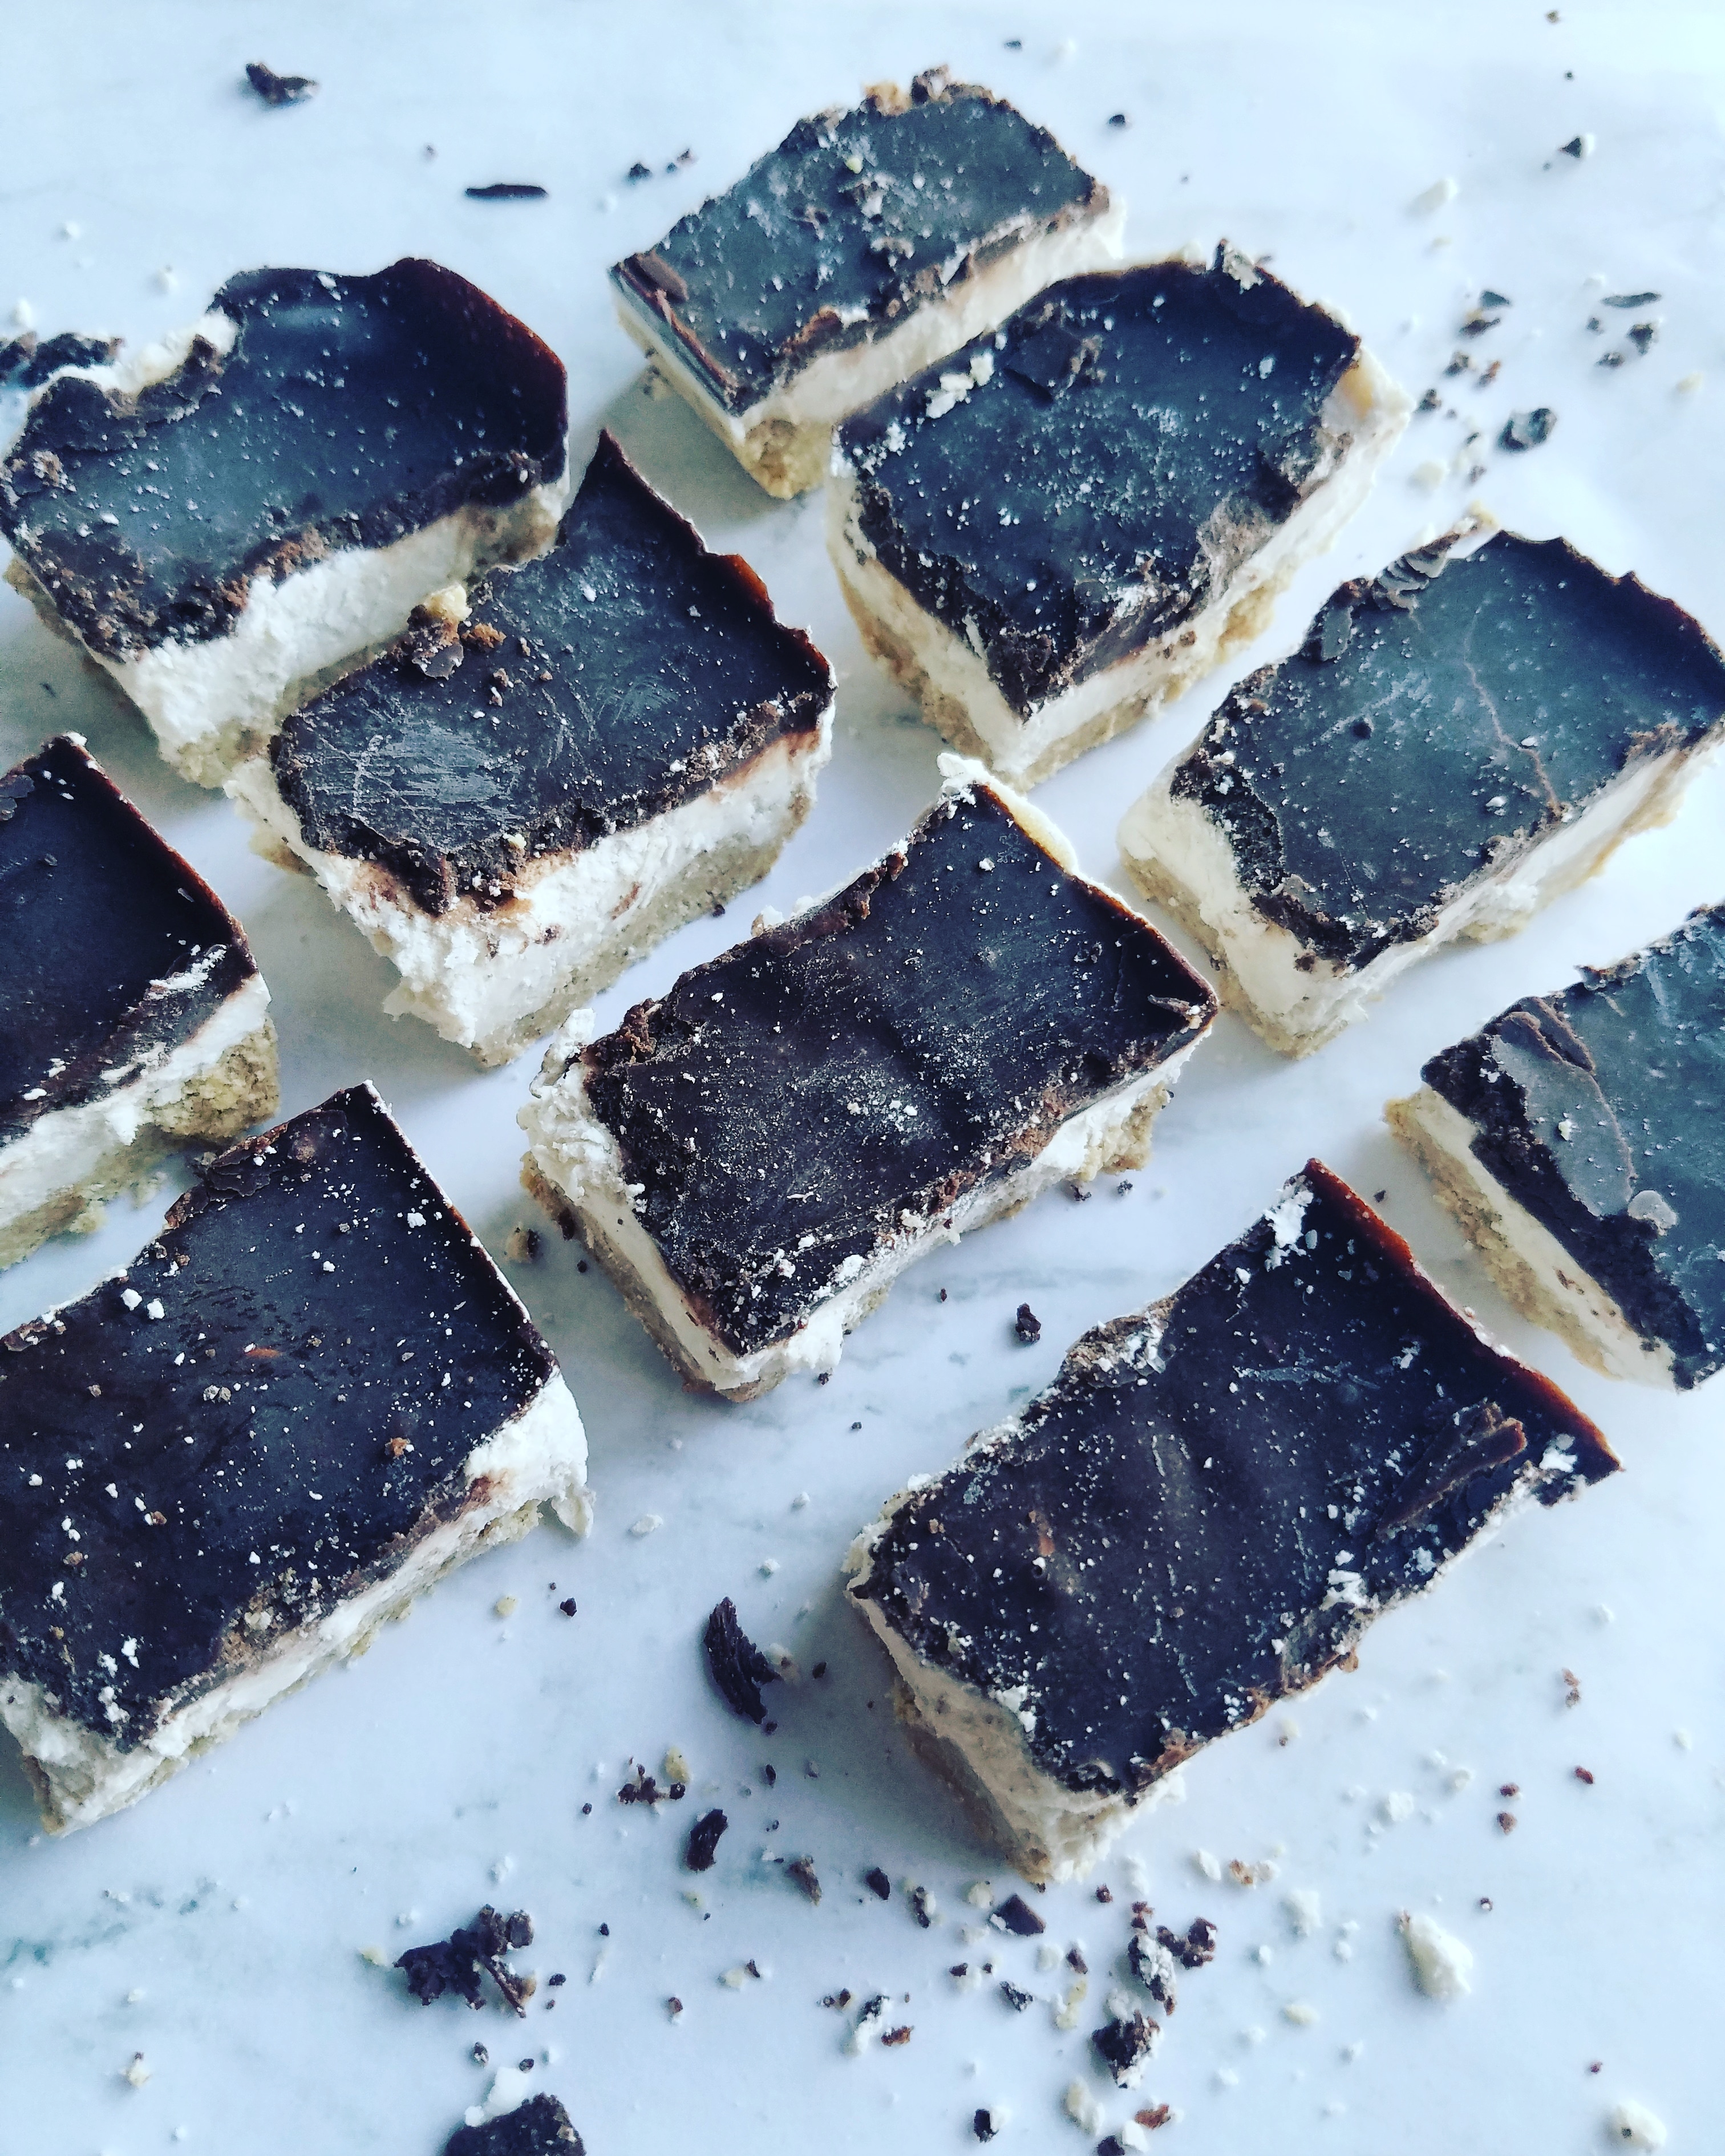
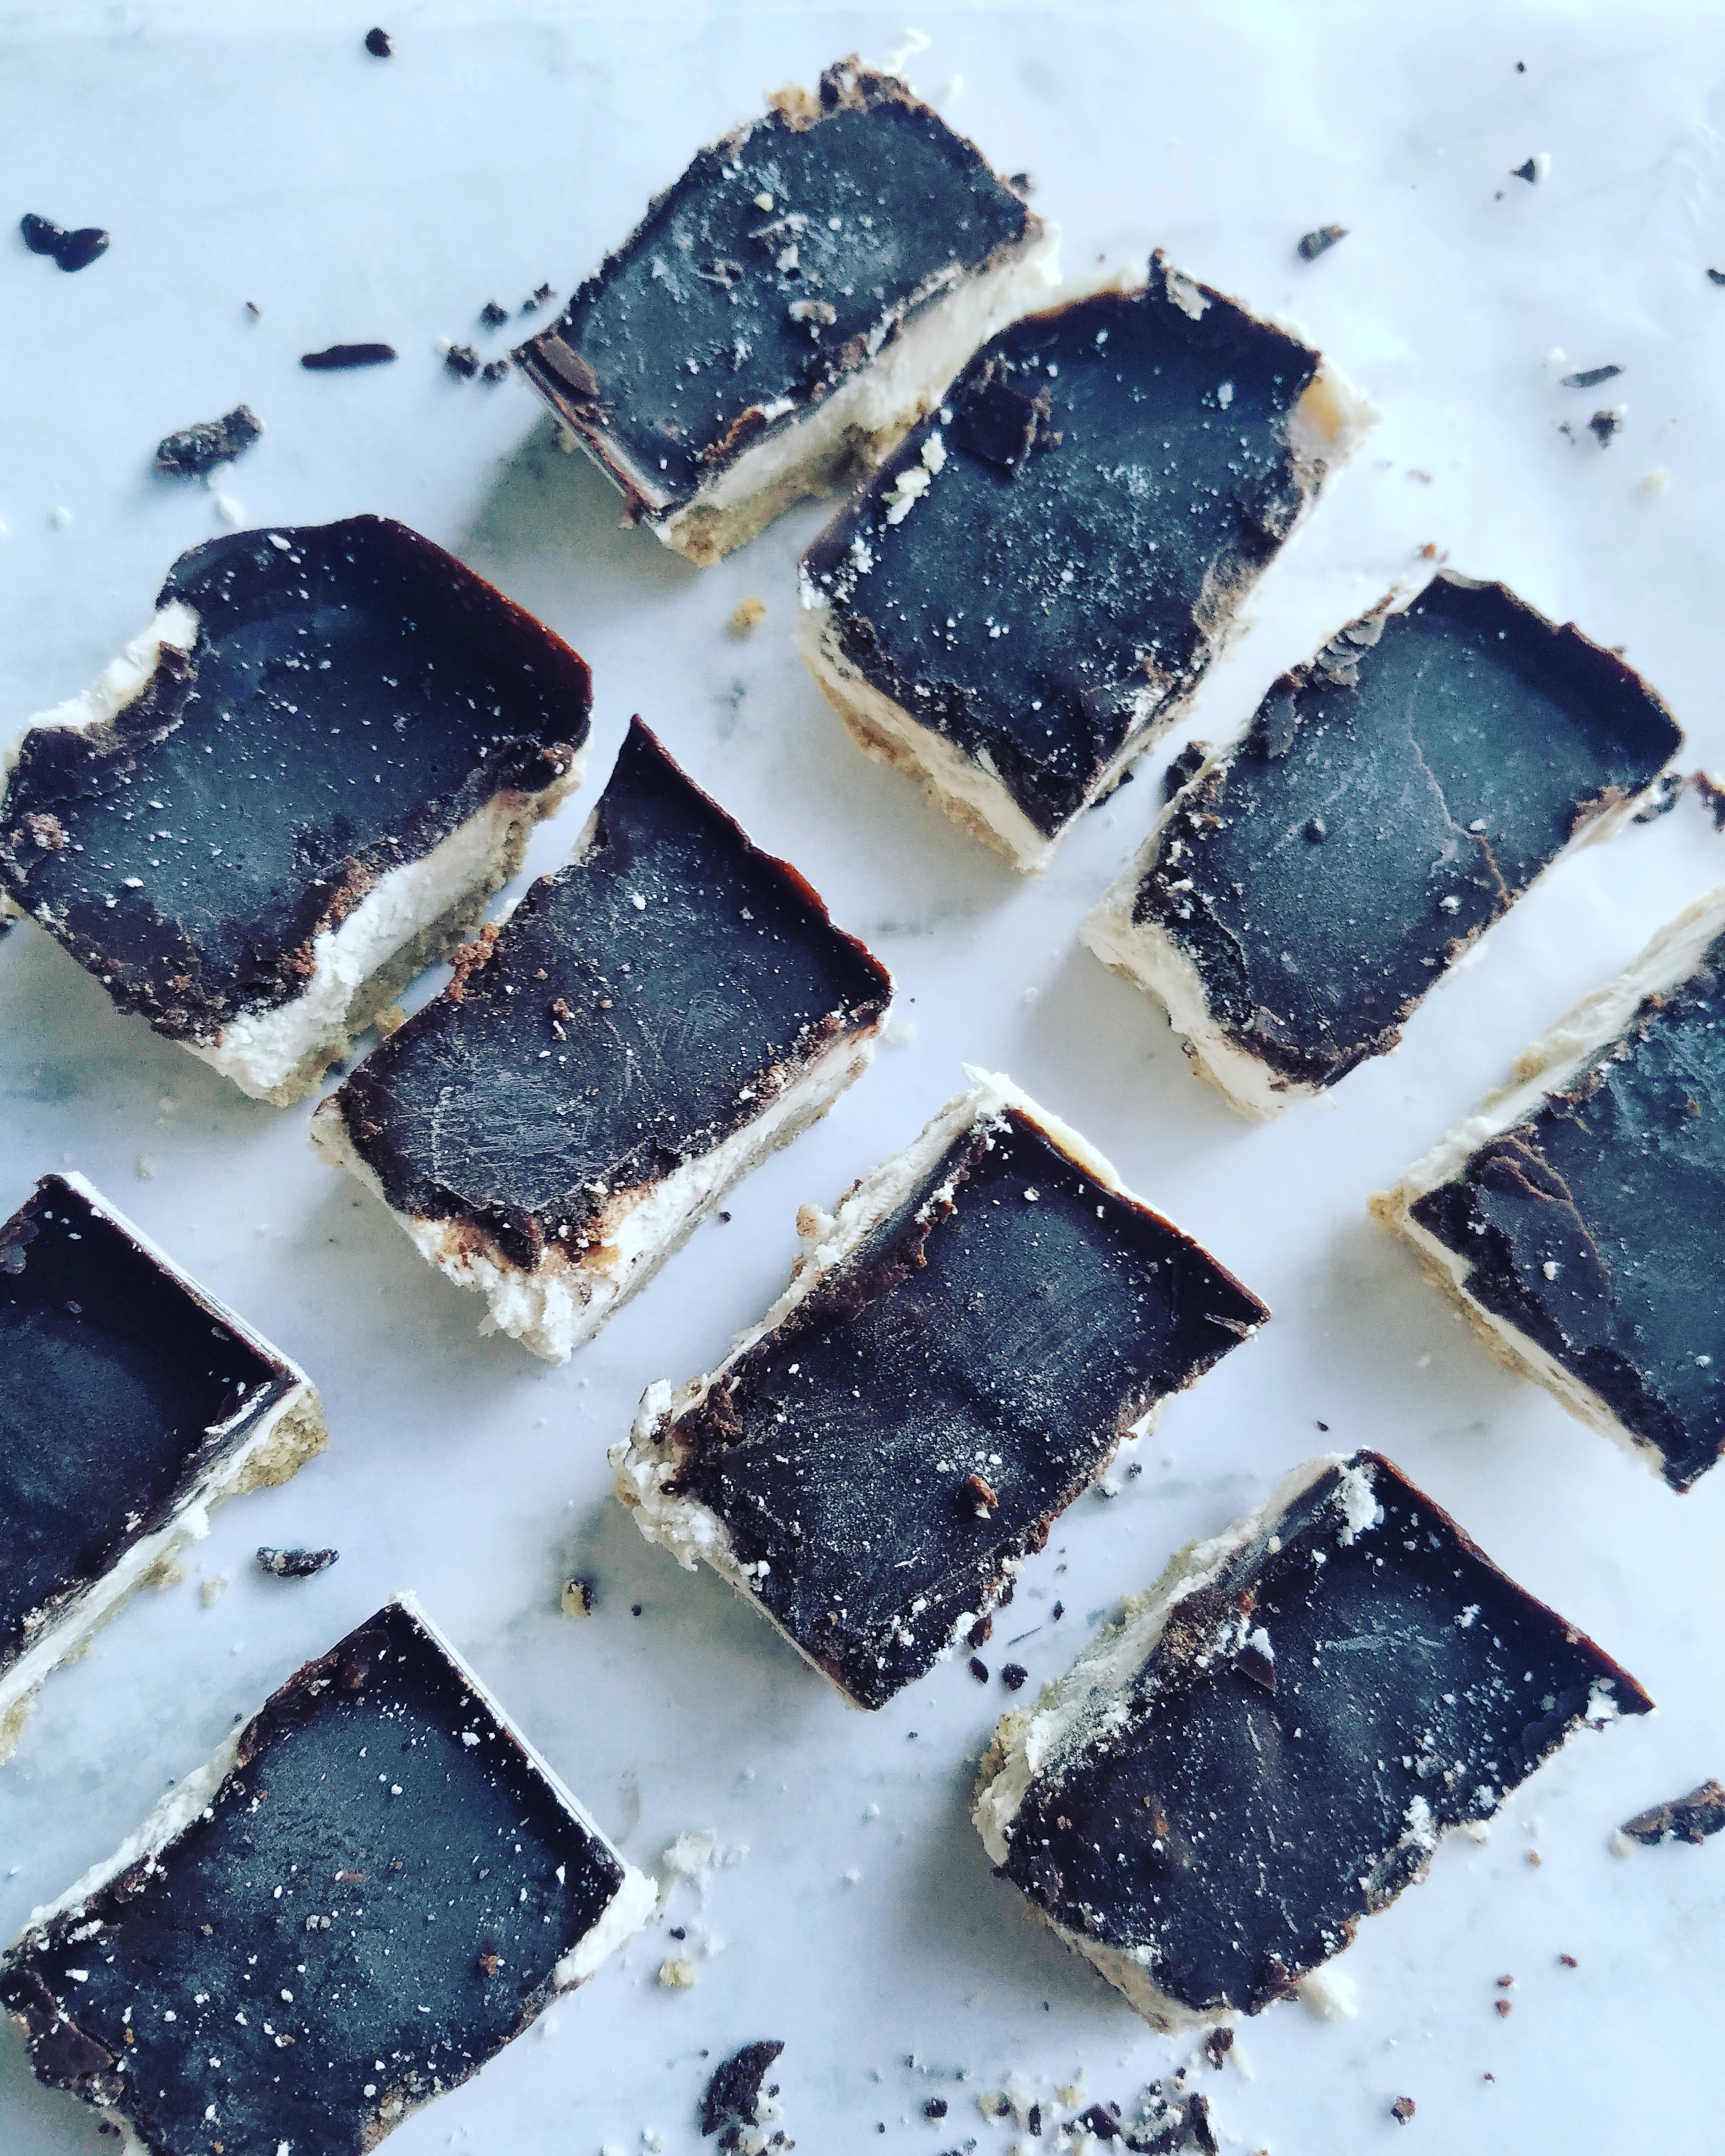
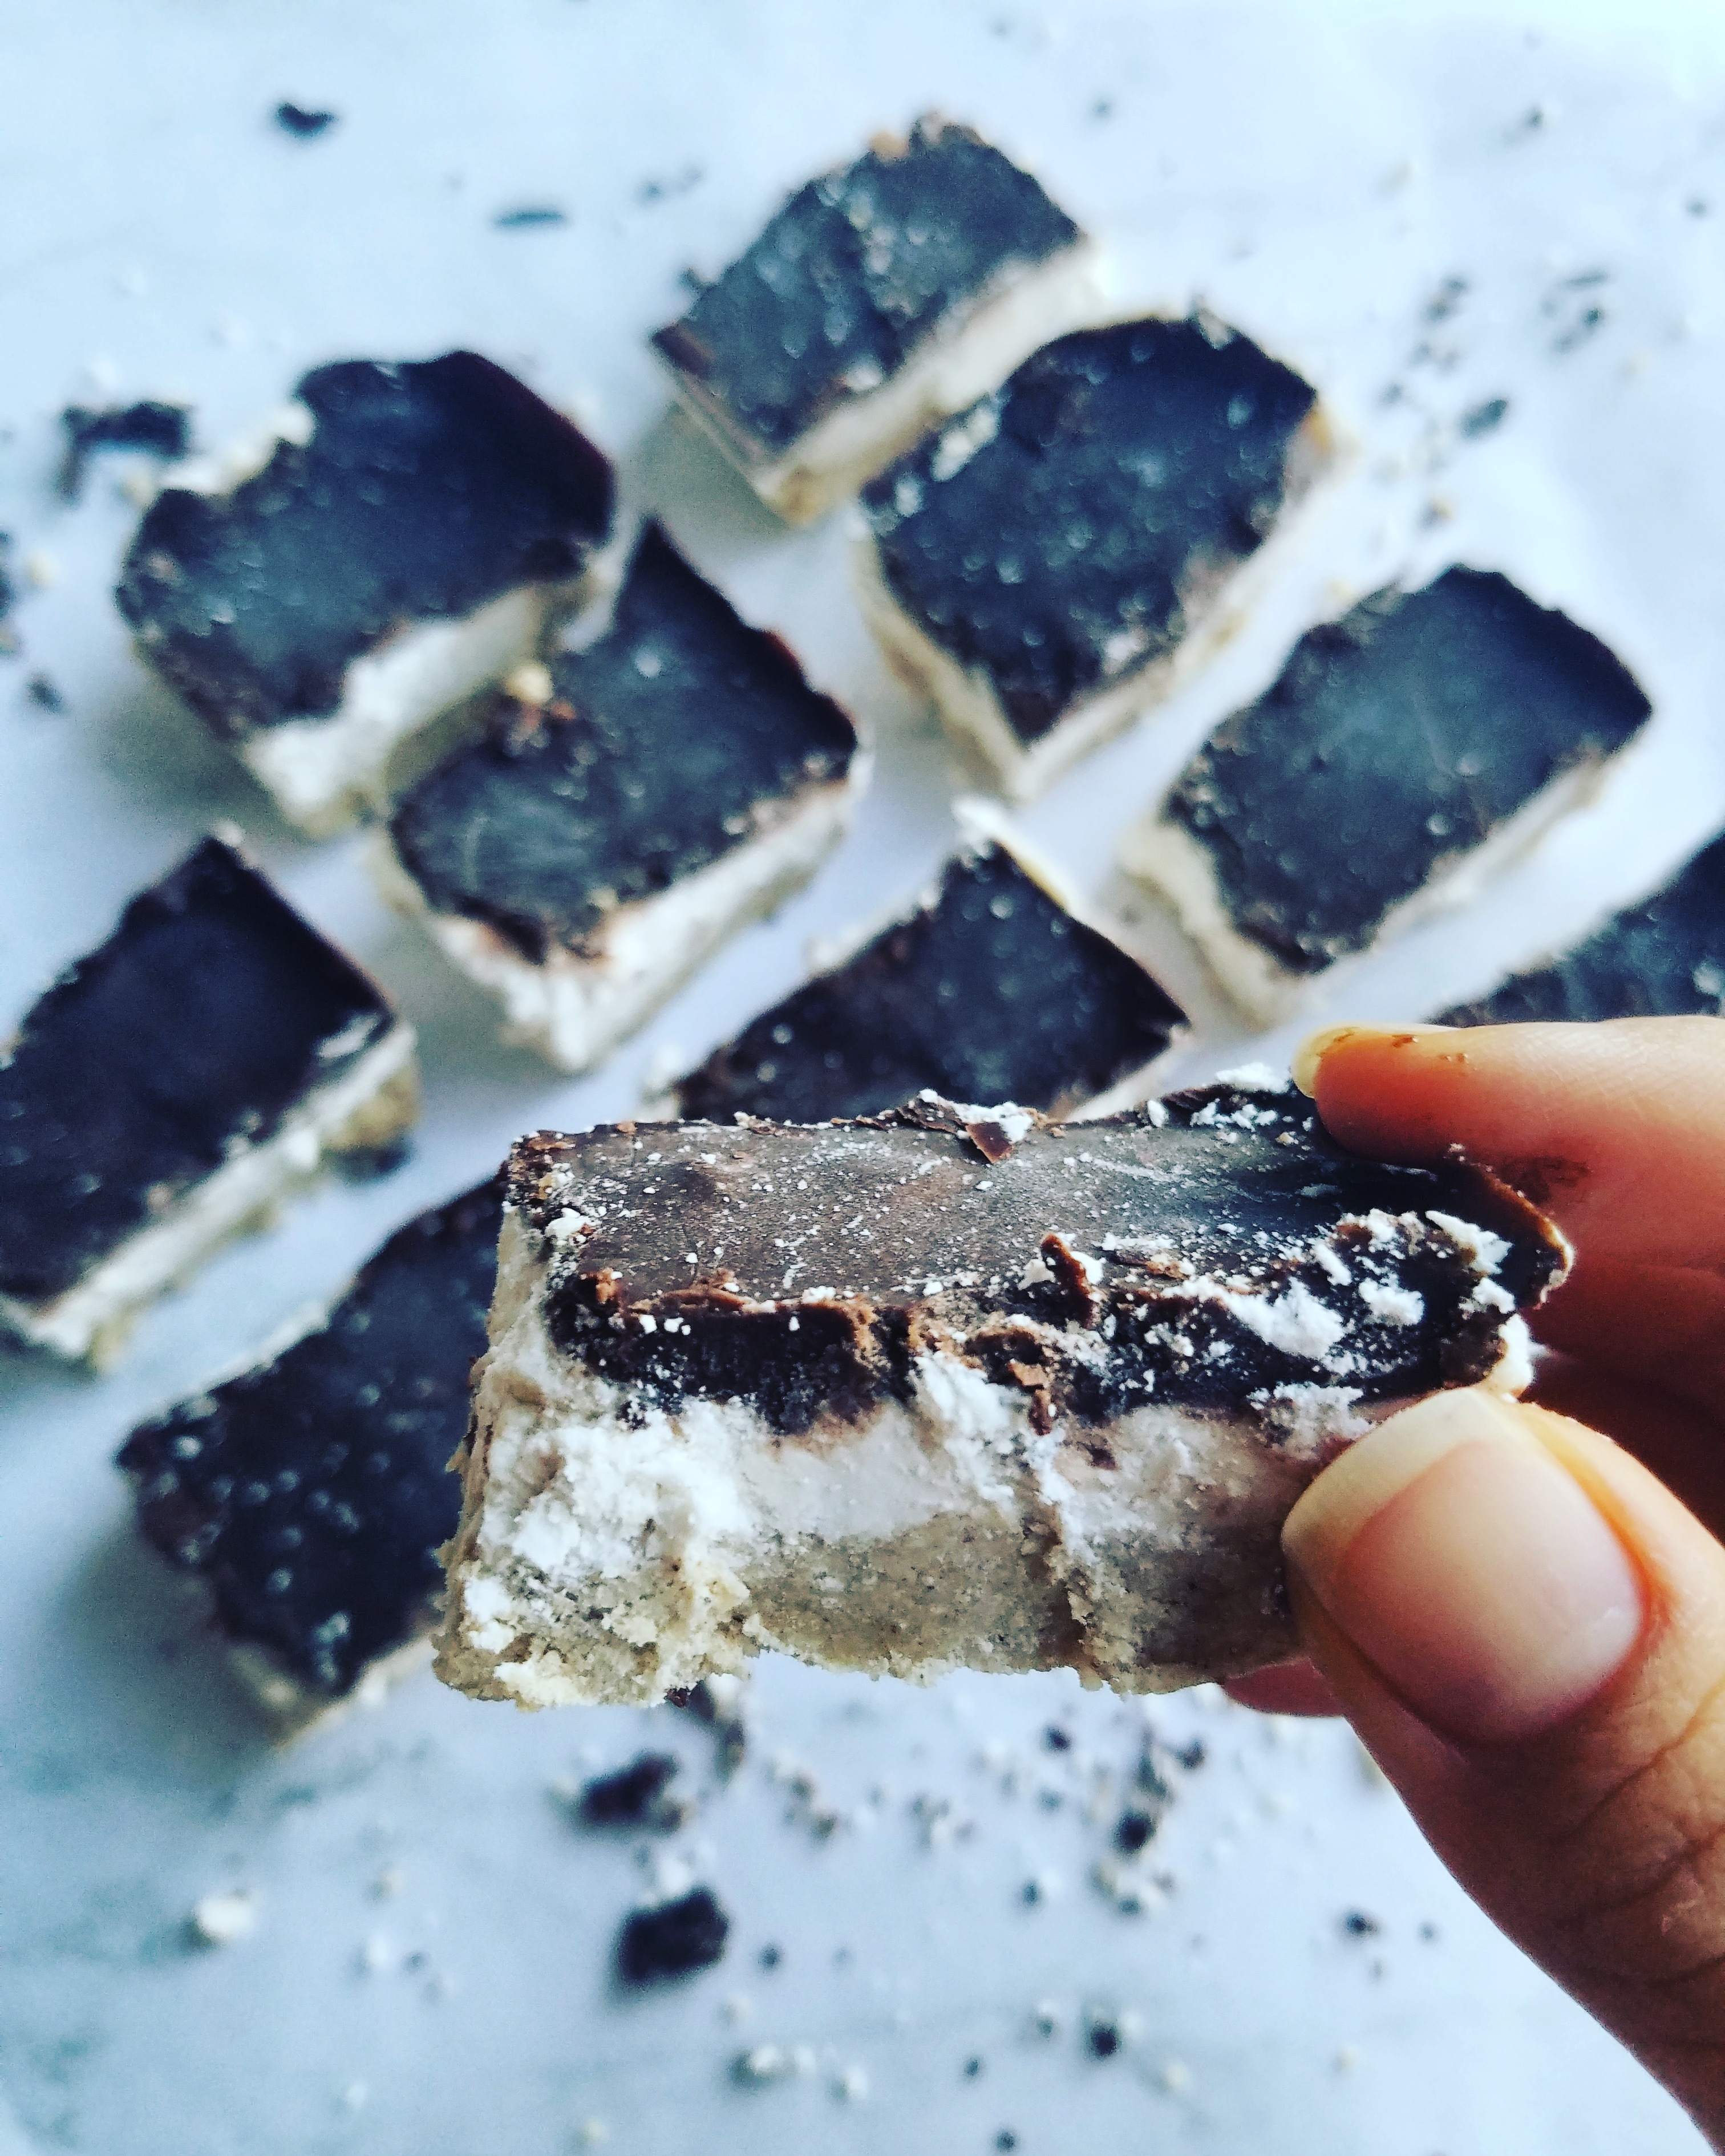
Almond, chocolate, and coconut come together to give you the magic that is Frozen Almond Joy Layer Bars. My spin on the classic treat is low-sugar and ultra creamy thanks to some simple ingredients and the trusty freezer!
Brr! Is that the first hint of cold weather that I’m feeling? My mom always jokes that I am the first one to pull out my boots and cardigans the moment a breeze is in the air. Basically, at this point, I’m restraining myself until November rolls around…but come November 1st, the boots are ON.
For now, the only cold weather I’m getting is coming from opening the freezer to grab one of these Frozen Almond Joy Layer Bars! LOL. Even as the winter season approaches, I love the taste of coconut treats. After all, it can’t be all pumpkin and gingerbread flavors all the time. (Though, I will certainly be enjoying some of both!)
So, make these whenever you’re feeling some fresh, cool, creamy, dreamy coconut, almond, and chocolate vibes.
Frozen Almond Joy Layer Bars
Recipe Type: Dessert
Author: Melanie
Prep time:
Cook time:
Total time:
Serves: 12 bars
Almond, chocolate, and coconut come together to give you the magic that is Frozen Almond Joy Layer Bars. My spin on the classic treat is low-sugar and ultra creamy thanks to some simple ingredients and the trusty freezer!
Ingredients
Crust
¾ cup almond flour
2 tbsp coconut flour
½ scoop protein powder (I like Tone it Up Peanut Butter or Vanilla)
½ tsp vanilla extract
2 tbsp melted coconut oil
2-4 tbsp almond milk
1 tbsp honey
Filling
½ cup coconut butter
½ cup almond milk
½ tbsp honey or maple syrup
½ cup shredded coconut
Topping
2 ½ tbsp cacao powder
1 tbsp honey or maple syrup
2 tbsp melted coconut oil
2 tbsp creamy almond butter
¼ tsp vanilla extract
Instructions
Grab a loaf pan and line it with some wax or parchment paper. I don’t always do this but it makes it a little easier to remove the bars from the pan.
Next, in a bowl, combine the crust ingredients. The batter should be on the crumbly side but smash together between your fingers. If the mixture only crumbles without the mash, add another tablespoon or two of almond milk and combine. Then, press the mixture into the bottom of your (lined) loaf pan and set in the freezer.
At this point, wipe out any crumbs left behind because we’re using the same bowl! Add the coconut butter to the bowl with the almond milk and microwave for 15 seconds so it is warm and mixable. Then mix in the honey and shredded coconut.
Remove the loaf pan from the freezer and add pat down the filling layer before returning it back to the freezer.
For the final step, wipe out the same bowl and begin adding the topping ingredients. Make sure not to leave any clumps or that will show on top of the bars. Again, remove the loaf pan from the freezer and spread the chocolate topping over the filling. Note: if for some reason the filling seems wet, leave it in the freezer for 10 minutes before adding the chocolate topping.
Lastly, I recommend freezing the bars for at least 3 hours before cutting into them. The Frozen Almond Joy Layer Bars can then be stored in an airtight container in the fridge or freezer.
3.5.3251
They are just the ticket when I’m craving a fresh treat that won’t mess with my blood sugar! Healthy fats from coconut butter + chocolate is simply the best combo! Let me know if you guys try these bars out.
Would you guys believe that I’ve been saving this French toast recipe for weeks just so that it would be closer to fall? I don’t know if anyone would’ve been on board for warm French toast when its 90-125 degrees outside.
Weirdly enough, this summer I’ve been eating a lot more warm foods for breakfast than ever before. If you’ve been around here for a while, you know I’m a hardcore smoothie enthusiast. Yet, as I’ve dabbled in ways to improve my digestion, I found a new love for warm breakfasts.
This recipe came about one morning when I was low-key craving cinnamon raisin buns—using this recipe from RachLMansfield—but did not have any of those around. Her recipe is super simple but when you want breakfast now, not hours from now, you get creative.
Here was my thought process:
Ooh cinnamon raisin Ezekiel bread in my freezer? This might taste similar to cinnamon buns.
Let’s use some vanilla unsweetened almond milk, too. Oh, maybe French toast?
Hmm but then I need to turn on the stove and that takes too long. GROAAANN.
Wait, how about the ol’ microwave? Yeah, this could work!
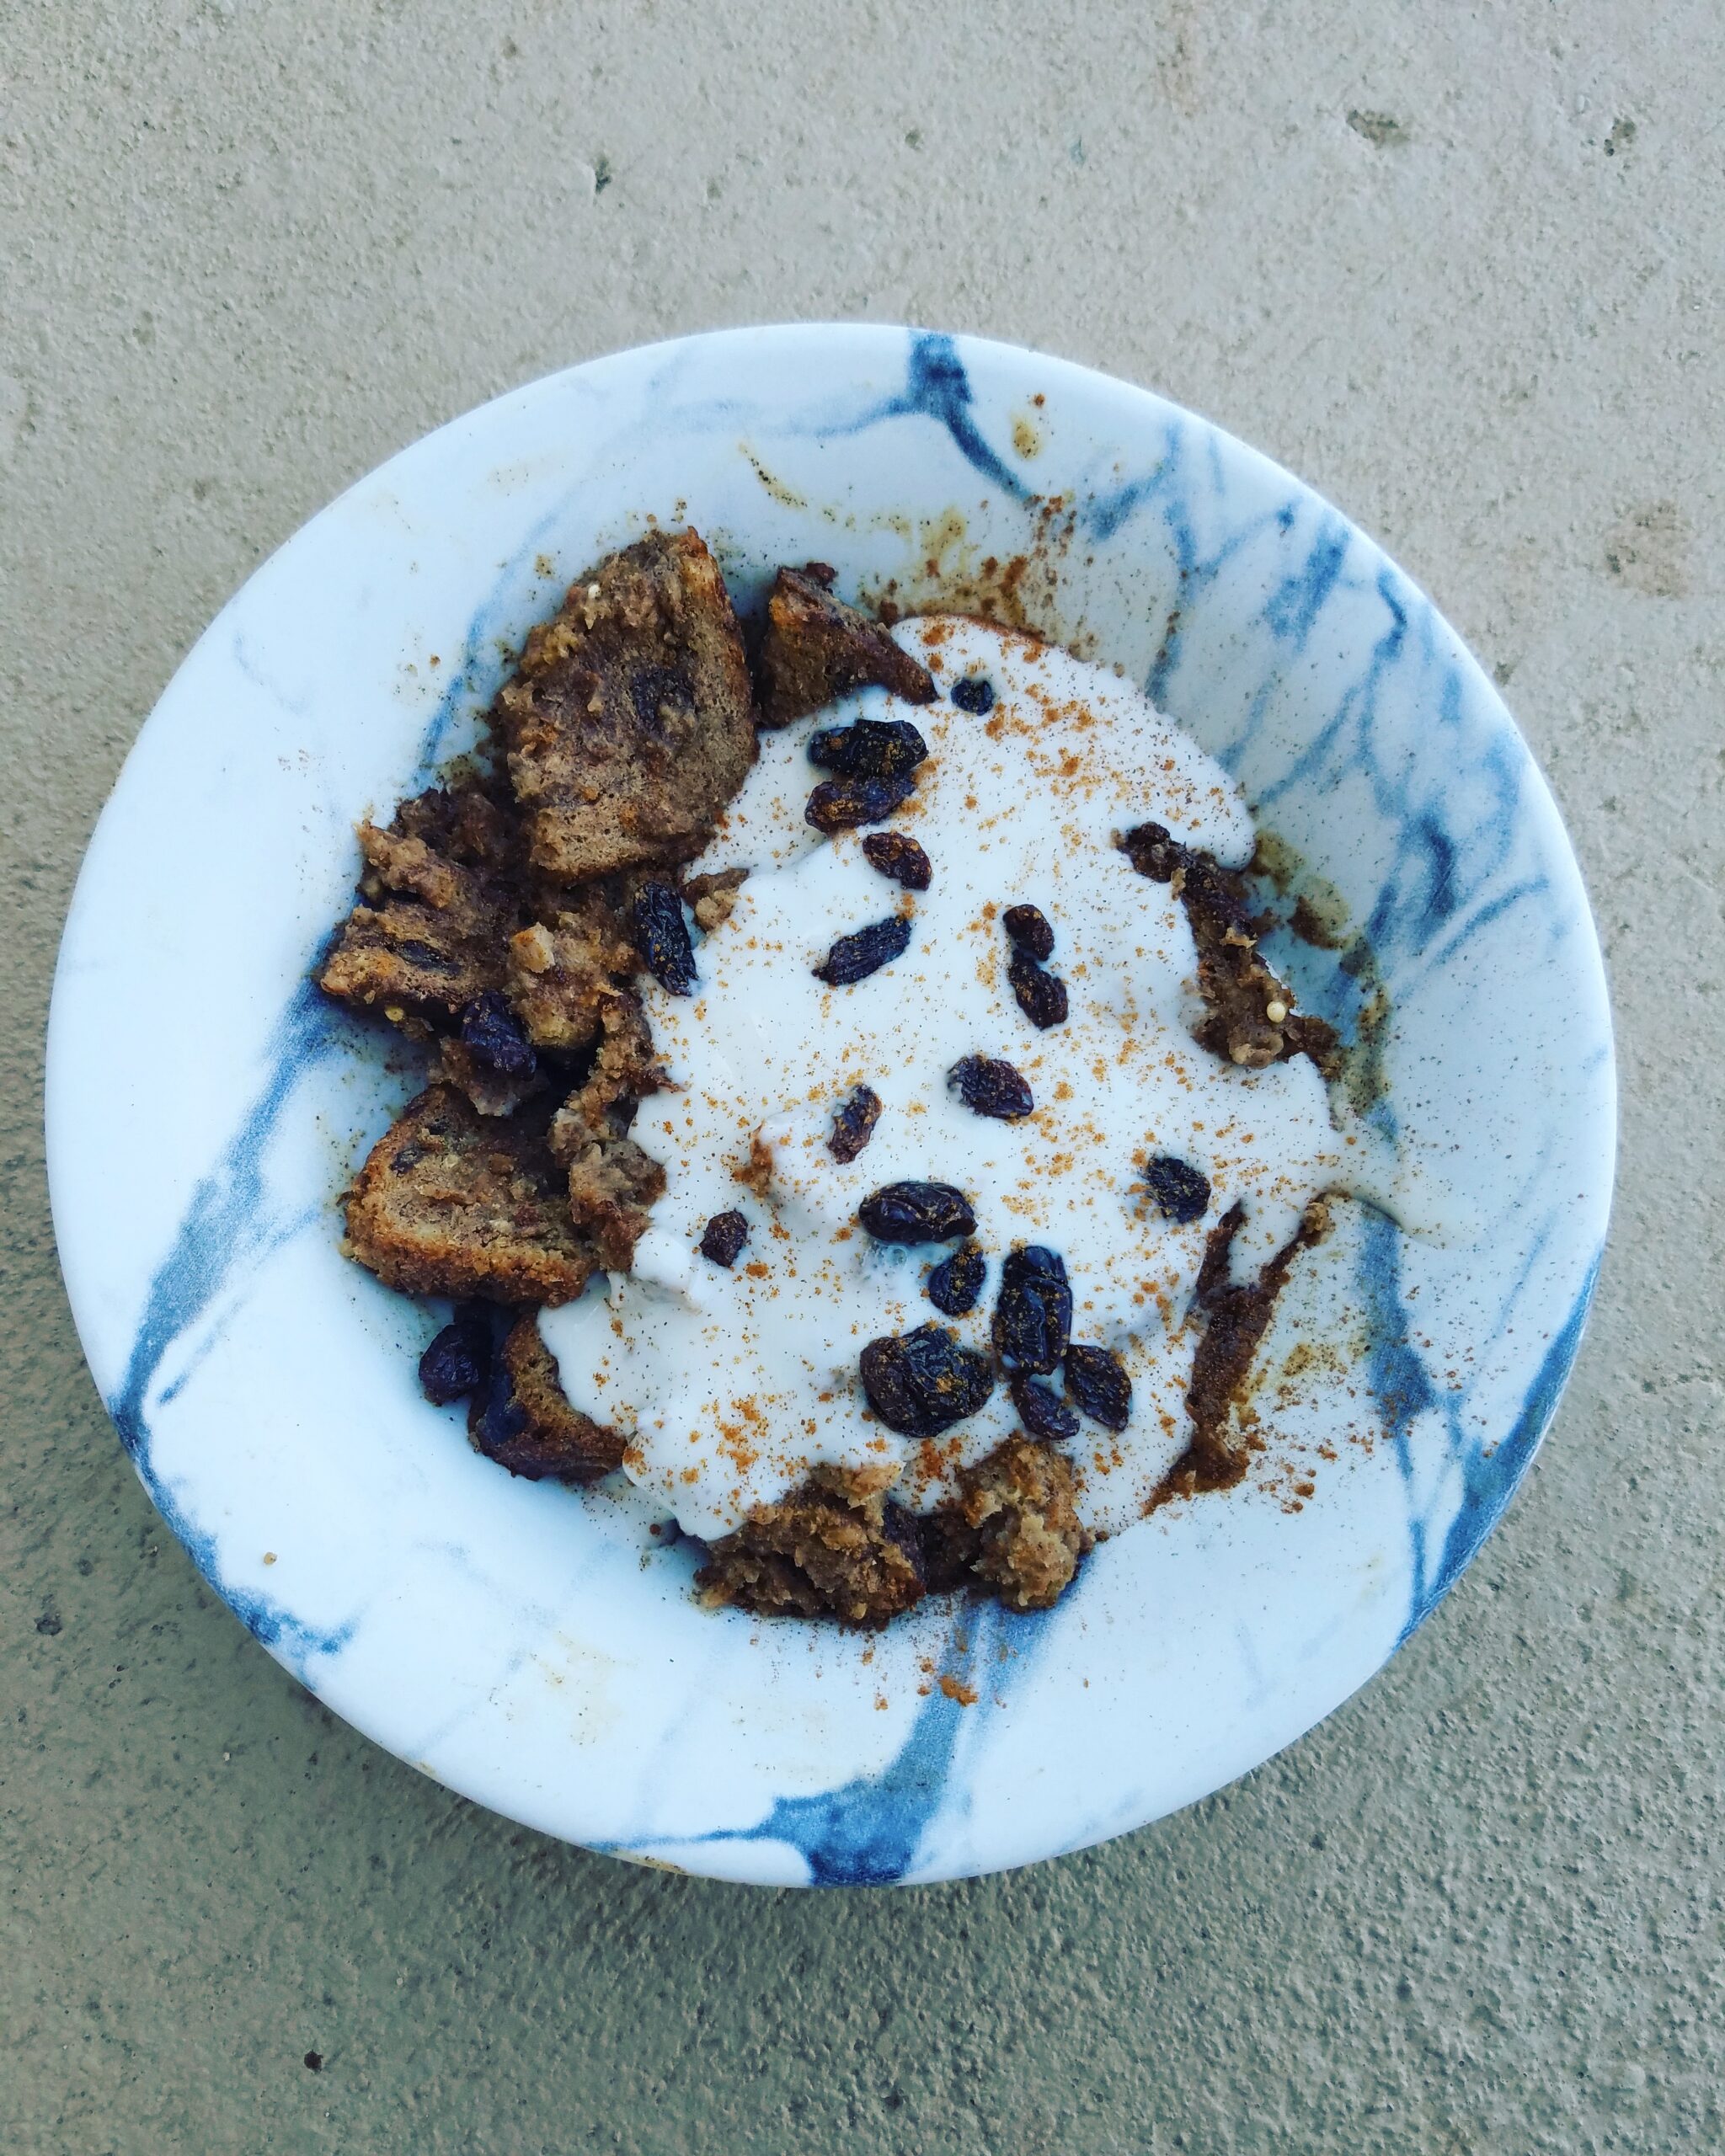
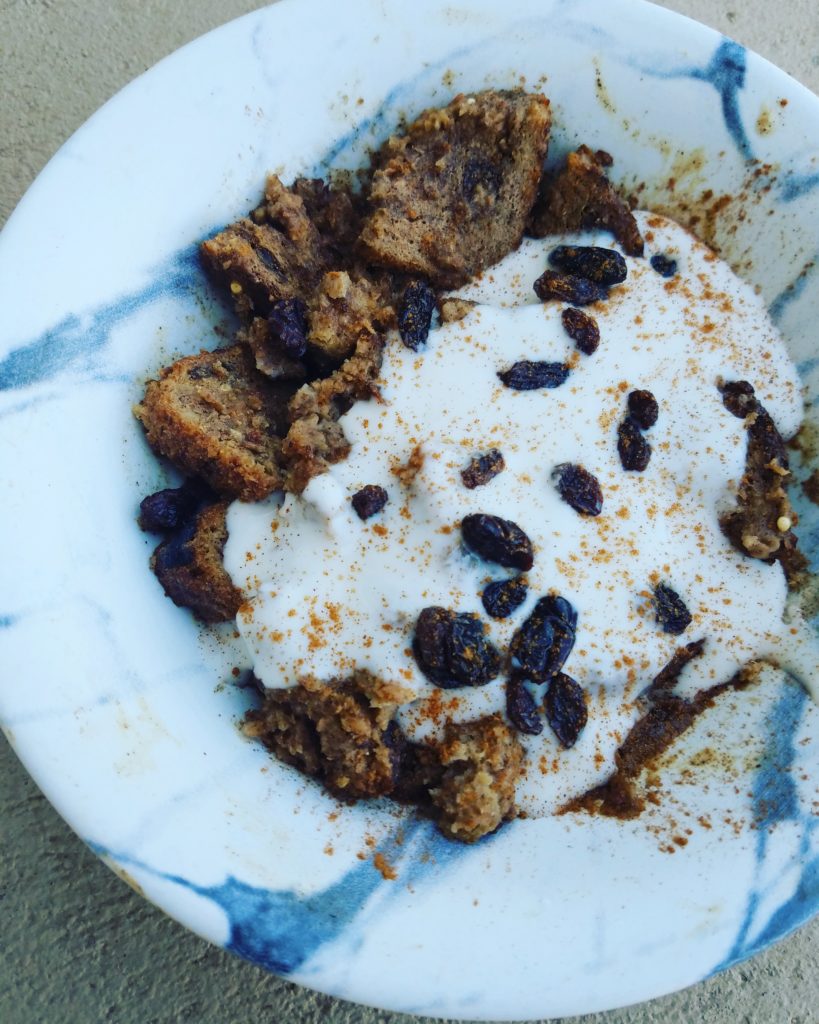
Honestly, the microwave is never my first choice for cooking but I knew it would provide the dried-out top the way the oven does for baked goods. I had a very specific texture I desired: crisp top and chewy center. I am happy to say I achieved this!
As a final note: I whipped this all up in the morning but, if you’re a planner, this would probably be excellent made-ahead. You could set it in your fridge overnight and then microwave it in the morning.
Single French Toast Bake in a Microwave
Recipe Type: Breakfast
Author: Melanie
Prep time:
Cook time:
Total time:
Serves: 1 serving
Ingredients
½ cup vanilla unsweetened almond milk
½ tsp cinnamon
½ scoop vanilla protein powder
½ scoop collagen peptides (optional, but adds a “chewy” texture)
A tiny pinch of sea salt
2 slices cinnamon raisin Ezekiel
Instructions
Cut the bread slices into cubes. I did three slices horizontally and vertically for 9 cubes per toast!
In a microwave safe bowl or wide ramekin, mix the milk, cinnamon, protein powder, and collagen until combined.
Then, dredge the bread cubes into the mixture. Lightly press them down while trying to coat all sides of the cubes. After all of the bread cubes have been dredged, press the cubes into a flat, even layer and place in the microwave.
Cook for 3-4 minutes, depending on your microwave. The top should look and feel dry to the touch.
Be careful when removing because the bowl will be HOT! Let cool for a few minutes before adding syrup, yogurt, or additional raisins to your French toast (microwave) bake!
3.5.3251
It makes me excited when I can discover a shortcut to something that usually takes a lot longer to make. I’m planning on just prepping containers of this in my fridge and warming them up for the weekday mornings. 😎
Let me know if you give this recipe a try! Comment below or tag me on Instagram!
After my candida prevention protocol, following my wisdom teeth surgery, I wasn’t eating fruit. I may have consumed a few dates here and there but I largely stayed away from fruit. I finally feel like my body is in a better place where it can tolerate fruit so I’m siked to enjoy some of my old favorite foods!
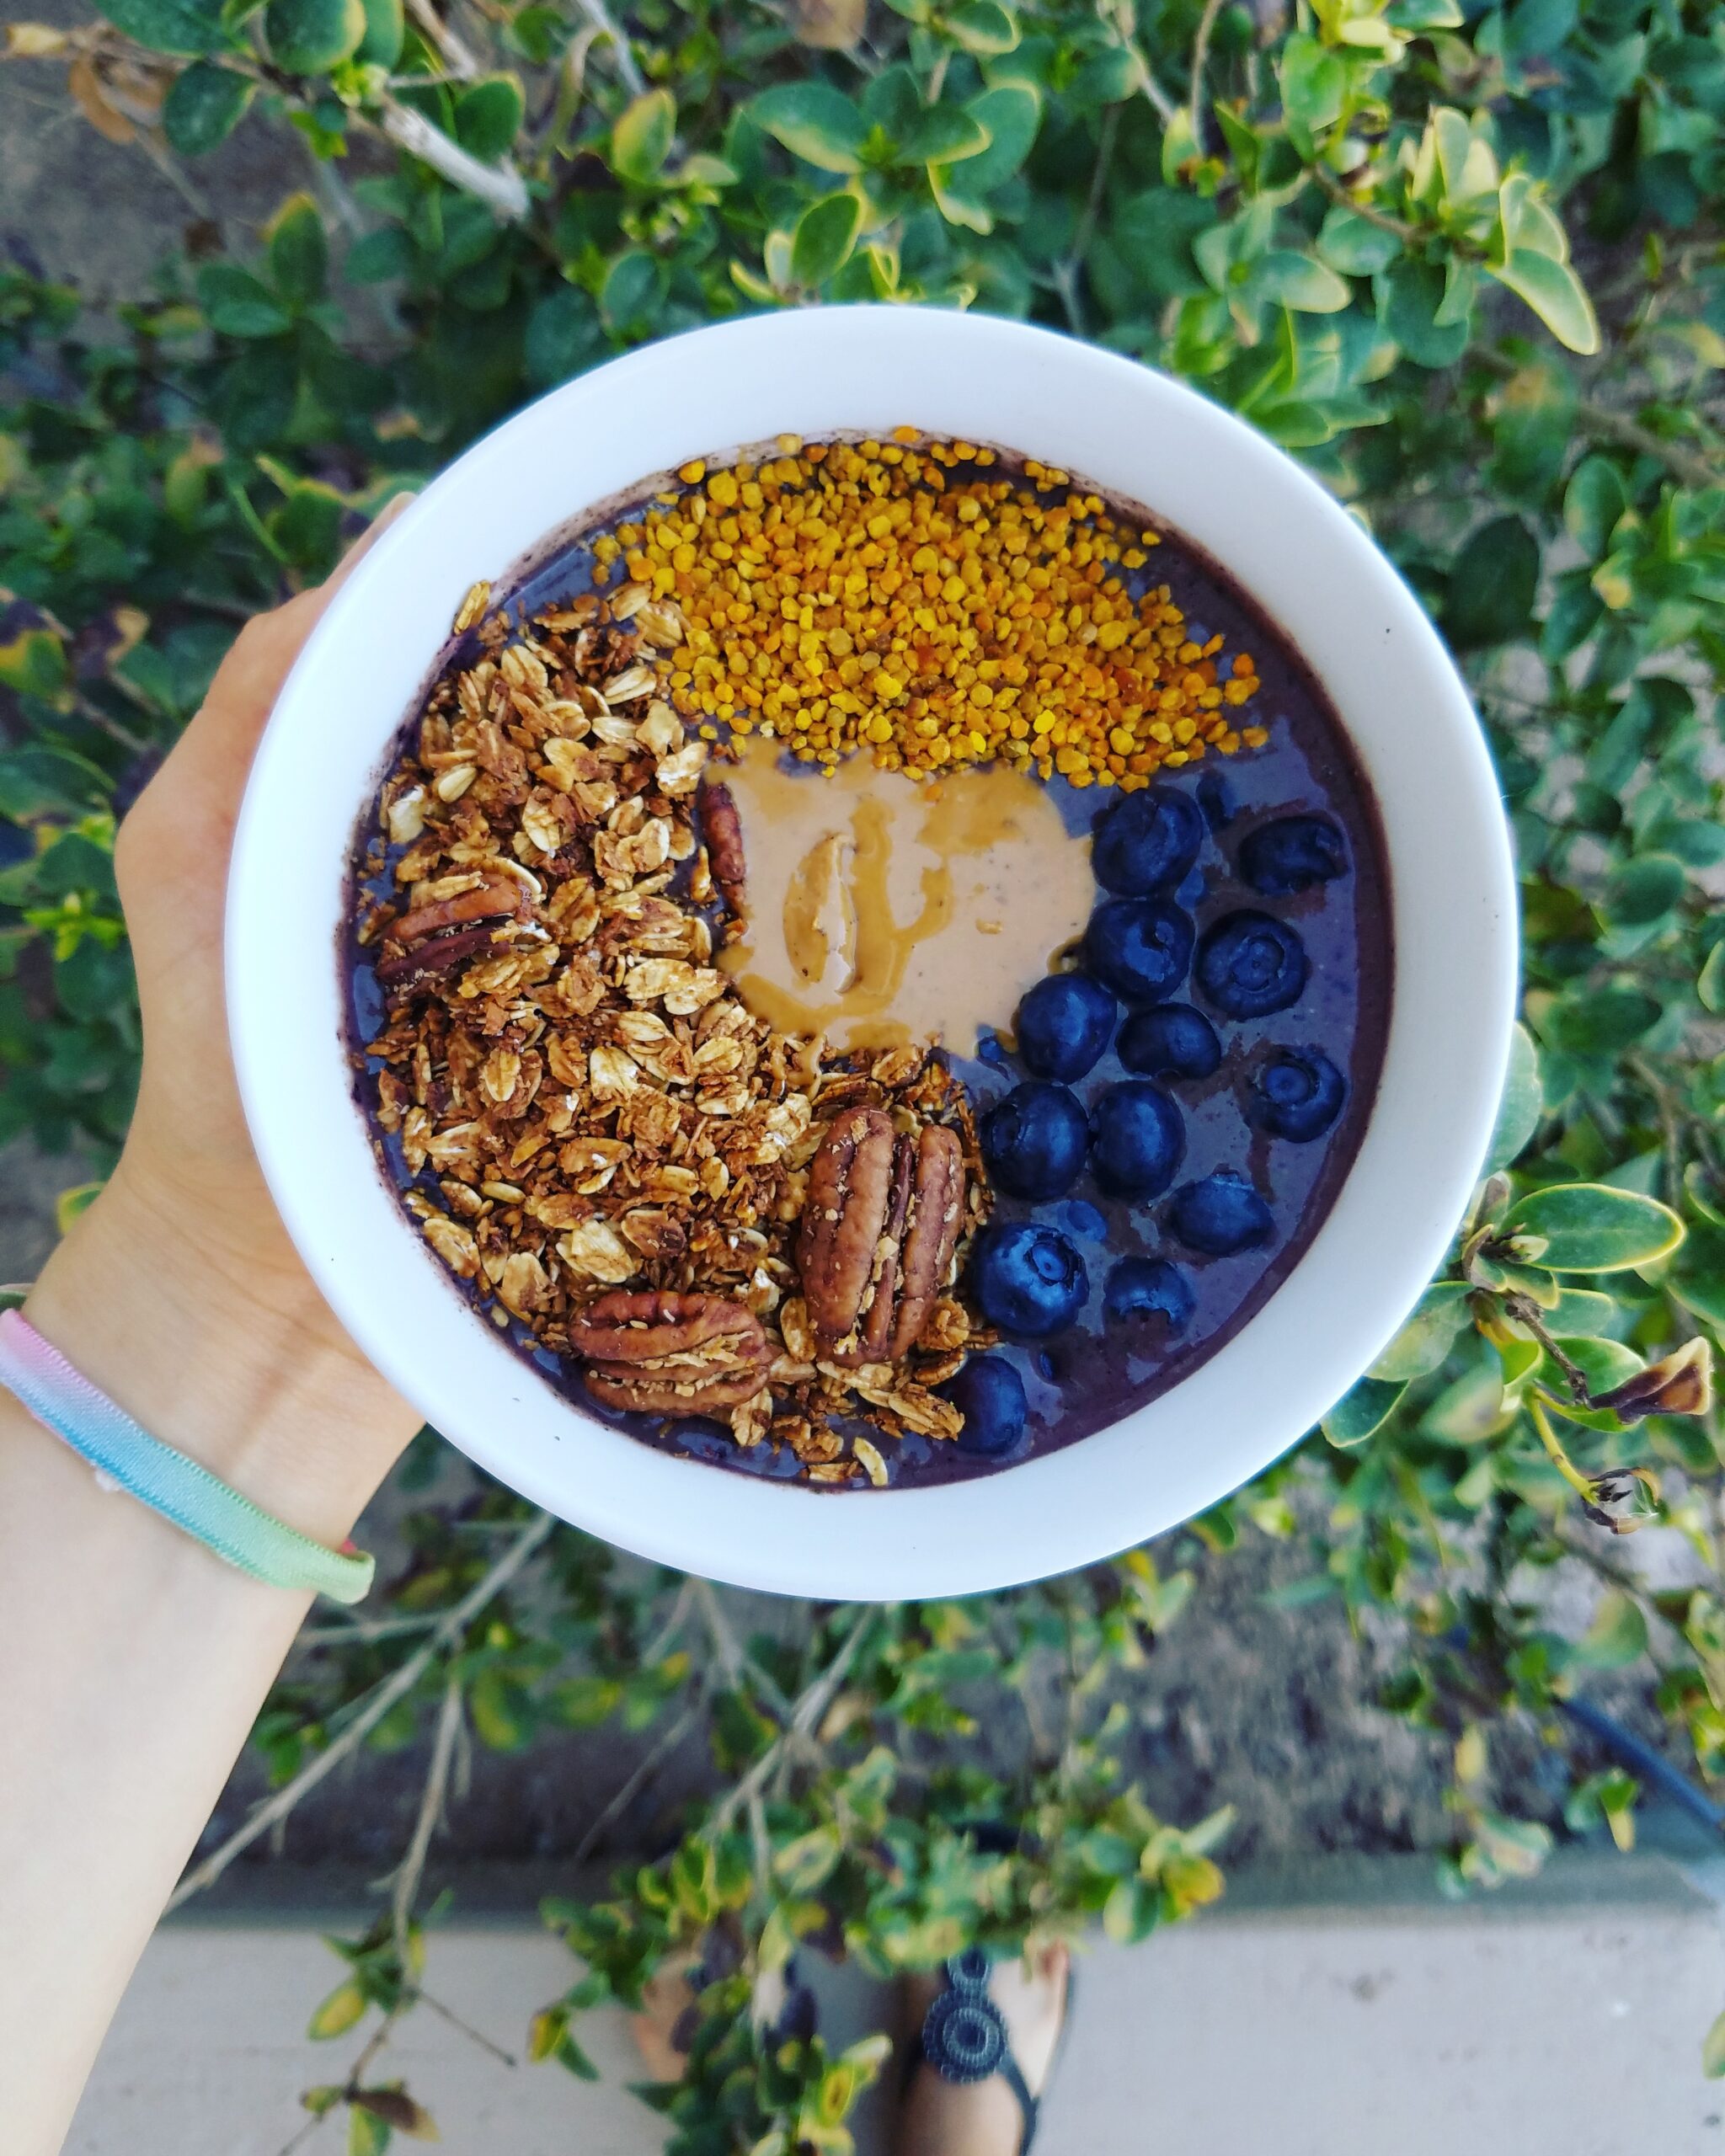
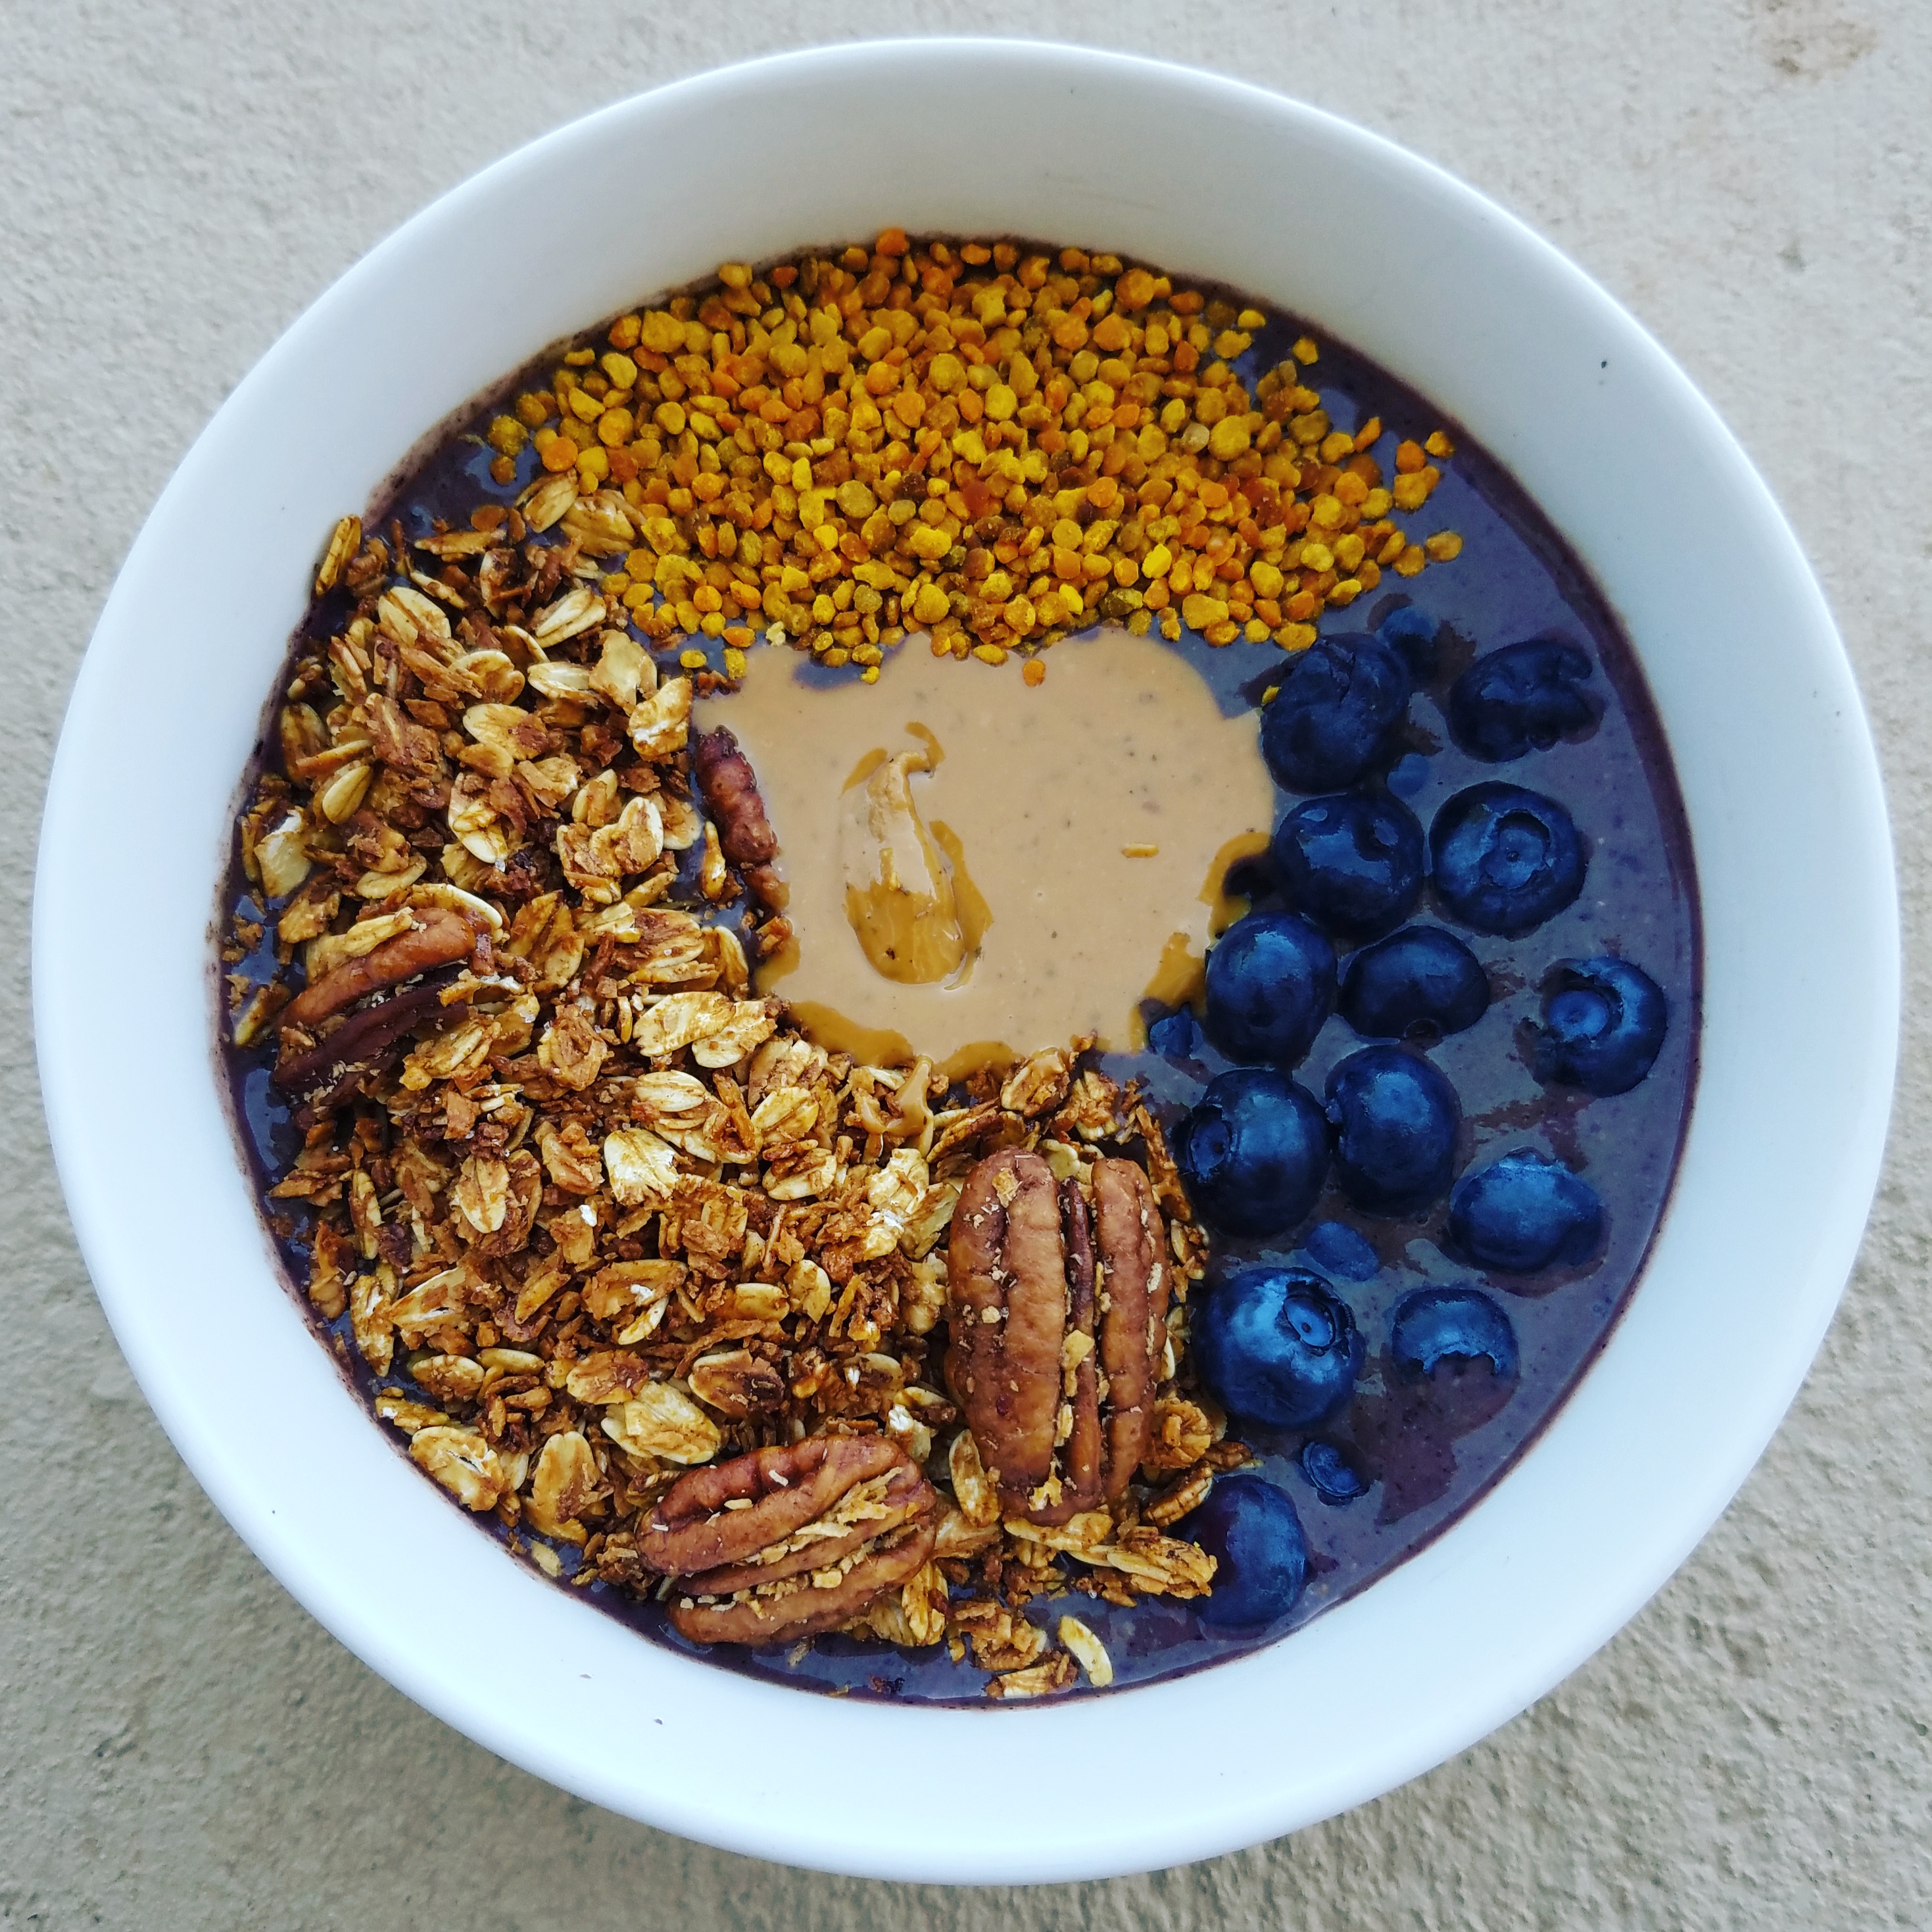
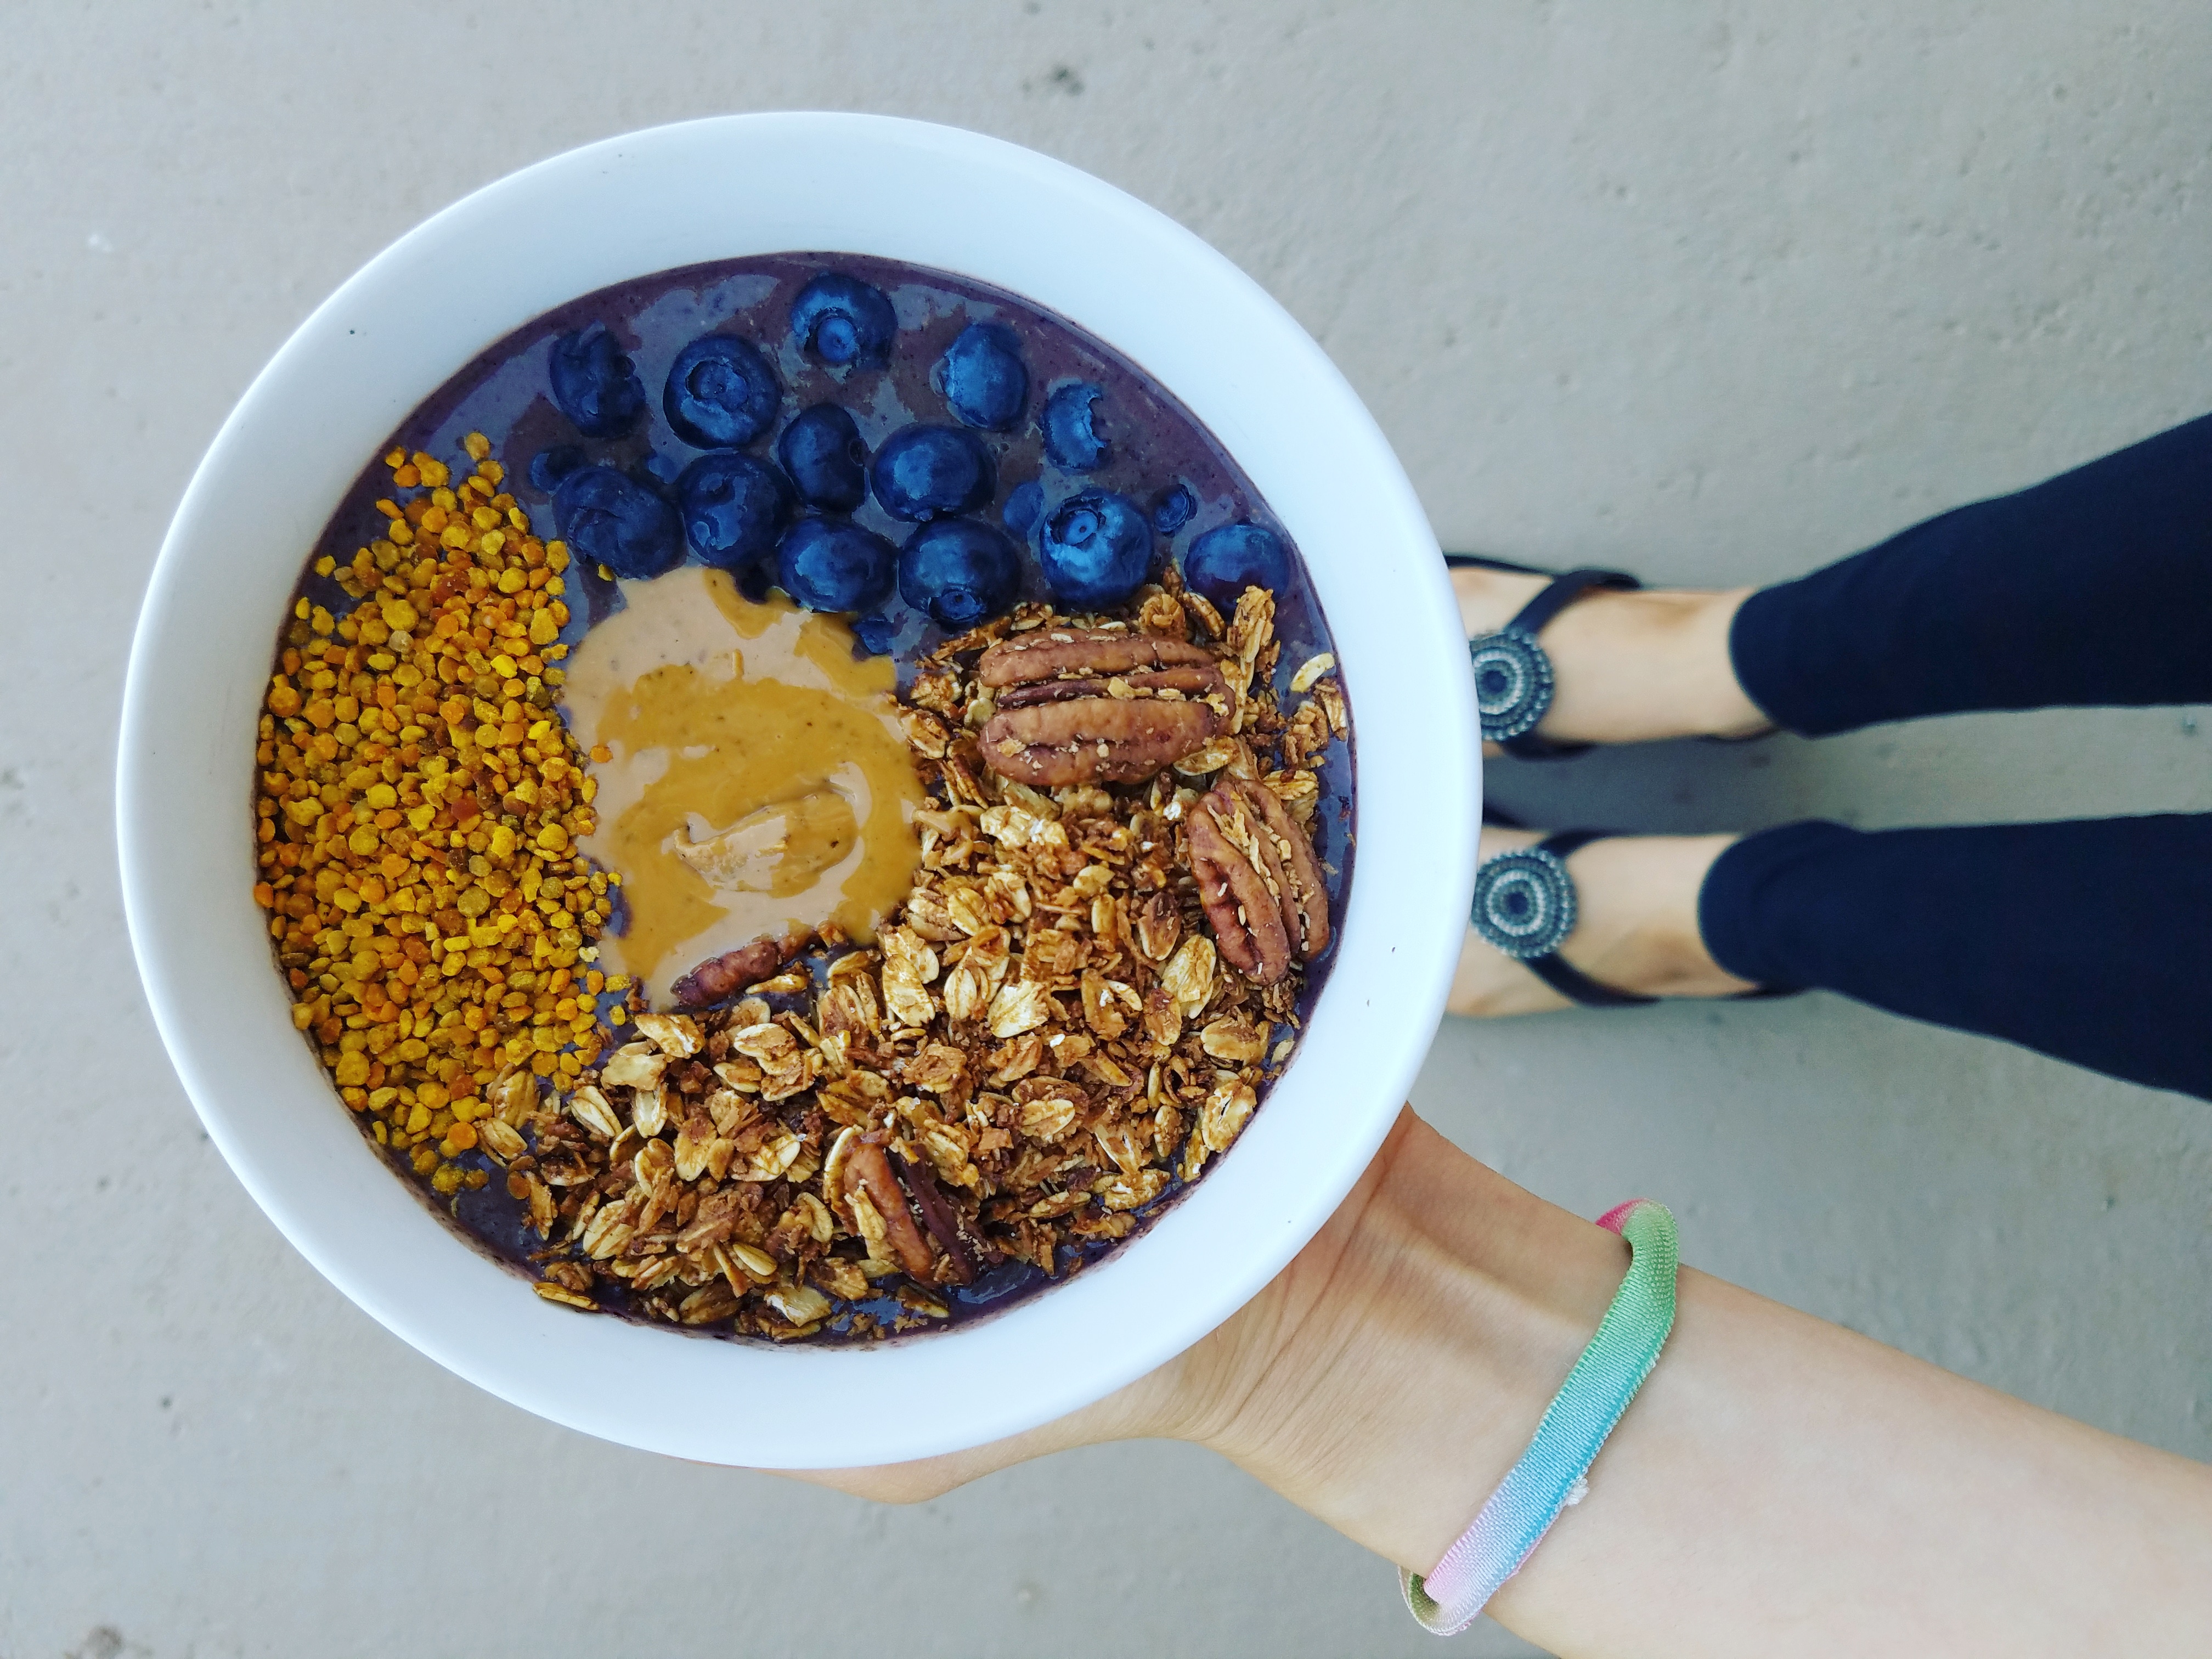
HELLO ACAI SMOOTHIE BOWLSSSS 💃💃💃
My elimination diet showed me that ripe bananas aren’t all that great for me. Barely yellow bananas are more tolerable but the nice, sweet, RIPE bananas I enjoyed before throw off my blood sugar. Therefore, I’m choosing to keep my banana intake to a minimum. So how else can you get a smoothie bowl to taste sweet and creamy sans bananas? I’m about to show you! 😉
Frozen fruit & veg – As you may remember from my Sweet & Fluffy Smoothie Bowl post, FROZEN ingredients are always the way to go to make a smoothie thicker. I also make sure to include a powerhouse fruit like MANGO to help compensate for the flavors banana would otherwise provide.
Yogurt– A game-changing ingredient that provides some creaminess and body. Use whatever kind you like but this Forager Project one is the best dairy-free kind I’ve tried!
Superfoods– I like to throw in some flax mixed with water—a “flax egg”—for creaminess and fiber. The addition of protein powder also helps to provide staying power and more substance than the typical acai shop bowl. I like a neutral-tasting protein powder such as hemp because it allows the acai and fruit flavors to take center stage.
If you’re into lower sugar or alternative ways to make your favorite sweet treats, then you’ll love this bowl! Tell me what your go-to smoothie order or combination is in the comments down below 🙂
If you haven’t yet made a flax egg, add the tablespoon of ground flax plus three tablespoons of water to the blender and wait 5 minutes for it to thicken.
Then, add all of the other ingredients to a blender or food processor (my lazy go-to) and blend until thoroughly combined.
Serve in a bowl with whatever fresh toppings your heart desires! I like berries but you can totally skip fruit toppings and opt for low-sugar granola, nut butter, bee pollen, and coconut. (Okay, usually I add coconut but I forgot this time!)
Note: *If using fresh blueberries, your smoothie bowl will be a little more liquidy than frozen but it is still delicious!
Have you ever wondered how to make your smoothies ultra thick and fluffy but just end up with a flat fruity liquid? Stay tuned for my top fluffy smoothie tips!
As I write this, I’m currently at home, in my comfy clothes, and with a mouth full of stitches. Okay, that sounds dramatic but, with all seriousness, I did just get my wisdom teeth removed. I know the thought of dentists and teeth weirds some people out so go ahead and skip to the bottom if you’re just here for the recipe.
Ever since November of last year, I knew 2018 was going to be the year I would get my wisdom teeth removed. My dentist has been telling me they were surfacing and close to pushing on my other teeth. So, after my last dental check-up, I just bit the bullet and made an appointment.
I’ve never had cavities or any big problems with my teeth so I can’t say I had too many concerns going in. Obviously the pain was concerning. Also, the fact that I would need to take some days off of work for recuperation was concerning (since I’m currently on my first year probationary period). Though, the real fright came the day of my wisdom teeth extraction when I got some news sprung on me.
While I was prepared to get all four of my teeth pulled out, I was not prepared for was the information my dentist gave me that day. Apparently, my two bottom teeth were literally grazing the top of a very sensitive nerve canal in my jaw. Basically, my dentist said, if the nerve gets damaged during the extraction, I could end up with numbness for a few weeks, months, or even a lifetime.
Perfect timing to break this to me, doc.
The chances were super slim. Apparently 99% people who have that occur will regain feeling within six months. So, I mean, my wisdom teeth were still wreaking havoc in my mouth… I figured I just needed to go through with the procedure as planned.
Thankfully, I’m here three days later and I’m okay. My cheeks are super swollen but I hardly have pain so that is good. I was even able to eat some solid (but soft) food today! Yay!
Let’s keep up the spirit of celebration by talking about this Sweet and Fluffy Smoothie Bowl, yeah?
Sometimes a drinkable smoothie is good. Sometimes a thick frozen puree is calling my name. And sometimes, I’m craving a fluffy cloud for breakfast. Anyone else?
If you have trouble getting your smoothie fluffy, use these ingredients:
Frozen banana – a usual suspect in smoothies but undeniably the best creamy and naturally sweet addition.
Chia seeds – add a tablespoon to your smoothie liquid (milk or water) to soak before adding the rest of your ingredients. Trust me. The soaked chia makes ALL the difference.
Ground flaxseed – follow the same method for the chia seeds for an easy, nutritious way to add body to a smoothie.
Frozen mango – serves to add thickness and fluff, and sweetness, just like banana.
Frozen cauliflower – the trendy fruit-free smoothie thickener. When mixed with other berries, spices, or flavored powders, it will remain unrecognizable in your smoothie. Try my Sweet Potato Cinnamon Peach Smoothie!
Frozen zucchini – you’ve seen me use this in previous smoothies like my Green Banana Tahini Shake and Zucchini Smoothie Bowl. I love using this light and easily digestible vegetable to give my smoothie some body.
Protein powder – it’s hard to get a fruit-only smoothie to be fluffy but add in some protein powder and suddenly it becomes a thick shake-like texture.
And for a new fluffy smoothie ingredient discovery of mine…oat milk!
Oat milk – make your own by soaking half a cup of dry rolled oats in 2-3 cups of water. Blend and strain as you would nut milk (reserve the oat pulp for overnight oats!). The starchiness from the oats releases into the water which helps add incredible thickness to any smoothie.
This list of ingredients is not comprehensive but it does include my go-to choices for making a delicious, thick smoothie. Tinker around with whichever ingredients sound good to you. Mix one or two with your favorite fruit or greens and let me know what you think!
If you want a little inspiration for how to combine some of these fluff-boosters then look no further.
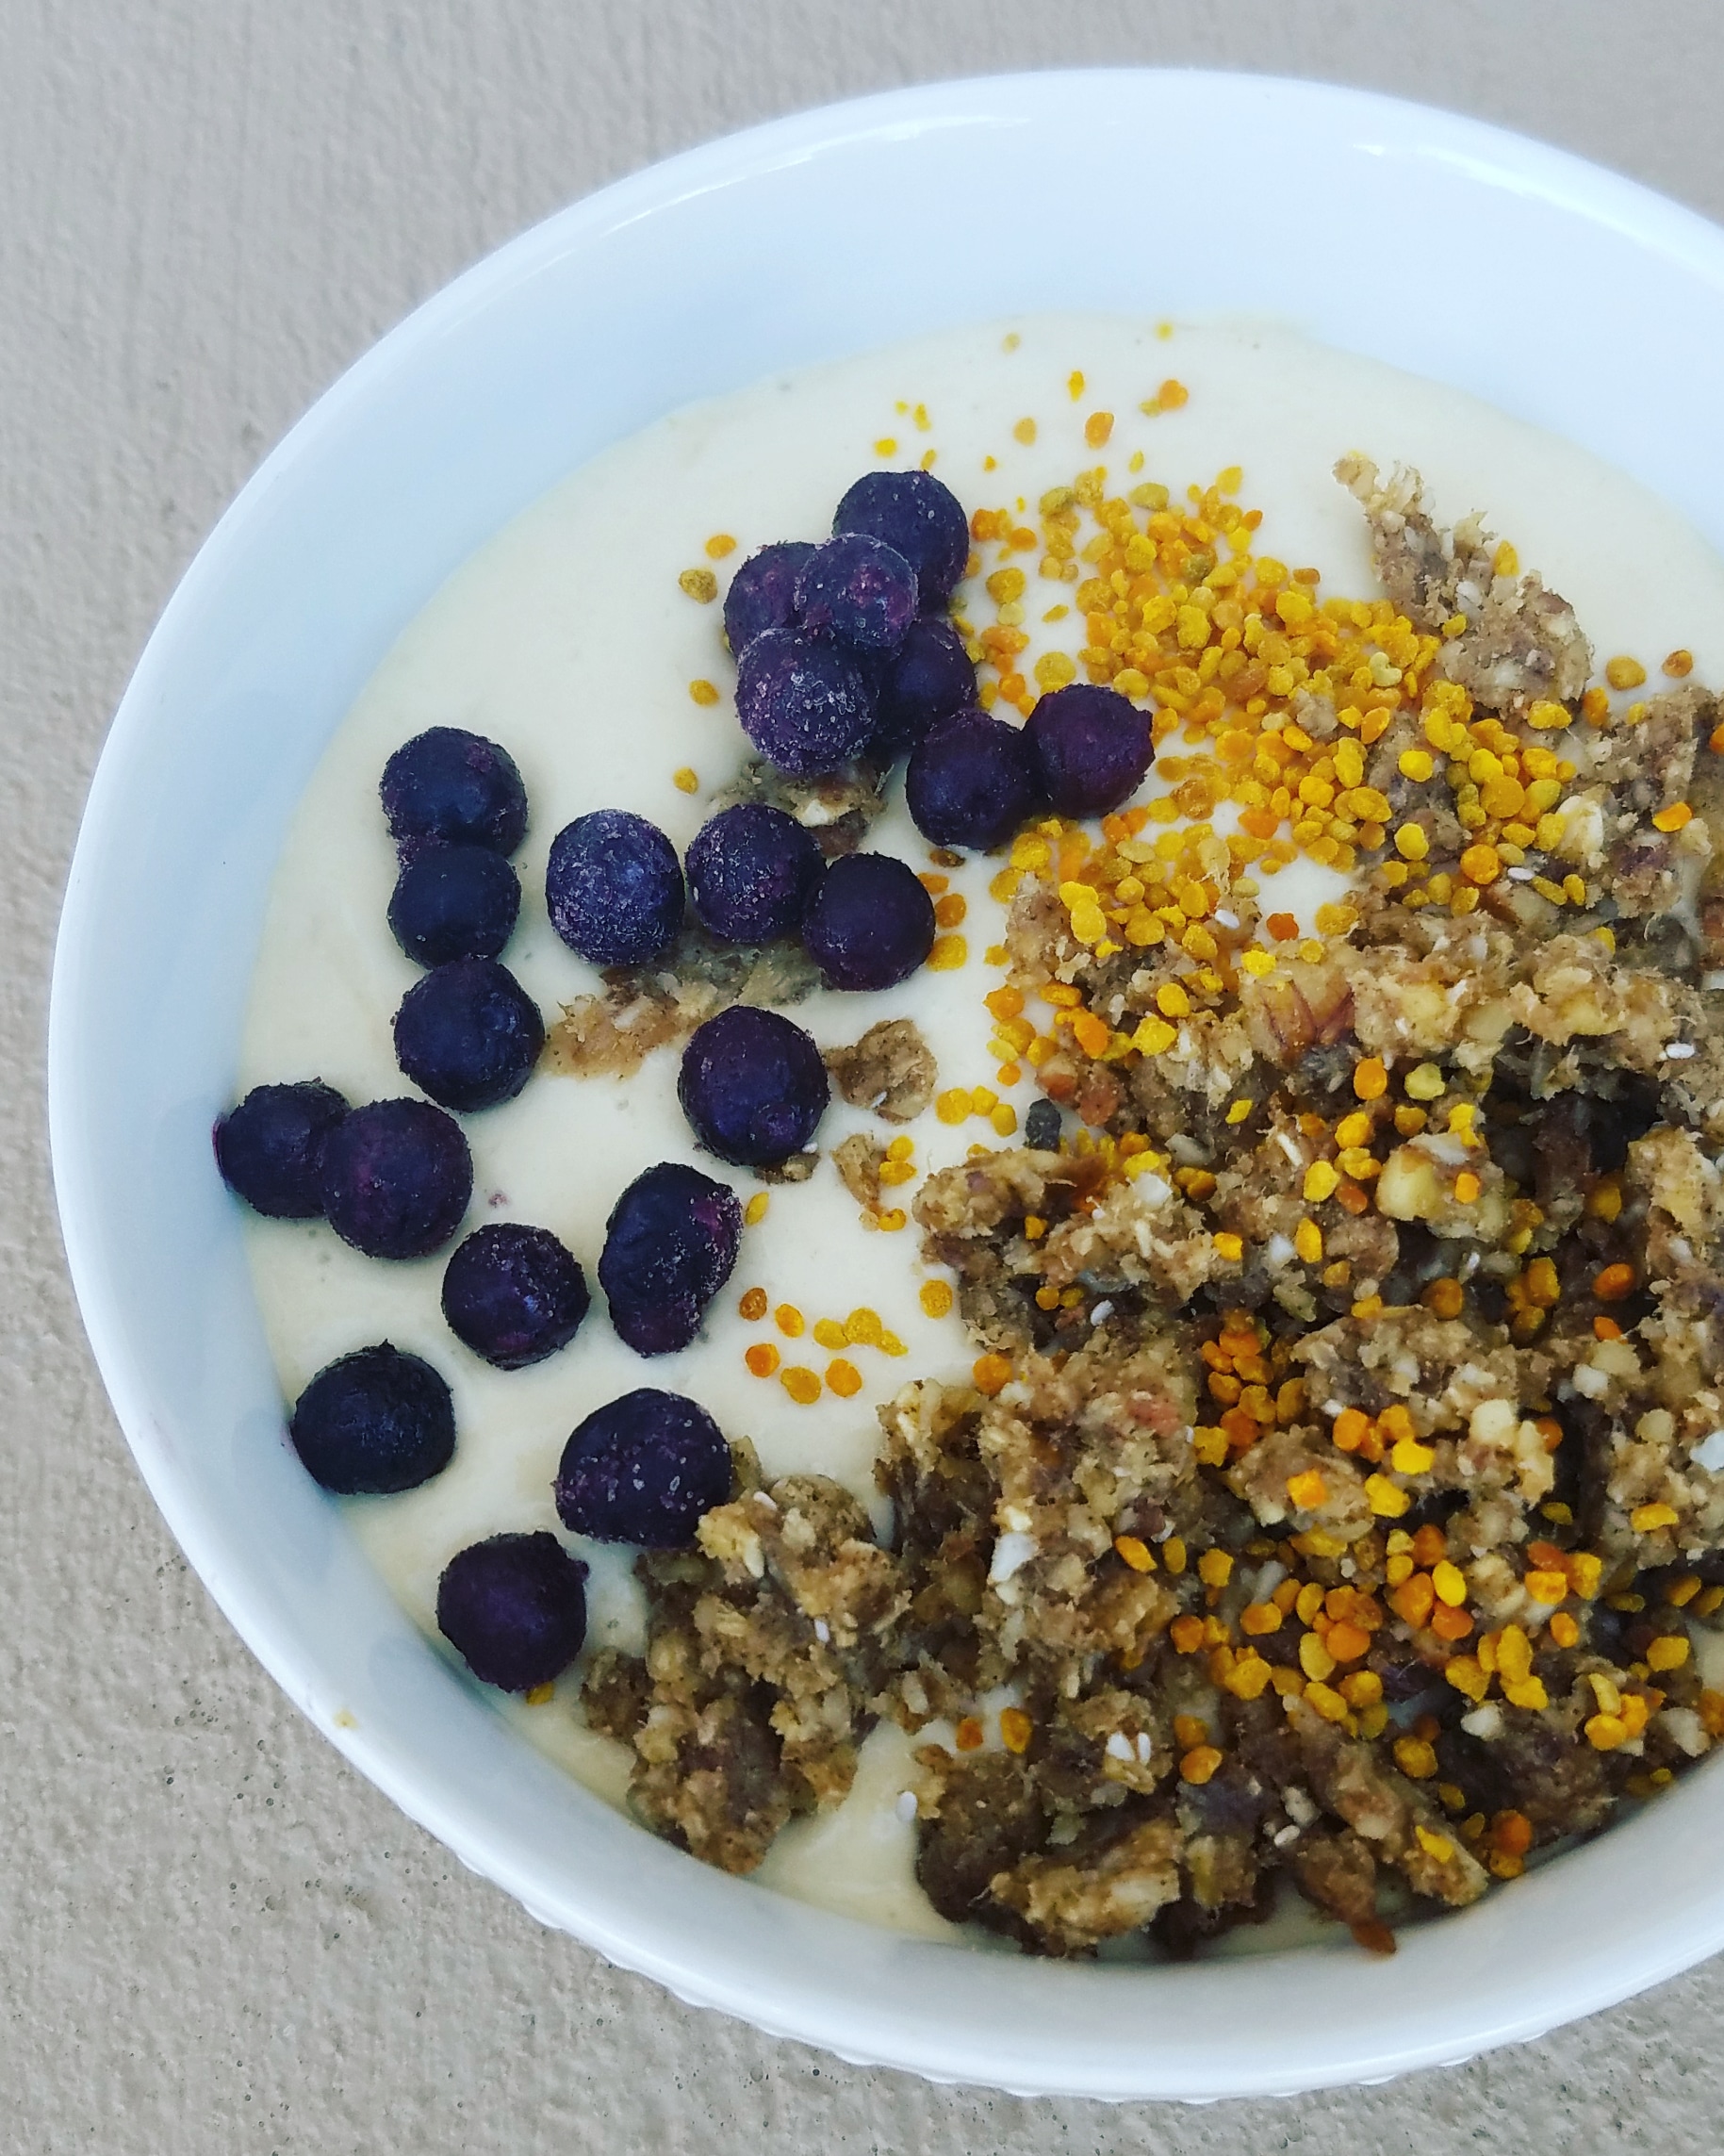
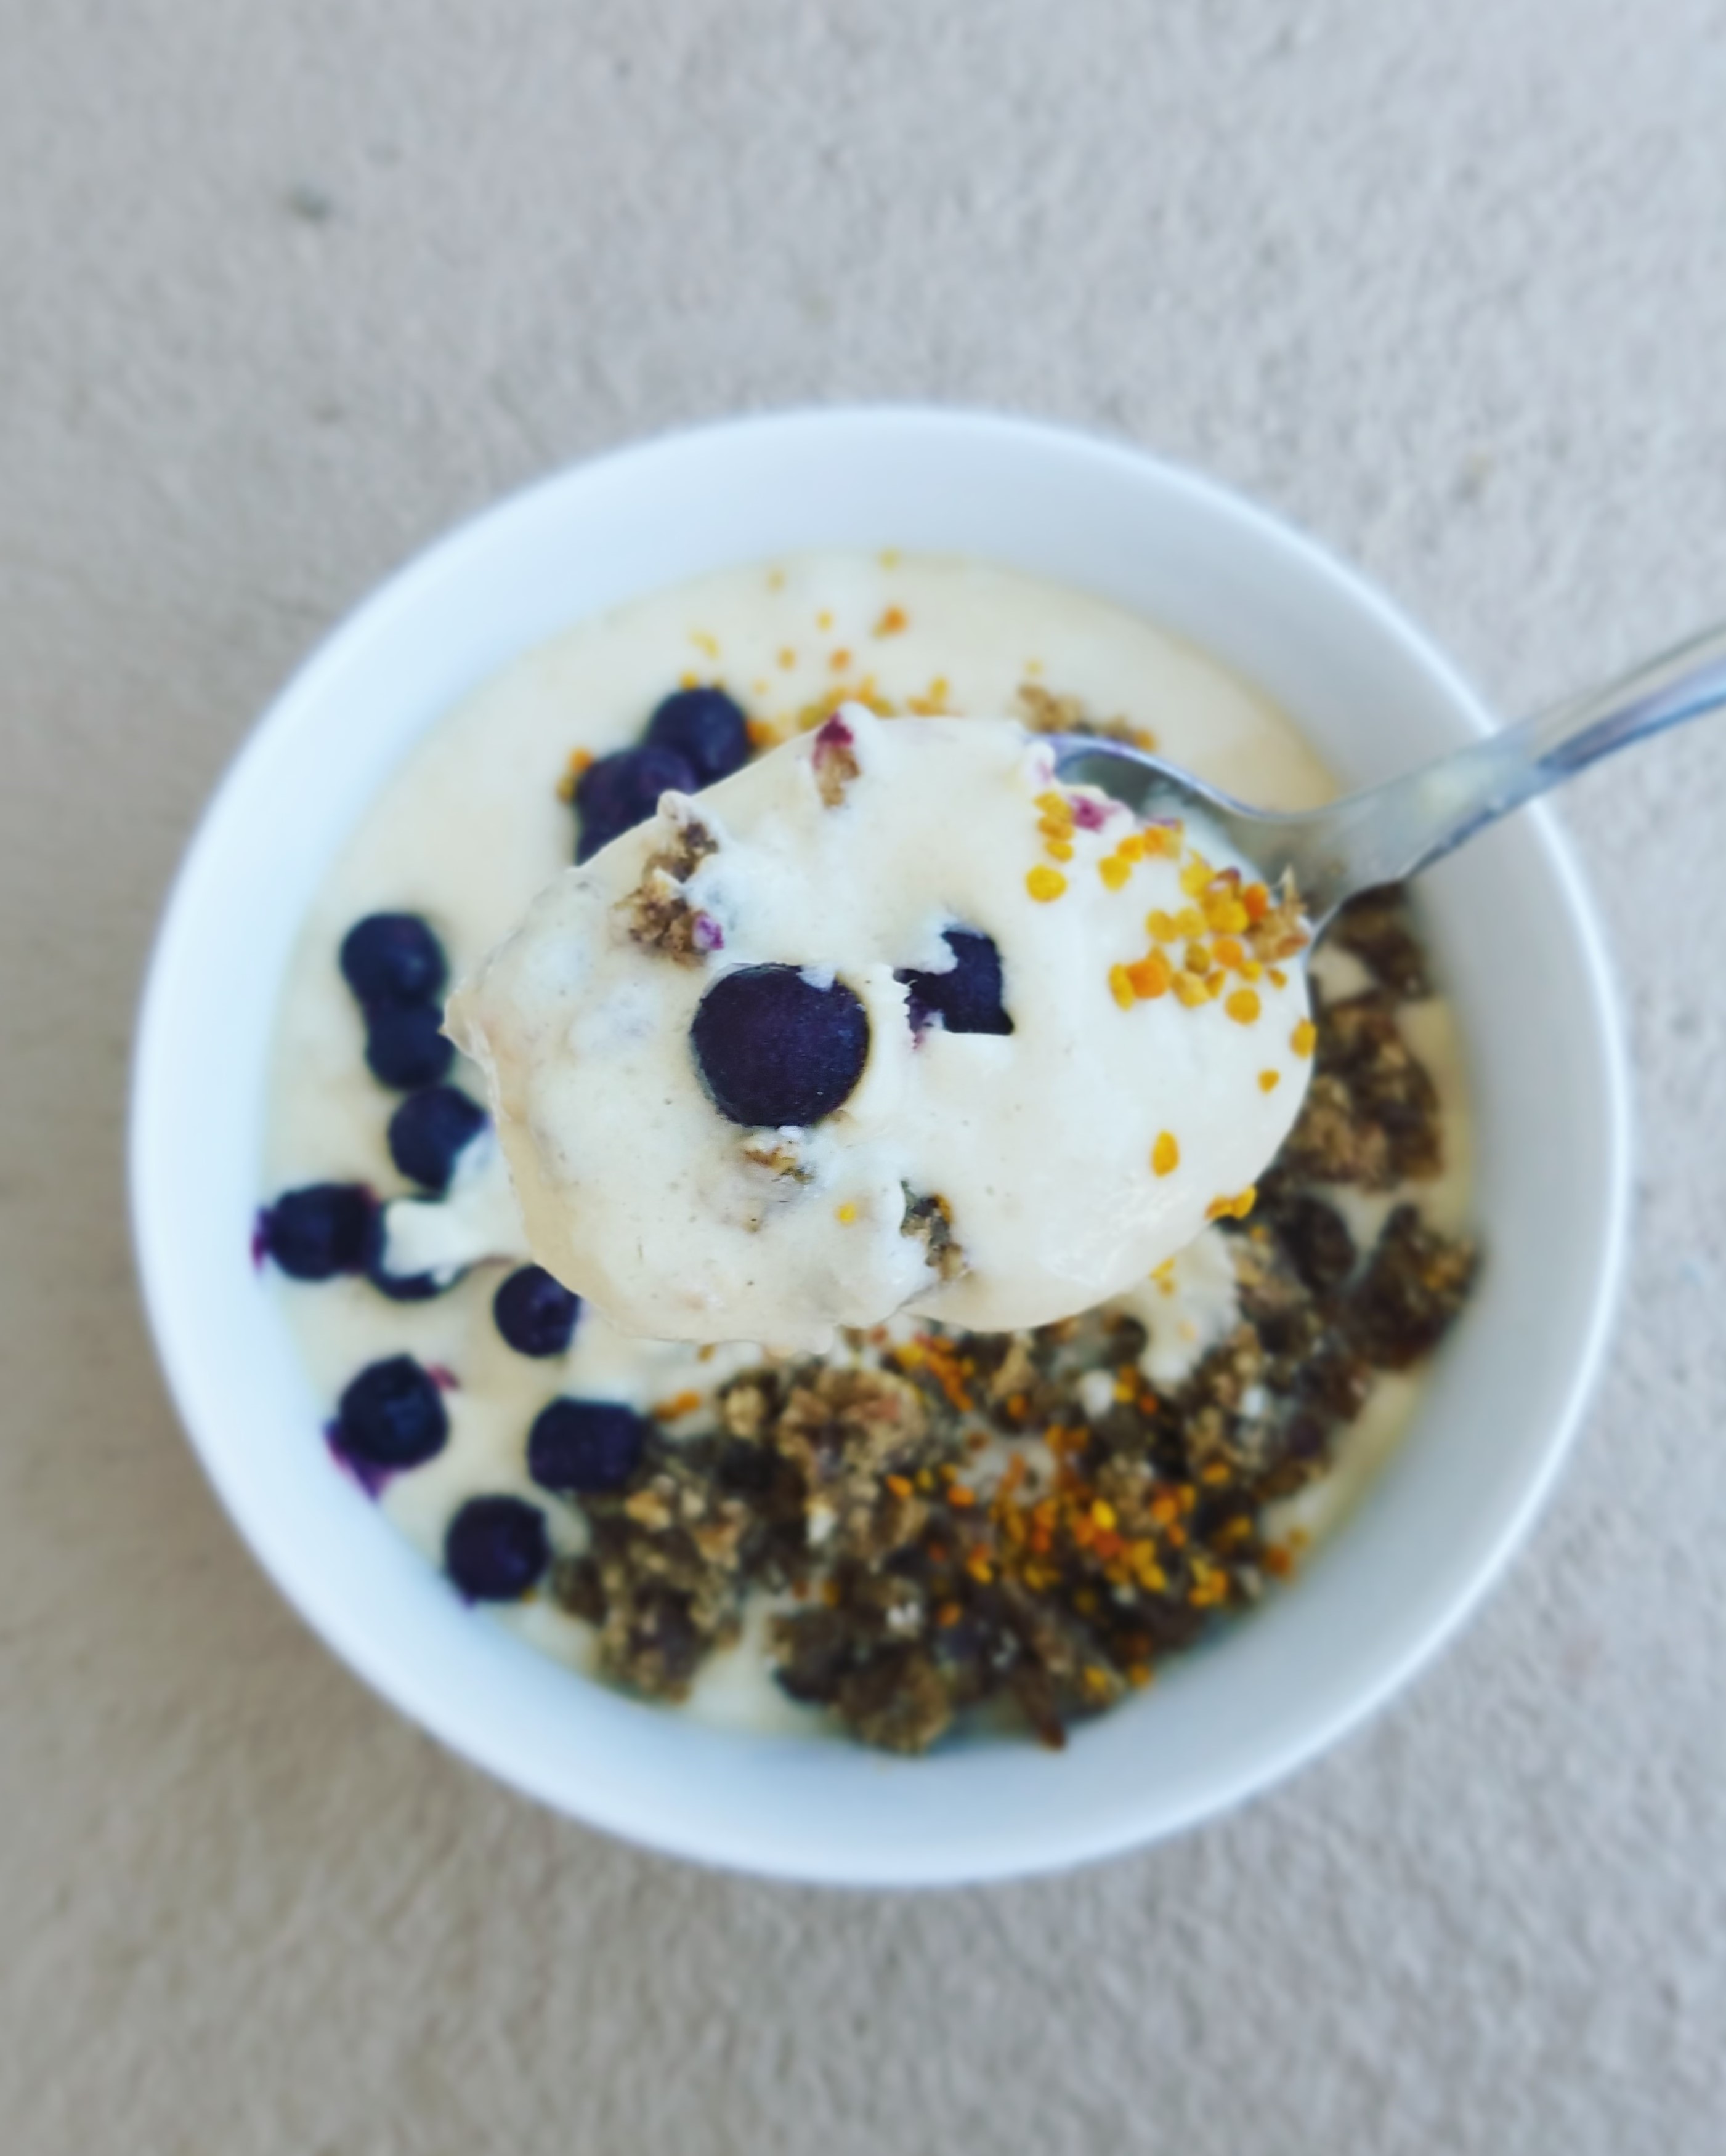
The addition of Minimalist Baker’s Rawnola, bee pollen, and ground flax make this breakfast bowl a real treat.
Sweet and Fluffy Smoothie Bowl
Recipe Type: Breakfast
Cuisine: Vegan
Author: Melanie
Prep time:
Total time:
Serves: 1 bowl
I use a combination of my top fluff-boosters to make this ultra creamy, dreamy, and fluffy smoothie bowl!
Add ¾ cup of the milk and frozen goods to the blender. Process until everything is nice and smooth.
Add the protein powder and, if needed, the remaining milk to the blender.
Let the blender run for at least a minute. The longer it blends, the more the ingredients get whipped (aka FLUFFY).
Once your smoothie is sufficiently fluffed, pour it into a bowl and add whatever toppings you like. I’ve been loving rawnola and bee pollen lately but coconut or fresh fruit would also be good! Enjoy!
3.5.3251
Thanks so much for reading! I am living off of pureed soups and smoothies these days but you definitely don’t need to have your wisdom teeth pulled out to enjoy this baby. If you give it a try—or if you try using any of my favorite fluff-boosters—let me know what you think! xoxo
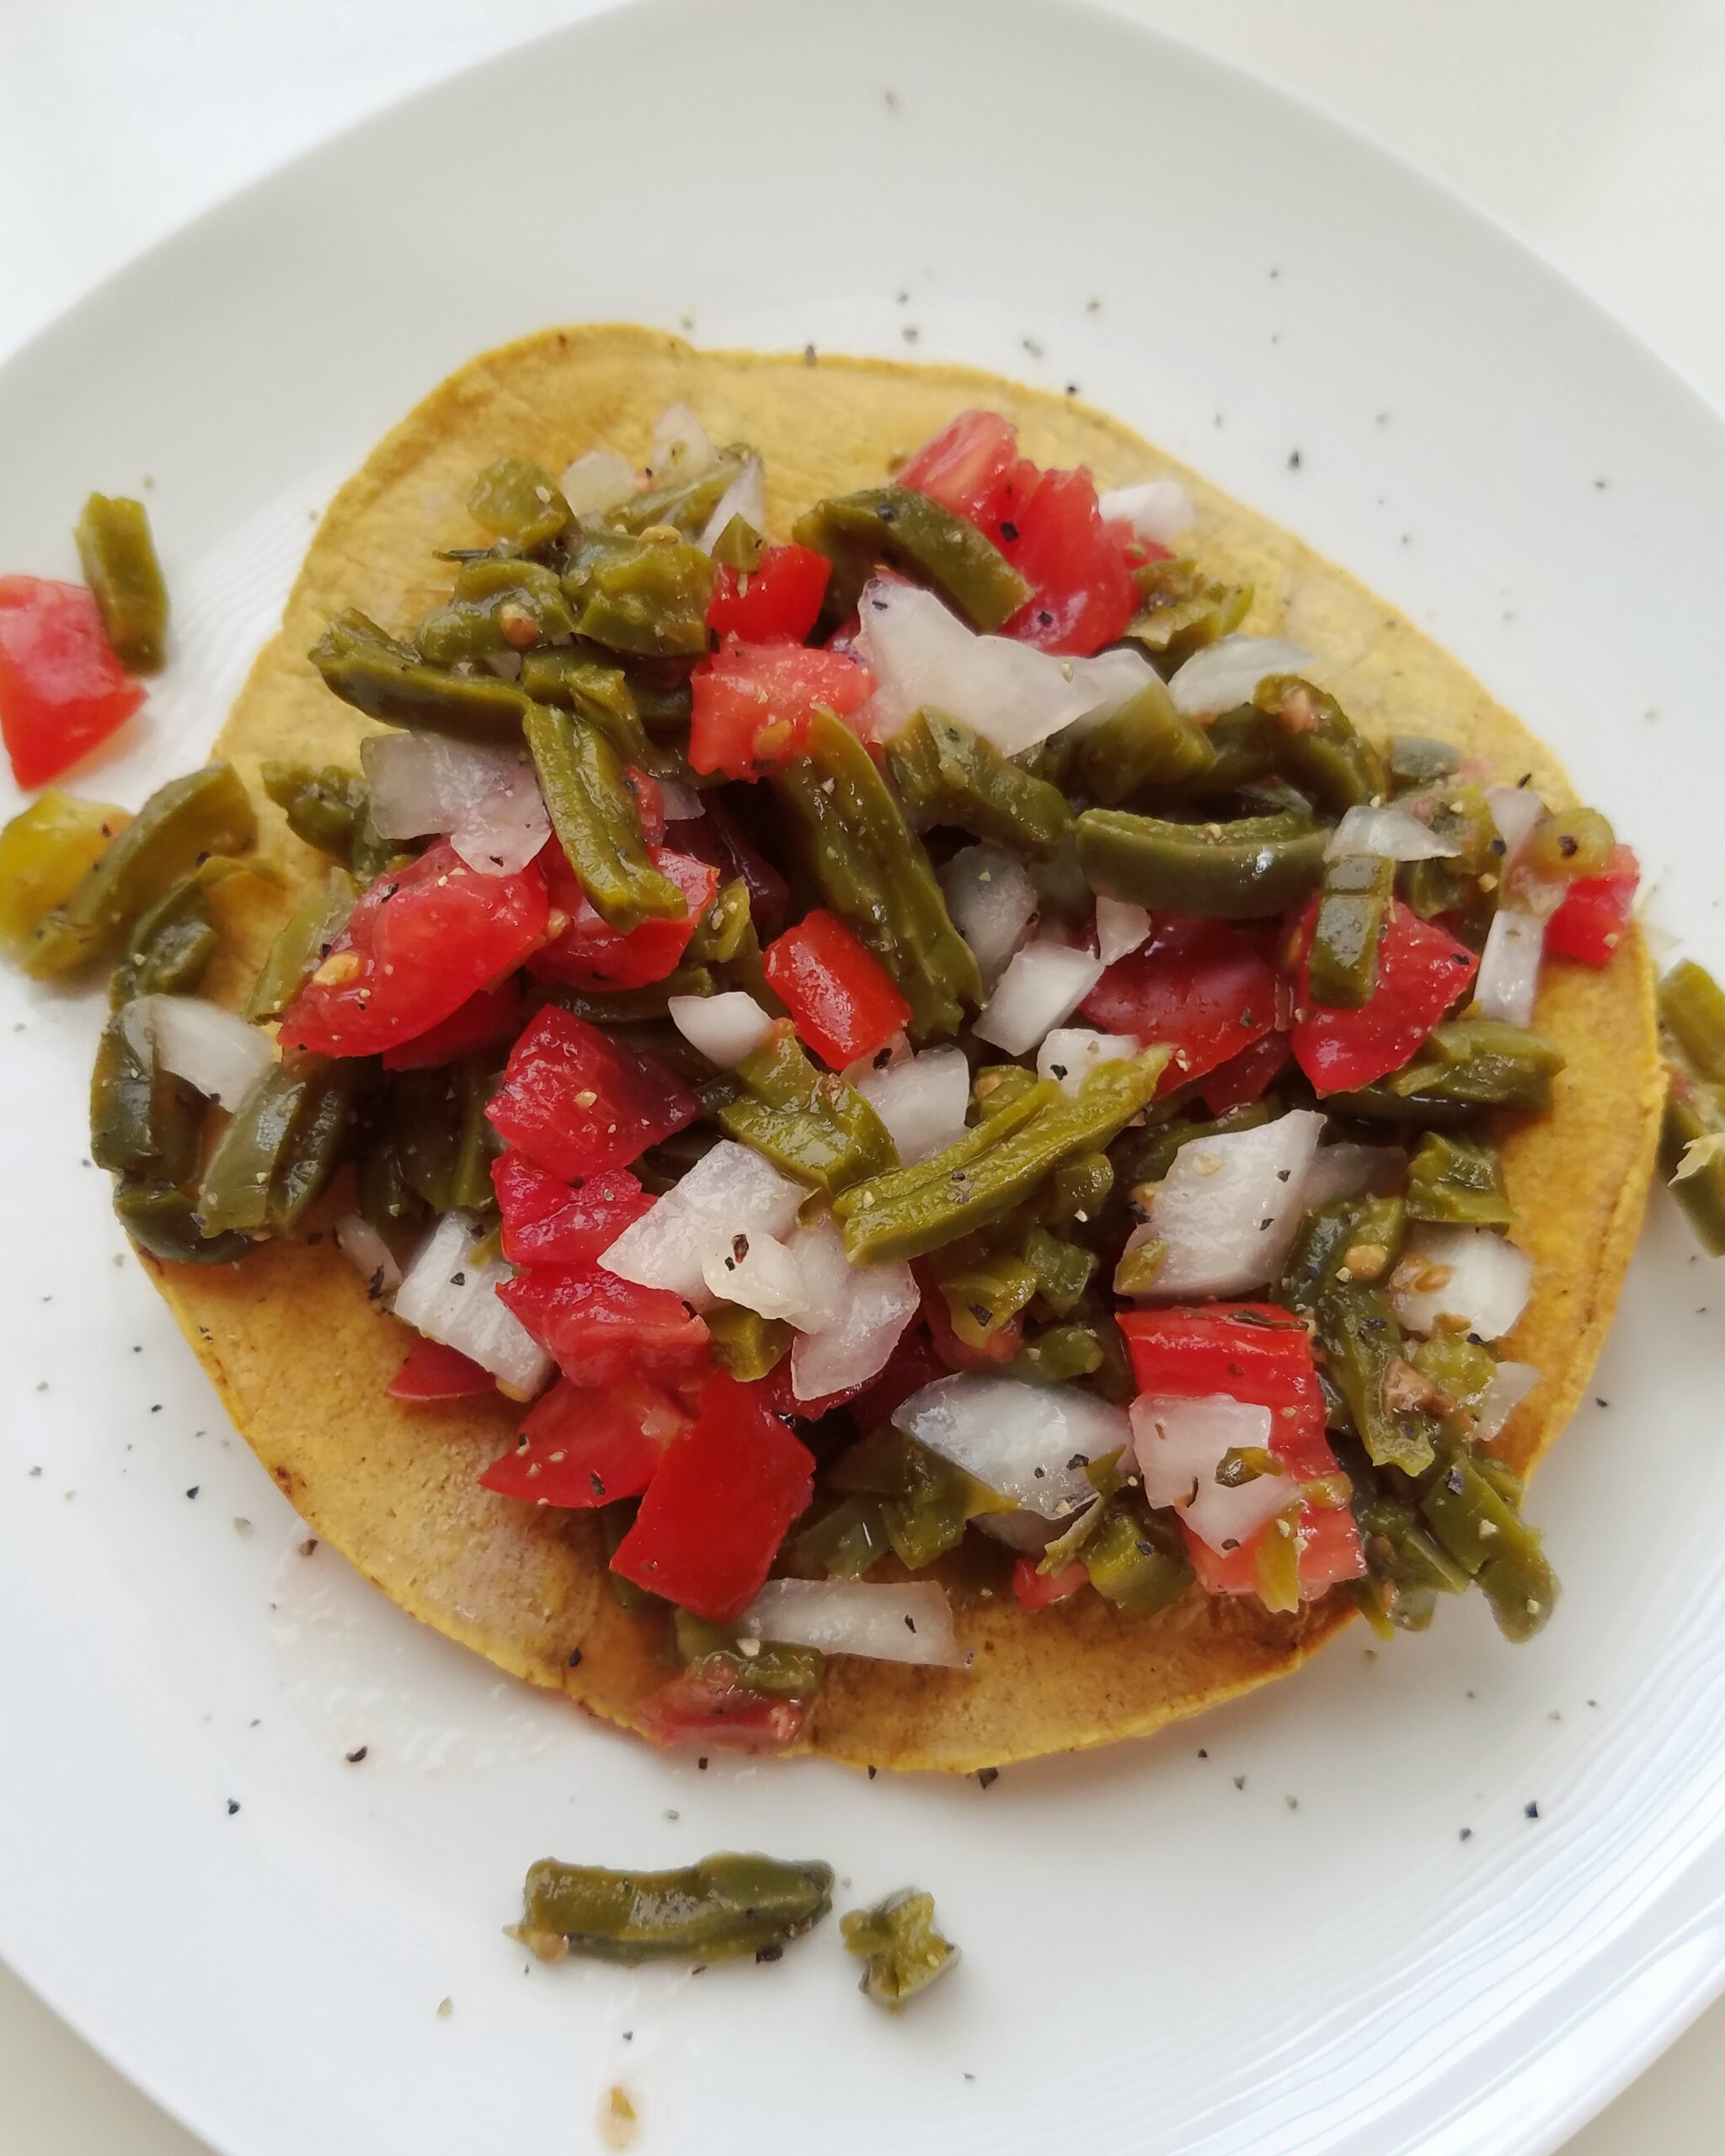
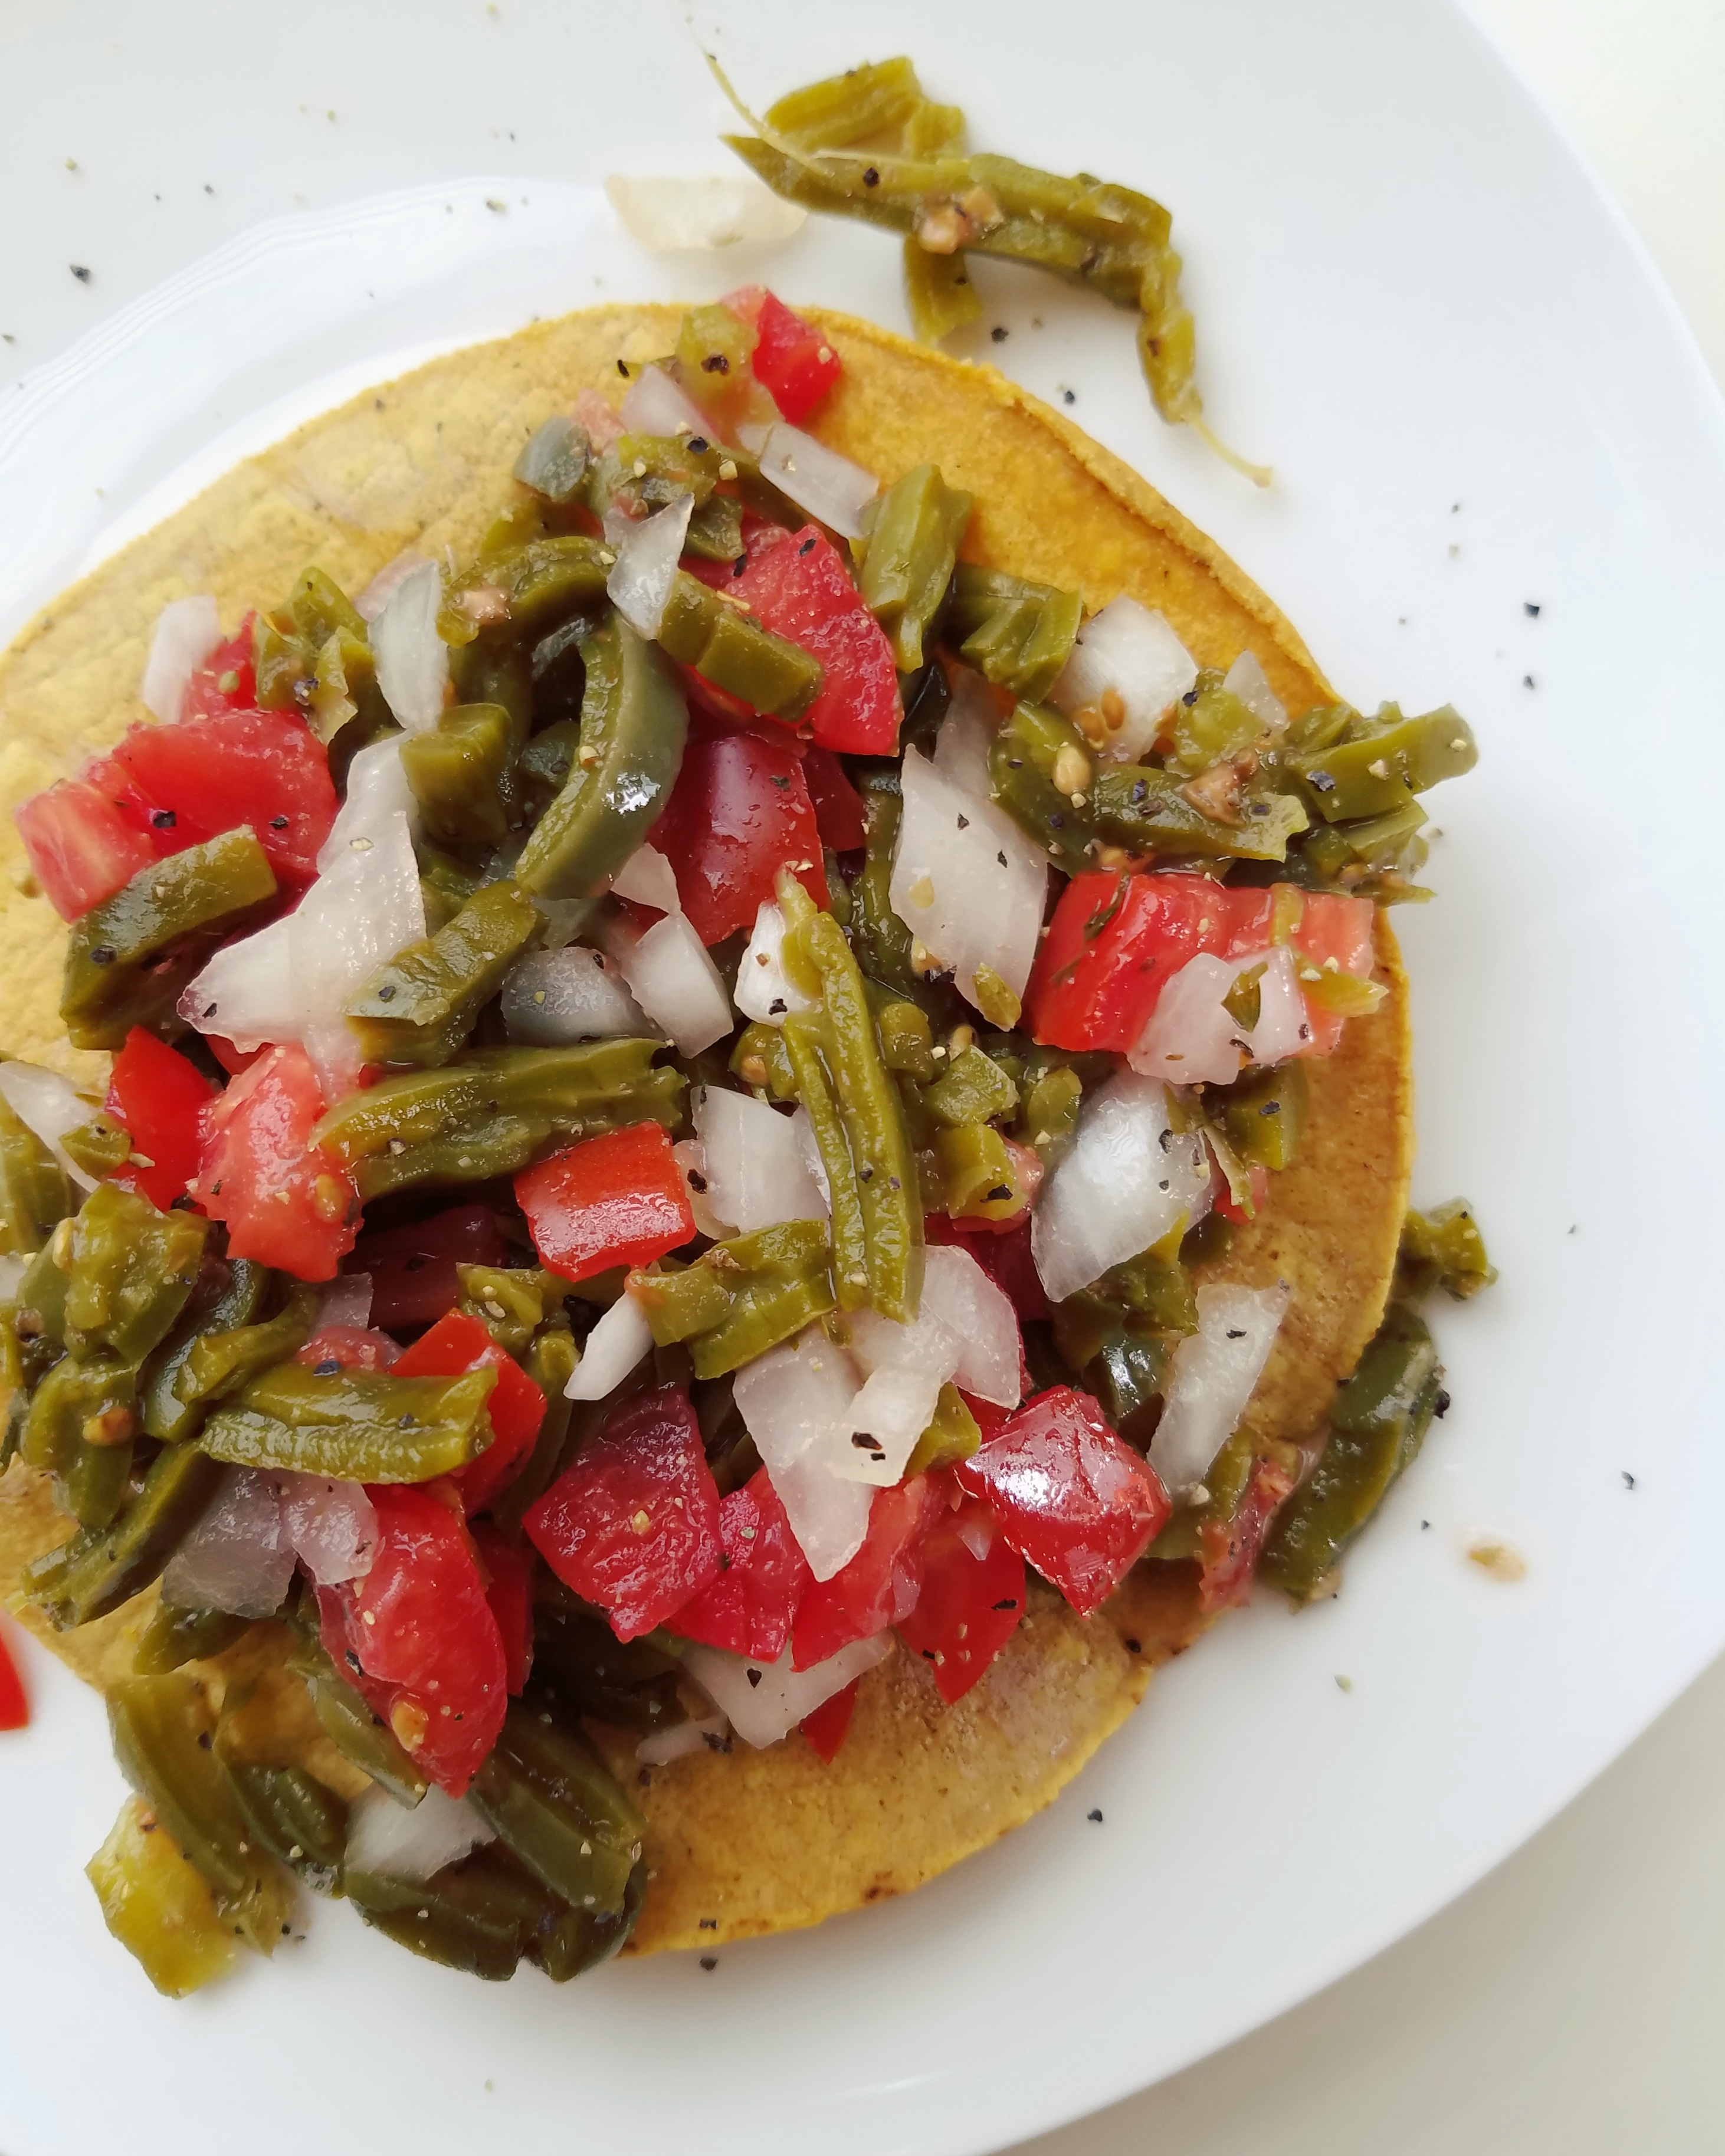
Move over taco Tuesday because tostadas are here and they’ve brought company (aka nopales)!
My Mexican roots involve a lot of delicious food…much of which I no longer eat. I grew up on tacos, posoles, combination plates, and, many times, meat plays center stage. I won’t even get into the different ways meat is prepared but it is a staple in Mexican cuisine! Luckily, there are meat-free options that can be made with little to no effort.
I’ve got to first and foremost give credit to my mama for this Nopales Salad. My mom would make this all the time while I was growing up and on a recent occasion she made it I was excited to think there is still a childhood food that I could eat 🙂 I can’t say that happens to often so it makes me feel connected to my heritage to enjoy dishes like this one.
You might be thinking: wait, so what are nopales??
Nopales are the Spanish term for cactus. Mexicans might have some cactus growing in their backyard which they can chop and prepare but, this recipe is made EASY thanks to a jar of nopales. You can find tender cactus slices in the Hispanic food section at you grocery store. I use the Dona Maria brand but any should be fine as long as there aren’t any added flavorings.
Make this salad when you’re craving a light, fresh meal or enjoy it as a side to barbecue dishes!
Nopales (Cactus) Salad
Recipe Type: Side Dish
Cuisine: Mexican
Author: Melanie
Prep time:
Total time:
Serves: 4 servings
A fresh nopales salad perfect for enjoying on its own or as a side dish to any Mexican food.
Ingredients
1 30oz jar of nopales
½ large white onion, chopped
4 small roma tomatoes, diced
Juice of one lemon, more to taste
¼ tsp garlic powder
¾ tsp dried oregano
Salt and pepper, to taste
Tostadas, for serving
Instructions
Before beginning the salad, clean the nopales. Add the nopales to a colander and rinse them in cool water. Shake off as much water as possible and add them to a bowl.
Chop the onion and tomatoes and add them to the bowl with nopales. There should be an even distribution of each ingredient. Season with lemon and the spices and your salad is ready!
Notes
I like to make this ahead of time because the nopales get a chance to marinate and there is no worry about the ingredients getting mushy or soggy. Two hours should be fine but you can also make it a day ahead!
3.5.3229
Let me know what you guys think if you give this simple recipe a try. I would also love to hear what some of your childhood foods are from your cultural background.
We use cookies on our website to give you the most relevant experience by remembering your preferences and repeat visits. By clicking “Accept”, you consent to the use of ALL the cookies.
This website uses cookies to improve your experience while you navigate through the website. Out of these, the cookies that are categorized as necessary are stored on your browser as they are essential for the working of basic functionalities of the website. We also use third-party cookies that help us analyze and understand how you use this website. These cookies will be stored in your browser only with your consent. You also have the option to opt-out of these cookies. But opting out of some of these cookies may affect your browsing experience.
Necessary cookies are absolutely essential for the website to function properly. These cookies ensure basic functionalities and security features of the website, anonymously.
Cookie
Duration
Description
cookielawinfo-checbox-analytics
11 months
This cookie is set by GDPR Cookie Consent plugin. The cookie is used to store the user consent for the cookies in the category "Analytics".
cookielawinfo-checbox-functional
11 months
The cookie is set by GDPR cookie consent to record the user consent for the cookies in the category "Functional".
cookielawinfo-checbox-others
11 months
This cookie is set by GDPR Cookie Consent plugin. The cookie is used to store the user consent for the cookies in the category "Other.
cookielawinfo-checkbox-necessary
11 months
This cookie is set by GDPR Cookie Consent plugin. The cookies is used to store the user consent for the cookies in the category "Necessary".
cookielawinfo-checkbox-performance
11 months
This cookie is set by GDPR Cookie Consent plugin. The cookie is used to store the user consent for the cookies in the category "Performance".
viewed_cookie_policy
11 months
The cookie is set by the GDPR Cookie Consent plugin and is used to store whether or not user has consented to the use of cookies. It does not store any personal data.
Functional cookies help to perform certain functionalities like sharing the content of the website on social media platforms, collect feedbacks, and other third-party features.
Performance cookies are used to understand and analyze the key performance indexes of the website which helps in delivering a better user experience for the visitors.
Analytical cookies are used to understand how visitors interact with the website. These cookies help provide information on metrics the number of visitors, bounce rate, traffic source, etc.
Advertisement cookies are used to provide visitors with relevant ads and marketing campaigns. These cookies track visitors across websites and collect information to provide customized ads.